Suspension repair issues rarely start as a “mystery breakdown.” Instead, most drivers notice noise, bounce, pulling, uneven tire wear, or steering instability. Those early signs often trace back to a short list of worn components, so the right diagnosis leads to the right fix. In this guide, you’ll learn how to interpret common symptoms, separate suspension problems from look-alikes, and choose practical solutions. We’ll also cover when repairs should be left to a qualified shop for safety and accuracy.
Just as important, not every symptom points to the same part. If you guess, you may pay twice or still drive with a safety risk. As you read, keep in mind that suspension repairs are a system. That means the solution usually includes correct repair work plus a follow-up verification step. That approach helps prevent unnecessary replacement and improves ride control.
This article focuses on common suspension faults in passenger vehicles. You’ll see how symptoms connect to component families, how to run a sensible diagnostic flow, and what changes after repair. You’ll also get clear “repair versus replace” guidance and the alignment logic that makes solutions actually stick. If you suspect structural damage or repeated alignment failure, you’ll also know when to seek professional inspection.
How to match what you feel, hear, and see to likely suspension parts
Good suspension repair starts with symptom correlation, not random parts swapping. When drivers can describe noise, vibration, or handling changes, the cause usually narrows quickly. For example, clunks over bumps often point to worn joints or bushings, while bounce after stops often suggests weak shocks or struts.
Suspension issues express themselves in three main ways: sound, feel, and handling. Sound includes clunks, squeaks, and grinding. Feel includes harsh impact, bottoming-out, or too much bounce. Handling includes pulling, drifting, steering wander, and vibration at speed. Because each symptom has patterns, you can map it to a component family rather than chasing a single part.
However, symptoms overlap. Brake problems can mimic suspension noise. Wheel bearing issues can feel like suspension vibration. Tire balance and tire construction can also create steering shimmy. In practice, you should treat symptoms as clues, then confirm with inspection rather than assumptions.
Another nuance involves tire wear. Uneven tread can look like “suspension wear everywhere,” but alignment can be the direct cause. That means you must separate alignment effects from worn suspension components. Also, wear can be asymmetric, with one side worse than the other, even if the car looks “fine” at first glance.
To document symptoms, note when they happen. Write down whether the problem appears cold or after driving. Record whether it shows up on straight roads or only during turns. Note if braking changes the noise or pull. Those details matter because joints often load differently under braking, cornering, and bumps.
As you narrow causes, do side-to-side checks. Lift the vehicle safely and compare left versus right movement. If only one side has play or torn boots, replacing the “wrong side” wastes money. If both sides are worn, you may need a matched repair strategy.
A step-by-step diagnostic path that prevents guesswork in suspension repair
A practical diagnostic path keeps suspension repair issues from turning into repeated labor. You should start with visual clues, then use controlled movement tests, and finally confirm during a road test. This workflow reduces false positives and helps you decide whether to repair, replace, or stop and escalate to a pro.
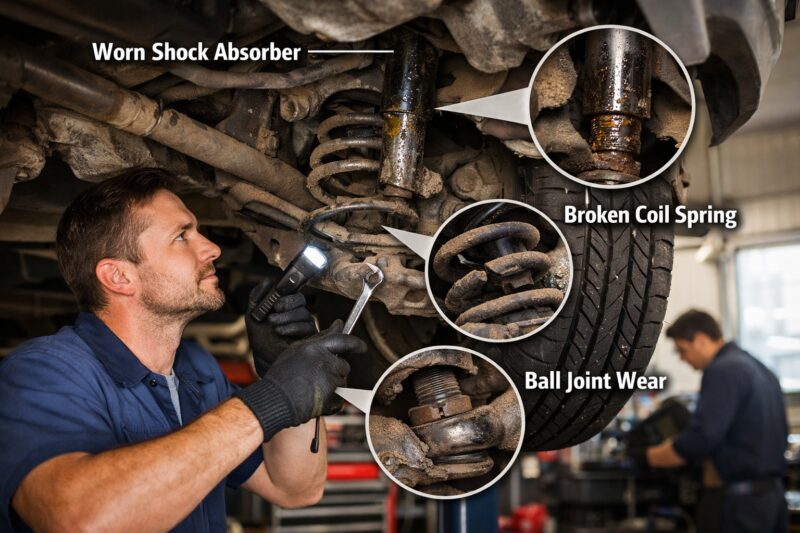
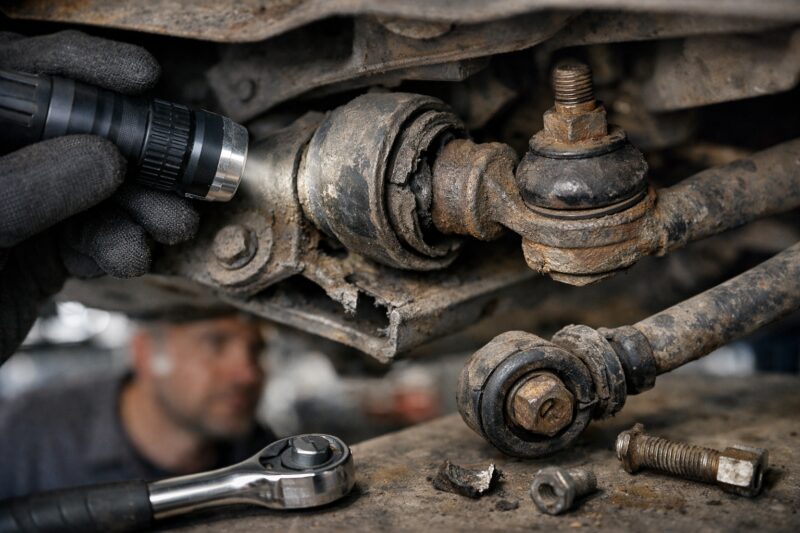
First, do a basic visual inspection. Look for torn boots around ball joints and tie-rod ends. Check for fluid leaks on struts and shocks. Inspect rubber control-arm bushings for cracking or separation. Also check for missing fasteners, damaged brackets, and corrosion around mounting points.
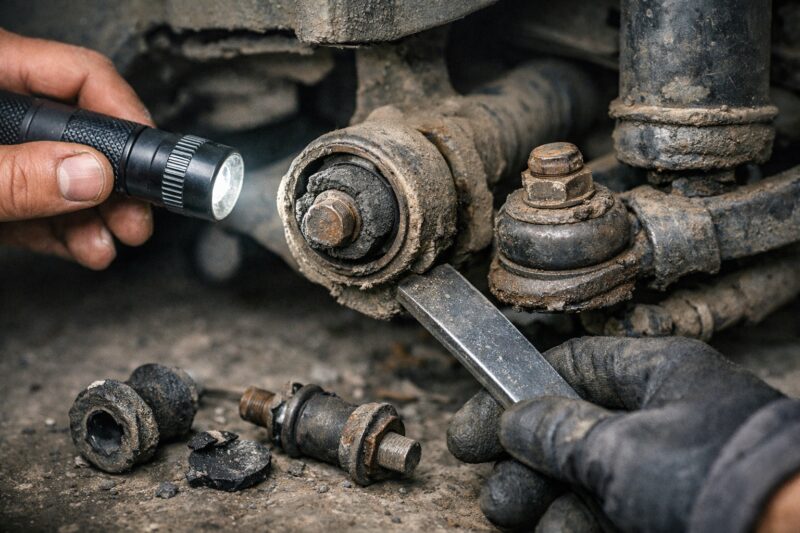
Next, run movement tests that are safe and repeatable. You’re looking for abnormal play, shifting, or binding. For example, a worn joint may show movement when force is applied by hand. A seized joint may not move smoothly, and you may also see stretched rubber. If you’re using a pry bar, apply force carefully so you don’t create damage or fool yourself.
Then, confirm whether the issue is joint wear, alignment geometry, or loose hardware. Joint wear usually shows up as play in the component itself. Alignment geometry issues show up as correct motion but wrong tire contact behavior. Loose hardware often returns after the first miles if torque was incorrect or if installation missed a critical step.
Finally, road test with a checklist mindset. Drive straight, then test turning behavior. Include bumps and braking events if safe. If the symptom correlates with braking, it may involve engine or drivetrain mounts, or it may shift load on suspension joints.
Tradeoffs matter. A DIY check can identify obvious damage, but it can miss “hidden wear.” A common hidden case is when boots look intact but the joint behind them is worn. That’s why people rely on strong diagnostics for suspension noise before buying parts.
If you suspect structural or corrosion-related problems, don’t keep guessing. Corroded mounting points can look “surface-only” until torque and load reveal a bigger problem. In those cases, you should prioritize expert inspection rather than extending the diagnostic loop.
Shocks, struts, and linkages that most often wear out and how to fix them
Shock and strut problems show up as poor damping control, not just rough ride. When damping weakens, you may feel excessive bounce, more tire skipping, or uneven tire wear. Those symptoms commonly point to leaking shocks or worn internal valving in struts.
Start with the simplest evidence: leaks and loss of control. A leaking strut or shock often leaves a visible residue. You may also see dry grime trails where fluid once ran. Even if it doesn’t leak heavily, the damping effect can still degrade over time.
Linkages like ball joints and tie-rod ends create a different signature. Worn ball joints can cause clunks over bumps and steering wander. Worn tie-rod ends can contribute to instability and uneven alignment behavior. Also check steering boots because torn boots invite contamination, which speeds up wear.
Control-arm bushings are another common wear pattern. Their failure can create noise because the bushing no longer isolates movement. It also changes how forces travel through the suspension during braking and cornering. When bushings degrade, you may hear creaks or clunks even if joints look mostly intact.
Solutions often involve matched replacement strategies. Many shops replace shocks or struts in pairs, especially on the same axle. The reason is simple: uneven damping can change handling feel and tire contact. In addition, linkages often wear together due to shared load paths.
However, you should not treat “replace in pairs” as an absolute rule. If only one side shows confirmed failure and the other side measures within spec, a single replacement may be reasonable. The limitation is that uneven wear can mask the cause of the symptom, especially if bushings or mounts still have play.
Hidden wear is a frequent real-world surprise. A boot can look fine, but the joint inside can still have free play. Another scenario is when an aftermarket part changes noise or firmness characteristics. The goal is predictable handling, not just a louder or softer ride that feels “different” but not better.
When you choose parts, consider whether the system needs to restore comfort and stability. That’s why many owners seek expert suspension repair services with test-and-verify methods. It also helps to bring an automotive repair checklist so nothing is missed during inspection.
Coil springs, mounts, and sagging ride height that create harshness or bottoming
Coil spring faults often show up as sag, reduced clearance, or a harsh bottoming feel. If the car sits low at one corner or bounces irregularly, the spring or its mounts may be the culprit. These problems can also increase stress on shocks and other components.
When springs fatigue, the ride height drops and bump travel changes. That means you may hit the bump stops more often, which feels like a hard thump. Over time, the altered ride height can change alignment geometry and tire contact. It can even change how steering feels during cornering.
Mounts and insulators can fail even when the spring is not obviously broken. Top mounts and spring seats can degrade or separate. You may hear clunks on steering inputs or cornering, especially on strut-based suspensions. Also inspect rubber isolators because they can crack and then allow metal-to-metal contact.
Solutions typically involve replacing damaged springs and the related mounts as a matched system. When corrosion or impact damage is present, you may need additional hardware for safe installation. Attempting to reuse damaged mounting parts can lead to premature wear or improper seating.
Safety is crucial . Spring work can be hazardous without the right tools and procedures. Springs store energy, and incorrect handling can cause severe injury. Many owners should treat spring service as a job for trained technicians.
A deeper nuance is that springs may not look “visibly broken.” Fatigue can reduce spring rate gradually, so the car slowly sags. You may then notice uneven clearance or a new bottoming sensation. In those cases, the fix is not just replacing the most obvious torn rubber. It’s restoring correct ride height and spring function.
Why alignment and tire wear often decide whether suspension repair is truly complete
Alignment is not an optional add-on after suspension repairs. When joints, bushings, or linkages wear, alignment geometry changes. That means the tires may carry the wrong load shape, causing rapid tread wear and steering complaints.
To understand this, look at the tire wear pattern. Inside or outside wear can suggest toe or camber issues. Feathering often points to toe problems or instability at certain steering angles. Cupping can suggest uneven contact and damping control issues, even when suspension parts are partly new.
Still, the tire itself can mislead you. Some tire types wear differently under the same alignment. Also, worn suspension components can create an alignment that keeps shifting during driving. That makes “alignment fixed it” a risky conclusion if the underlying joint play remains.
That’s why a good sequencing matters. Diagnose, repair worn components, align, then road test and re-check when needed. If you align too early, you may mask the real problem. If you repair but skip alignment, you may restore ride feel while leaving tire wear to accelerate.
At an alignment shop, ask for reference measurements and what adjustments were actually made. Confirm that all suspension fasteners were tightened and settled before alignment begins. Also ask the shop to check steering wheel centering. If the steering wheel stays off-center, it can indicate a geometry issue not fully corrected.
There are also alignment won’t-hold scenarios. For example, persistent pulling can return if hardware was under-torqued. Bent or corroded parts can also prevent stable alignment geometry. If that happens, the “alignment” fix is incomplete and the root cause needs review.
Because these interactions can be confusing, it helps to plan repairs using fast accurate suspension inspections and a structured automotive repair checklist. That approach reduces repeat trips and helps your tires last longer.
Common misconceptions that prolong suspension repair issues and waste money
Many delays come from trying to solve suspension repair issues by guesswork. Misconceptions lead to parts replacement that doesn’t address the actual cause. As a result, the same symptom returns, often with no improvement.
One common misconception is “if it’s making noise, replace the easiest part.” Noise can travel through multiple components. For example, a clunk can originate at a control-arm bushing but still sound like it comes from a different corner. That’s why diagnostics for suspension noise should rely on correlation, not just sound direction.
Another misconception is “shocks are the only problem.” Shocks and struts do influence bounce and tire contact, but bushings, mounts, ball joints, and even steering linkage can create similar sensations. Also, a worn mount can amplify noise during cornering, which makes damping look like the problem.
Some people assume alignment will solve everything after any suspension work. Alignment corrects geometry, but it can’t fix worn joints with free play. If the joint shifts under load, alignment readings can look fine during the test and then drift quickly on the road.
Workmanship mistakes are also a major cause of rework. Incorrect torque specs can loosen components or stress bushings. Reusing damaged hardware can change how parts seat. Mixing bushing types can change ride and noise characteristics in unexpected ways.
The most frustrating scenario is the “new part but same symptom” trap. That usually means an adjacent component is still worn, the new part wasn’t installed in the correct orientation, or the mounts were not properly seated. Another cause is incorrect fastener torque after settlement. When that happens, you should stop and re-inspect with structured checks.
Choosing between component replacement, matched pairs, and a full refresh strategy
Not every suspension repair needs a full overhaul. The right choice depends on damage type, wear balance, and how stable the current system is. This decision impacts cost, ride quality, and how long the fix will last.
Component replacement can work well when inspection confirms a specific failed part. For instance, a leaking strut on one side with the other side confirmed healthy may only require that strut. The tradeoff is that you still need alignment after any geometry-changing service.
Matched pairs or sets often make sense when wear is balanced across an axle. Shocks and struts are a common example. If one side has failed, the other side is often near the end of its life. Pair replacement helps maintain consistent damping and tire contact behavior.
A full refresh is a good option when multiple components show wear, or when you keep seeing the same symptom return. This might include bushings, control arms, and related mounting parts as a package. The goal is predictable handling, especially for drivers who want stable steering feel over the long term.
Car age and corrosion matter a lot in 2026. If hardware is heavily corroded, partial repairs can require more labor to free parts later. Sometimes replacing an entire strut assembly is safer and more practical than attempting separate service in place. Also, repeated labor can erase any cost advantage of partial jobs.
Budget decisions can backfire when partial repairs ignore the cause. For example, replacing a tie-rod end while control-arm bushings remain loose can leave steering feel unchanged. You then repeat alignment later, adding cost and time. A refresh approach can cost more up front, but it often reduces repeat labor.
| Option type | Typical components | Best-fit scenarios | Main tradeoffs |
|---|---|---|---|
| Single component replacement | One strut, one ball joint, one tie-rod end | Confirmed failure with healthy neighbors | Requires careful diagnosis and alignment |
| Matched pairs on an axle | Two shocks or two struts, shared wear | Uneven damping could affect handling | Higher cost than single-side replacement |
| System refresh | Bushings, control arms, joints, alignment package | Multiple worn components or repeat symptoms | More parts and labor upfront |
To choose confidently, use photos and notes during inspection. Compare left and right condition. Then plan repairs around what is actually worn, not what is easiest to access. This is where expert suspension repair services can help you avoid repeated failures.
Unusual symptoms from impact damage, corrosion, and confusing overlaps
Some suspension repair problems have causes that feel “unrelated” at first. Impact damage, corrosion, and bent parts can create persistent vibration or unstable alignment. Meanwhile, tire balance, brake rotors, or wheel bearings can mimic suspension symptoms.
Start by considering the vehicle’s history. Past curb strikes, pothole hits, or collision repairs can affect subframe alignment, bearing mounting points, or control-arm geometry. A bent component can still look straight if you only check with your eyes. That’s why measurement and structured inspection matter when symptoms persist.
Corrosion can also seize joints even when rubber looks intact. Rust can trap motion or weaken mounting points. It can also affect fastener integrity during service. When a fastener fails or a bracket cracks, the repair may need escalation beyond a simple swap.
Symptom overlap is a major challenge. A vibration at highway speeds may be tire-related, balance-related, or wheel bearing-related. Brake pull or vibration can come from rotor issues. To separate causes, compare symptoms under different conditions. For example, if the vibration changes when braking, brake components become likely. If noise changes during steering, suspension linkages become likely.
Non-obvious contributors can also play a role. Loose wheel fasteners can create dramatic vibration and noise. Missing splash shields can change how dirt hits boots and joints. In some cases, steering linkage boots may be damaged while the steering feel still seems normal.
For structural or fitment concerns, it’s safer to escalate to professional inspection. A trained shop can check component straightness, mounting points, and torque-to-spec installation steps. They can also verify repeat alignment behavior after repairs.
Also remember intermittent problems. Weather and temperature can affect rubber bushings and noises. Under-load events can reveal play that doesn’t show up while parked. In those cases, reproducing the driving conditions during diagnosis is key to accurate troubleshooting.
Planning suspension repairs in 2026: parts fitment, tools, and proof the fix worked
Successful suspension repair planning reduces surprises and confirms safety. Before work begins, verify parts fitment, mounting hardware condition, and whether additional components will be required. Then confirm the fix with structured checks after installation.
Start with part compatibility. Suspension systems vary by trim level, wheel size, and manufacturing revisions. Confirm the part number and orientation, especially for strut mounts and bearings. Check whether new mounting hardware is recommended, since reused hardware can compromise clamping force.
Next, think about tools and technique. Some repairs require press tools, spring compressors, or special alignment procedures. Using the wrong tools can damage boots and seals or create false “play” during inspection. That’s one reason to plan for safe lifting and correct support points, not improvised work.
After repair, verify resolution. Recheck for play and noise under controlled movement. Then road test using a checklist approach. Test straight driving, turning behavior, bumps, and braking. Confirm steering wheel centering returns if steering was changed during repair.
Documentation helps you confirm trends over time. Take photos of failed parts. Save alignment printouts. Write down the symptoms before work and whether they fully stopped after repair. If noise remains, record when it happens and what triggers it.
In 2026, shops may also use updated diagnostics to help interpret stored codes that can confuse symptom attribution. For example, traction control or brake intervention events can change how you feel stability. That doesn’t replace mechanical inspection, but it can help interpret why “handling problems” appear only in certain driving modes.
Finally, set fix verification thresholds realistically. Comfort and noise can change slightly due to new bushings or aftermarket part characteristics. However, clunks, severe bounce, persistent pull, or rapid tire wear should not remain. If they do, you should revisit the diagnosis using fast accurate suspension inspections and a return-to-work inspection plan.
Frequently asked questions about common suspension repair issues and solutions
What are the most common suspension repair issues?
The most common categories are worn shocks or struts, failing ball joints and tie-rod ends, degraded control-arm bushings, and broken or fatigued coil springs. Many drivers also face issues from failed strut mounts and top bearings. In addition, alignment problems often appear after these parts wear because geometry shifts under load.
How can I tell if the noise is from suspension or something else?
Start by correlating the noise with driving events. For example, clunks over bumps on straight roads often point to joints or bushings. Meanwhile, squeaks during turning can suggest mounts, while vibration at speed may point to wheel or tire issues.
Do I need to replace shocks or struts in pairs?
Pairs are recommended when the axle shows similar wear or when one side has clearly failed and the other side is likely near failure. This helps keep damping consistent and reduces handling imbalance. Exceptions exist when inspection confirms the other side is in good condition and measurements support single-side replacement.
Why does my car pull after suspension work?
Most pull issues after suspension work relate to alignment sequencing or installation verification. A joint with remaining play can also distort alignment quickly after the adjustment. In addition, bent or corroded parts, or under-torqued fasteners, can cause a persistent pull even after an alignment.
Can alignment issues cause suspension symptoms?
Yes, alignment problems can mimic suspension symptoms by changing steering feel and tire contact. For example, incorrect toe can cause vibration-like feedback at speed and rapid tread wear. Measuring alignment after repairs helps confirm whether the root cause is geometry rather than joint play.
What tire wear patterns suggest suspension problems?
Inside or outside wear often suggests alignment geometry issues, while feathering can point to toe problems. Cupping can indicate damping control problems or uneven tire contact patterns. However, tire wear can also come from tire construction and pressure, so confirm with suspension inspection before concluding.
How do boot tears affect suspension reliability even if nothing feels broken yet?
Boot tears allow dirt and water into joints, which speeds up internal wear. Even if you do not hear clunks yet, the joint can develop play as contamination accumulates. Early boot replacement can prevent a ball joint or tie-rod end from failing sooner.
What should I check before replacing ball joints or tie rods?
Check control-arm bushings and adjacent mounting points for wear. Then inspect the steering linkage boots and confirm the correct installation orientation. This prevents repeat labor when the real cause is loose bushings or worn neighbors.
Is it safe to repair coil springs myself?
Coil spring work can be dangerous without proper tools and safe procedures. Springs store stored energy, and incorrect handling can cause injury. In practice, most owners should leave spring service to trained technicians with the right spring equipment.
How long should suspension repairs take, and what could extend the job?
Time varies based on corrosion, parts availability, and how many components require replacement. Seized hardware can add significant labor, especially on older vehicles. If inspection uncovers additional worn components, the job can extend because those parts should be handled before alignment.
My suspension was “fixed,” but the clunking is still there—what should I suspect?
The most common suspects are incomplete diagnosis and remaining worn adjacent components. Clunks can also persist due to installation orientation, incorrect torque, or unaddressed mounting failures. If the noise returns quickly after a test drive, re-inspection with structured checks is usually the next step.
To support safer work and accurate diagnosis, you can also reference guidance from U.S. Department of Transportation vehicle maintenance resources and manufacturer service information through official channels like Toyota Service Information. For alignment and suspension system safety context, Consumer Reports can also help you understand what to look for during inspection. Use these as learning references, but rely on your inspection results or a qualified technician for decisions.
Wrapping up: how to turn symptoms into lasting suspension repair solutions
Common suspension repair problems become solvable when you match symptoms to component families and follow a diagnostic path. When you do, suspension repair issues turn from “random discomfort” into a repair plan you can verify. Then the solution includes alignment logic, because worn joints can change geometry and tire contact.
Focus on correlation and proof. Document symptoms, take photos, and use an automotive repair checklist during inspection and road testing. That way, you can confirm the fix actually removed the trigger, not just changed the sound for a week. It also helps you avoid the “new part but same symptom” trap.
If you see structural concerns, repeated alignment failure, or heavy corrosion, choose safety-first escalation. In those cases, a qualified shop can run expert suspension repair services with fast accurate suspension inspections. Your next step is simple: identify when the symptoms occur, write them down, and match them to what is actually worn. Then plan repairs around the components that your inspection confirms, and finish with verification and alignment.
Updated September 2026