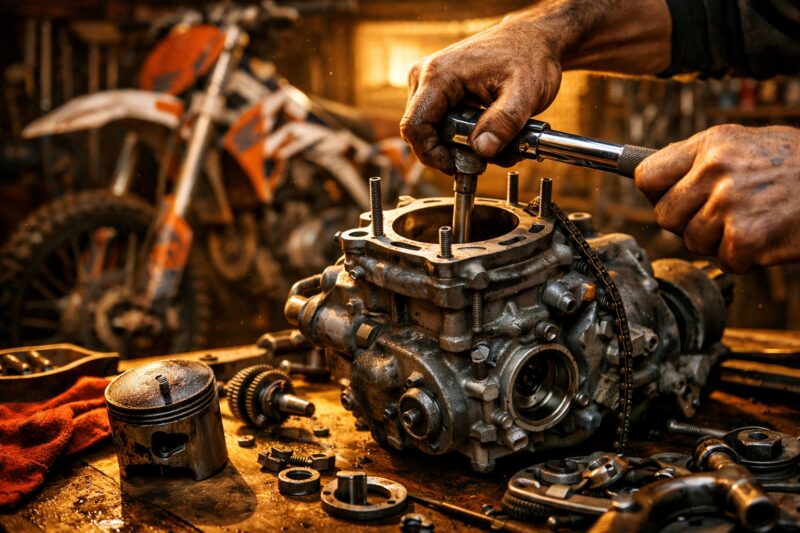
If your dirt bike lost power, a Dirt Bike Engine Rebuild should restore compression, improve sealing and valve performance, and get you back to stable throttle response—so “faster power return” means correct diagnosis first, the right parts after measurements, clean assembly to spec, and a deliberate break-in and tune that avoids repeat failures. In 2026, riders (and shops) still pay the hidden cost of wrong rebuild decisions: repeat teardown, missed riding windows, and shipping delays that extend downtime. A checklist that prioritizes speed-to-running without sacrificing safety or machine-shop correctness is what makes the difference between a “runs again” engine and one that reliably returns power.
This article covers rebuilding an engine for performance recovery—getting back the power you expected—rather than generic maintenance, cosmetics, or unrelated upgrades. The goal is decision-oriented: you will plan the measurements and parts you actually need, structure the workflow to reduce mistakes, and use success metrics beyond “it starts” so you avoid the classic scenario where low power comes back a week later.
For readers who want fast reliable dirt bike repairs, the same logic applies: you shorten turnaround by confirming the root cause before ordering components and by using QA checkpoints that catch assembly errors early. Use this as a practical project plan you can hand to a technician or follow yourself with the service manual for your model and year.
Power Return Goals: What “Faster” Means After a Dirt Bike Engine Rebuild
Faster power return after a Dirt Bike Engine Rebuild means you not only restore compression, but you also re-establish throttle response, hot-start behavior, and stable idle within a predictable time and temperature range. Commercially, it is the difference between returning the bike to service the same week versus doing a second rebuild because the first one targeted symptoms instead of the cause.
To make “faster” measurable, start with a power return goal worksheet that translates symptoms into engine and system expectations. For example, if the bike has strong crank rotation but weak acceleration, you should expect issues related to combustion sealing, valve seating, fuel/air calibration, ignition timing, or exhaust restriction rather than assuming “rings first.” Conversely, hard starting with low compression points more strongly toward top-end leakage or timing/valve clearance problems. The earlier you can classify the engine as “primarily losing power” versus “primarily refusing to start,” the faster you can choose the correct scope and avoid ordering unnecessary parts.
In practical terms, faster return is achieved by sequencing the work so the parts you need are ready before teardown, machining slots are reserved, and assembly follows repeatable QA checks. This is where a “quick checklist before you call” becomes more than a slogan: confirm the model-specific requirements, compression target ranges, and what measurements will be taken before purchasing any wear components. If a shop can’t provide a clear measurement plan, it usually means the rebuild will be parts-driven rather than data-driven, which increases both cost and repeat downtime.
Tradeoffs exist. Some machining operations can’t be rushed (and attempting to “assemble immediately” can be faster short-term but slower overall when the compression test comes back outside spec). Also, even a correct rebuild can feel inconsistent during the early break-in period because new rings and valve seats need time to seal. The goal is to differentiate “normal early learning curve” from actual mistakes that cause persistent low power.
Real-world scenario: a 250cc four-stroke arrives with “no compression” complaints after a crash. If the shop measures compression and end-gap assumptions incorrectly, they may replace rings when the true issue is head flatness damage. That rebuild can start and run briefly, yet power return stays poor because combustion sealing never stabilizes. A measurable plan helps prevent this.
Intake-to-Outcome Checklist: Plan the Dirt Bike Engine Rebuild for Speed-to-Running
The fastest dirt bike engine rebuild plan starts before you touch the cases: define symptoms, define targets, gather parts and machine work timelines, then verify the engine condition with measurements before you order components. This intake-to-outcome checklist prevents the most common delay cause in commercial rebuilds—waiting for parts or machining after the bike is already disassembled.
Begin with a “power return goal” worksheet. Write down symptoms like low power at mid-throttle, bogging, hard starting, oil consumption, smoke color/amount, and whether idle is stable or surging. Include expected compression ranges from your service manual, plus an “if compression is X, we do Y” map. For example, low compression across cylinders typically points to valve sealing, cylinder/piston sealing, or timing, while a single-cylinder drop can suggest localized cylinder wear or a valve seat issue. Also note whether the engine is primarily refusing to start (often ignition, fuel delivery, or timing) versus losing power (often internal sealing, top-end wear, or fueling/air restriction).

Next, build a parts-and-tools readiness timeline. OEM parts may have longer lead times depending on stock, while aftermarket parts can ship faster but vary in tolerance quality. Reserve machining slots with the actual measurement outcomes you expect to find, not with assumptions. Many delays occur when the teardown reveals the need for unexpected operations like valve guide replacement or an oversize piston/bore decision. You can mitigate this by securing gasket and seal kits early and by confirming that rings and pistons required by your measurement results are available.
Before disassembly, perform an upfront measurement plan: do a compression test using the manufacturer’s procedure and a consistent cranking method, and consider leak-down basics where applicable for top-end sealing diagnosis. Where leak-down isn’t feasible, you can still map symptom-to-component risk by combining compression results, spark plug readings, and whether the engine has a history of overheating or detonation. This is the stage where you choose scope rationally rather than ordering parts “just to be safe.” A key limitation: some bikes have starting issues from carb/EFI and ignition faults that mimic internal wear, so you should inspect air leaks, fueling delivery, and ignition components before committing to machine work.
Success metrics go beyond “it runs.” After assembly, you want idle stability, throttle response consistency, hot-start behavior, and reasonable oil pressure behavior (for models that specify it). You should also validate tuning sanity checks: does the carb/EFI respond normally when warmed, do plugs show correct mixture, and do you avoid persistent fouling? If the engine starts but power return is poor under load, the “success metric” should trigger a controlled re-check rather than immediate repeat teardown.
Failure modes to explicitly flag include ordering wrong wear parts (wrong oversize, wrong ring set, wrong gasket thickness), skipping inspection steps that determine machining (taper/hone, head flatness, valve seat condition), and reusing questionable hardware such as bearings with play, damaged crank journals, or contaminated oil passages. The commercial reality is that repeat downtime is usually caused by one missed confirmation step, not by lacking parts.
Diagnosis Before Disassembly: Identify What Actually Needs Rebuilding
Before you pull the engine, map symptoms to inspection steps so you can confirm whether a Dirt Bike Engine Rebuild is truly needed and which sub-assemblies require machining or replacement. This diagnosis-first approach is how you restore power without burning time on unnecessary disassembly and parts.
Start with a component mapping strategy. Common power-loss causes include worn piston rings and cylinder sealing (low compression with consistent readings), cylinder wear with excessive taper/hone damage (leading to recurring blow-by), crankshaft and bearing wear (which may show metal debris, abnormal play, or oil pressure anomalies depending on design), and valve/seat condition (often low compression plus prolonged warm-up or smoke/plug fouling). Ignition and fueling contributors must be considered too: a failing stator/coil, incorrect timing marks, contaminated injector/carb circuits, or an air leak can mimic “engine weakness” while compression looks acceptable.
Use a decision path. When compression is near spec and symptoms point to combustion stability issues, you may stop and diagnose outside the engine—fuel delivery, ignition timing, exhaust restriction, or clutch drag. If compression is low and leak-down or inspection supports sealing failure, then a top-end rebuild and valve seat work may be enough. If multiple measurements indicate deeper wear (crank/bearing play or significant cylinder damage), a full rebuild scope becomes justified. The tradeoff is that deeper teardown costs time up front, but it prevents a second rebuild when the true root cause is internal.
Specify what to measure so you don’t guess. Cylinder diameter with taper/hone assessment, crank runout and journal condition, bearing play, valve guide clearance, and head surface flatness checks determine whether you re-hone, bore oversize, replace guides, cut valve seats, or deck components. Common mistake: measuring only one cylinder point or relying on a visual cylinder score as “proof” of machining needs. Deeper insight: some bikes develop false rebuild needs due to clogged jets, stuck float valves, vacuum leaks, airbox leaks, or damaged ignition components that reduce spark energy—these can produce symptoms that resemble poor sealing.
Commercial scenario: a shop receives a bike “for rings” based on low power, but compression is only moderately reduced while plug readings show lean operation after warm-up. Instead of immediately ordering rings, the shop verifies jetting and fuel delivery, then finds a partially blocked main jet and an air leak at the intake boot. The bike returns to service faster because the rebuild scope was corrected by diagnosis.
As a practical supporting content angle for future work, you can also reference engine repair checks before parts to ensure your process stays measurement-driven rather than parts-driven (see the phrase engine repair checks before parts naturally in this workflow planning sentence).
Parts, Clearances, and Machining Specs: Build for Correct Fit and Quick Recovery
Correct measurements and machining decisions are what determine whether a Dirt Bike Engine Rebuild returns power quickly and reliably. If clearances are wrong, you risk seizure, excessive blow-by, poor ring sealing, or extended break-in that delays power return.
Build your “critical measurements” checklist with the clearances that directly affect compression and durability. Piston-to-cylinder clearance and ring end gap influence sealing and heat transfer. Rod bearing clearance affects lubrication and longevity, while valve lash/clearance targets determine effective valve timing. If you skip these, you may end up with an engine that starts but never regains its original response because the combustion process remains unstable under load.
Machining decisions are also part of speed-to-running. Whether you re-hone versus bore oversize depends on cylinder taper and out-of-round results. Whether to deck the head or cut valve seats depends on flatness and seat condition, and valve guide replacement may be required to restore proper valve alignment and sealing. Tradeoff: more machining increases time and cost, but it prevents repeat failures. In commercial turnaround terms, correct machining up front is often faster than assembling with uncertain clearances and then redoing everything when power remains poor.
Compatibility checks must be model/year specific. Verify you have the correct oversize piston and ring sets, correct gasket thickness, and the correct orientation and sequence for seals and bearings. A deeper, less obvious issue: clearance choices influence break-in time. Too-tight can cause scuffing or seizure under heat; too-loose increases blow-by and can lead to chronic tuning problems and persistent smoke. The “right” clearance is the one that matches your measurement results and the manufacturer’s spec targets.
Before assembly, add a QA pass. Re-check part markings, confirm oversize values match your bore plan, verify crank journal condition meets spec for the chosen bearing set, and ensure machining shop notes correspond to your parts selection. Common mistake: using correct-looking parts that are slightly mismatched in oversize or gasket thickness; even small mismatches can change compression dynamics and valve clearance.
If you want a workflow that supports other service categories, tie your documentation practices into your broader service handling by using the same measurement mindset you’d apply for small engine repair workflows (a process note: quick checklist before you call for machine shops mirrors how you prepare tool and parts readiness).
Assembly Protocols That Prevent Repeat Failures
Assembly is where most “looks correct on the bench” rebuilds fail to deliver reliable power return. A disciplined assembly protocol ensures parts go together in the correct order, with proper lubrication, torque integrity, and alignment checks that prevent binding and leakage.
Organize the workflow to reduce mistakes. Use a clean-room mindset: stage components, protect machined surfaces, and keep fasteners organized by length and location. Step-by-step torque/sequence adherence is not optional—overtorquing can strip threads or distort surfaces; undertorquing can lead to leaks or loosening. Use a calibrated torque wrench and verify fasteners are in usable condition (threads not stretched, mating surfaces not contaminated).
Lubrication and installation rules must match the design. Apply assembly lube to bearings where specified, use correct oiling practices for moving parts, and use sealants only where required by the service manual. A hidden failure prevention focus: oil passages blockage from machining debris, mis-seated bearings, incorrect bearing orientation, or crank alignment mistakes can create issues that don’t appear until the engine is hot. Practical application: before final closure, wipe surfaces clean, confirm alignment marks are correct, and verify that all oiling ports are unobstructed.

After assembly, perform post-assembly verification. Rotate the crank by hand to feel for binding. Confirm valve movement and check timing alignment to ensure cam and crank timing marks line up as specified. Inspect for binding at the cylinder and confirm that any suspected interference is corrected before first-start. Tradeoff: spending time on verification may add an hour now, but it prevents a full “second tear-down” later—one of the biggest time killers in commercial scenarios.
Real-world example: a mechanic assembled a top-end quickly, then found low power under load and hard hot starts. The cause was mis-seated bearing alignment that wasn’t obvious until heat expanded tolerances. A hand-rotation QA step combined with timing verification would have flagged the issue early.
If you want to align your assembly process with a shop workflow, you can also use the phrase fast fix checklist before riding as the operational standard for your final pre-start checks and walk-away procedure.
Lubrication, Break-in, and Tuning to Re-Establish Power Quickly
Break-in is how you re-establish power quickly after a Dirt Bike Engine Rebuild while avoiding overheating, glazing, or detonation risk. The fastest power return happens when the engine reaches correct sealing and ring wear targets under controlled heat cycles with safe fueling and ignition.
Define break-in goals that match your rebuild scope. If rings and valve seats are new, early load should be conservative: vary RPM, avoid prolonged high-load pulls, and follow a manufacturer-approved pattern. Heat cycles matter because sealing develops as surfaces mate under normal combustion temperatures. Too-aggressive break-in can cause scuffing or glazing, extending power recovery or creating permanent compression loss.
Oil and filter choices are commercial multipliers: the wrong viscosity or poor filter quality can increase contamination risk during the period when debris control is critical. Use fresh oil of the specified viscosity and a correct, compatible filter, and prevent contamination during the rebuild (seal machined surfaces, avoid leaving bearings exposed). Practical application: track oil level and inspect for unusual wear particles early rather than assuming everything is normal.
Tuning is part of the power return system. For carbureted bikes, verify jetting against conditions and confirm air screw settings that produce stable idle. For EFI, verify sensor health and ensure fuel maps are not overly rich or lean. A deeper nuance: combustion behavior changes after rebuild because ring sealing and valve seating are still maturing, so idle and throttle response can be temporarily different. “Normal” often includes slight changes in warm idle behavior that stabilize after the break-in period, not persistent misfire or severe surging.
Failure modes to watch: overheating during break-in, knock caused by incorrect ignition timing or fuel quality, and rushing to wide-open throttle without stability. A practical safeguard is to monitor temperature and plug behavior, then correct tuning before load increases. If you want a dedicated tuning/verification workflow, the phrase fast reliable dirt bike repairs works as a reminder that “fast” must still include temperature and mixture sanity checks.
Options and Tradeoffs: OEM-First, Budget Rebuild, or Balanced “Performance-Return” Build
The fastest overall outcome depends on choosing the right rebuild option and scope for your timeline, not just picking the cheapest parts. For a Dirt Bike Engine Rebuild, “performance-return” means the engine regains power quickly while maintaining the durability needed for your riding season.
Three practical approaches exist. OEM-equivalent refresh focuses on correct fit and proven quality with predictable machining and parts compatibility. A quality aftermarket rebuild can reduce some lead-time and cost but requires careful selection to ensure tolerances match spec. A machining-forward rebuild with performance-oriented clearances aims to optimize sealing and thermal stability, but it still must stay within safe limits and service manual guidance to avoid break-in issues and seizure risk.
Choose based on commercial constraints: downtime tolerance, how much of the riding season you can afford to lose, budget ceilings, and your risk tolerance. If you need immediate ride availability, machine-shop capacity and parts availability matter as much as cost. Decision criteria should include cost-to-serve-life ratio, warranty or return policy terms for parts, machining shop turnaround times, and whether your supplier provides traceable specs. A limitation: “budget rebuild” can appear fast at purchase time, but if it forces repeated corrections due to mismatched clearances or lower quality bearings/rings, total time and cost can increase.
When is a balanced build worth it? If you have a repeated failure history—like recurring low compression, chronic blow-by, or valve sealing issues—then the solution isn’t “replace again,” it’s inspection upgrades and measurement-driven machining decisions. A balanced rebuild invests in measurement certainty and the right machining steps (cylinder finish/hone plan, head flatness correction, seat cutting) to reduce the likelihood of repeat downtime.
Writer planning note: compare fast power return priorities across approaches. Speed-focused choices should still include the measurement-before-assembly workflow and QA verification to ensure you’re not trading a quick start for long-term power instability. This is where following engine repair checks before parts supports consistency across different build budgets.
Common Misconceptions and Pitfalls in a Dirt Bike Engine Rebuild
Most failed Dirt Bike Engine Rebuild outcomes come from misconceptions—like assuming “new gaskets fix everything,” or treating ring replacement as a universal cure for low power—rather than from a lack of mechanical ability. Pitfalls usually show up as repeat downtime, chronic fouling, or a persistent “not as strong as before” feel even after the engine runs.
A major misconception: “new gasket = fixed.” Gaskets prevent leaks, but if the root cause is valve seating, cylinder sealing, or timing/clearance issues, a new gasket simply makes the leak not the primary failure. Another misconception: “ring replacement alone solves all compression loss.” Low compression can come from valves, damaged combustion chamber surfaces, or cylinder out-of-round/taper that requires specific honing or boring. A third pitfall: “if it fits, it’s correct.” In reality, fit includes clearance targets, correct oversize selection, and correct seal placement and orientation.
Practical pitfalls checklist (paragraph-based, not procedural bullets): reuse worn bearings without measuring play, skip runout checks, ignore cylinder surface finish/hone quality, and mix sealant types where the manual specifies none. Symptom confusion is common: low power may be jetting, intake air leaks, exhaust restriction, or ignition timing issues rather than internal wear. A deeper edge case: excess clearance or incorrect ring orientation can cause chronic blow-by that never stabilizes. That can lead to ongoing tuning problems, oil consumption, and fouling that resembles “it needs another rebuild.”
Adopt a stop-and-recheck rulebook during assembly and early break-in. If you feel binding when rotating the crank by hand, find abnormal compression results that don’t match expected scope, or see persistent fouling and instability beyond normal break-in patterns, verify first what could be assembled incorrectly: timing alignment, valve lash/clearance, bearing orientation, gasket thickness mismatch, and oiling passage cleanliness. What most guides get wrong is treating early problems as proof of “more internal wear,” rather than checking assembly correctness and fueling/ignition calibration.
To connect this to shop readiness, remember that a “fast” rebuild still requires disciplined verification and is consistent with fast fix checklist before riding as your checkpoint mindset.
Advanced Considerations Most Guides Skip (Edge Cases, Objections, and Timing)
Advanced considerations can prevent delays and repeat failures in a Dirt Bike Engine Rebuild by addressing constraints and edge cases most guides overlook. The biggest improvement to speed-to-running often comes from knowing when not to blame the engine and from protecting machining decisions that affect long-term sealing.

First, sometimes the engine isn’t the real constraint. Clutch drag, transmission friction, exhaust restriction, or chassis-related power delivery limits can mimic “engine weakness.” Before you order machining, inspect drivetrain behavior: does the wheel roll freely in gear with clutch disengaged, are there signs of clutch plates sticking, and is the exhaust unobstructed? A real-world scenario: a bike feels sluggish in the midrange, but compression is acceptable; the real issue is a sticking clutch hub that prevents full power transfer. Another limitation: if you ignore drivetrain checks, you can spend weeks rebuilding an engine that was not the bottleneck.
Second, contamination risk affects turnaround and repeat reliability. Protect machined surfaces, control storage conditions for bearings and seals, and keep debris away from oil passages until final assembly. If machining is delayed, humidity and corrosion can compromise precision surfaces and seals. Practical application: store machined parts in sealed packaging, use clean gloves, and re-verify surface conditions before assembly if downtime occurred.
Third, rare scenarios require different decisions. Damaged crank journals may exceed the scope of standard bearing replacement, bent valves require evaluation of guide/seating surfaces, and scoring beyond typical re-bore options may require specialized repair pathways. Timing matters: waiting on a critical machining specification can be faster long-term than assembling immediately with uncertain measurements. Common mistake: accepting an optimistic machining estimate without verifying the final cylinder finish, valve seat angles, and clearance results in the shop paperwork.
Commercial objections should be answered explicitly: “Can I cut corners to get running faster?” The reliable answer is that you can cut noncritical work like cosmetic replacements, but you cannot cut verification steps like clearances, valve seat condition, and correct assembly lubrication. If you follow the principle behind fast reliable dirt bike repairs, you’ll cut the right things, not the safety and spec steps.
Local/Regional Considerations for Faster Turnaround (Parts, Machining, and Support)
Regional parts availability and machine shop capacity directly affect how fast a Dirt Bike Engine Rebuild can complete without missing service deadlines. In the U.S. in 2026, variability in distribution lead times, shipping delays, and seasonal machining demand can be the difference between finishing in days versus weeks.
To lock in speed, pre-call machine shops and confirm current lead times for the specific operations you’re likely to need (bore/hone, valve seat cutting, guide replacement, head surfacing). Confirm parts availability before teardown by checking distributor stock and alternative suppliers within your region. If a key item like an oversize piston, ring set, valve guide parts, or a gasket kit is backordered, you can adjust scope based on measurement outcomes rather than being forced into a waiting period after disassembly. Reinforce this with a “quick checklist before you call” approach to sourcing: know what sizes you might need and have at least one backup path.
Climate and storage conditions matter too. If there’s downtime between machining and assembly, humidity can increase corrosion risk for machined surfaces and can compromise rubber seals if not stored properly. Practical application: plan your workflow so machining to final assembly is minimized, and use sealed packaging for parts. If delays occur, re-inspect surfaces and replace any compromised seals before first start rather than hoping they’ll “work out.”
Escalation plans are a commercial necessity. If your primary supplier slips, switch to a secondary distributor that can still meet spec requirements. Adjust rebuild scope when allowable: for instance, if valve seat work is delayed but the measurements indicate it’s not immediately required to restore safe sealing, you may decide based on service manual triggers—though this must be done carefully to avoid repeat failures. Support angle: use manufacturer service manuals and parts fiches to ensure torque specs and compatibility remain correct across suppliers.
For future workflow consistency, you can also integrate how you coordinate parts for related services, such as steps used in small-engine repair scheduling (a process reminder aligned with small engine repair workflow planning).
Frequently Asked Questions About Dirt Bike Engine Rebuild
How do I plan a Dirt Bike Engine Rebuild checklist for faster turnaround?
Start with symptom classification (power loss versus no-start) and set specific success metrics like stable idle, throttle response, and hot-start behavior. Next, confirm the measurement steps before ordering parts, because the right scope depends on compression, cylinder condition, and valve sealing indicators. Finally, coordinate machining lead times and gasket/seal availability before teardown so you are not waiting mid-project.
What parts should I measure before I start a Dirt Bike Engine Rebuild?
Measure cylinder diameter for taper/out-of-round, check piston-to-cylinder clearance targets, and verify ring end gap for the specific rings you plan to install. Also inspect crank runout and bearing play, and check valve guide clearance and head flatness when rebuilding the top end. These measurements determine whether re-hone, bore/oversize, valve seat cutting, or guide replacement is actually required.
Can I rebuild a dirt bike engine without machining and still get good compression?
Sometimes, if measurements show the cylinder surface finish and out-of-round are still within spec and valve sealing can be restored without extensive cutting, you may avoid machining. However, if you have significant cylinder wear (taper or out-of-spec finish), poor valve seat condition, or head warpage, skipping machining risks persistent low compression and repeat failures. A good rule is to rebuild only what measurements prove is within safe limits.
What is the fastest way to restore power after a rebuild, without overheating?
Use a conservative break-in loading strategy with heat-cycle awareness, then monitor temperature during early runs to avoid overheating. Use fresh, correct-viscosity oil and a compatible filter to control contamination during ring seating. Finish with careful tuning checks so fuel/ignition conditions do not cause knock or detonation during the period combustion behavior changes.
How do I know if low power is from internal wear or carb/EFI issues?
Begin with compression testing and basic leak checks to determine whether internal sealing is failing; if compression is near spec, look at fueling/air leaks, jetting/sensor health, and ignition timing. Plug readings and throttle response patterns can help map symptoms to systems before you open the engine. If fuel and ignition checks are ignored, internal work can become an expensive misdiagnosis.
Should I use OEM parts, aftermarket parts, or a mix for a commercial-speed rebuild?
OEM parts typically offer the most predictable fit and spec confidence, but can have longer lead times. Aftermarket parts can be faster and cost-effective, but you must verify they match the exact oversize, gasket thickness requirements, and tolerance expectations. A mix is often reasonable if you keep critical wear components and machined-surface compatibility aligned with measurements.
How long should a rebuilt dirt bike engine take to break in for best results?
Break-in duration varies by engine design and rebuild scope, but you generally need multiple heat cycles and a gradual load increase to help rings and valve seats seat properly. Many riders aim for short, varied-rpm riding periods early on, followed by progressive load as behavior stabilizes. Stop break-in early and troubleshoot if you see persistent overheating, severe fouling, or unstable idle beyond what you consider normal.
What are the most common reasons a Dirt Bike Engine Rebuild doesn’t fix the problem?
The most common causes are missed root-cause diagnosis, wrong clearances or oversize mismatch, and contamination or assembly errors like mis-seated bearings or timing misalignment. Another frequent issue is tuning mismatch after rebuild when combustion behavior changes, which can lead to ongoing fouling and poor power return. Finally, skipping verification steps can hide problems that only show up under heat and load.
Is valve work included in every Dirt Bike Engine Rebuild, or only when needed?
Valve work is not automatically included; it should be driven by inspection triggers such as valve seat condition, guide clearance measurements, and head flatness checks. If the seats are worn, sealing is poor, or clearances are out of spec, valve seat cutting and/or guide replacement is often required. If measurements indicate valves are within spec, you can avoid unnecessary valve machining.
What torque specs and sealants matter most during a Dirt Bike Engine Rebuild?
Use the manufacturer’s torque specs with a calibrated torque wrench and verify fastener condition before tightening. Sealants matter only where the service manual specifies them—applying sealant incorrectly can block oil passages or create leaks. Incorrect torque can distort mating surfaces and lead to recurring compression loss, so fastener integrity is a core part of a speed-to-running rebuild.
Conclusion: Execute the Checklist for Faster Power Return in 2026
To get faster power return from a Dirt Bike Engine Rebuild, your process must be measurement-driven: diagnose correctly, match parts to measured clearances, assemble with QA checks, then break in and tune deliberately. This avoids the commercial trap of “rebuilding by parts list,” where the engine starts but never regains the power you paid to restore.
Use the checklist as a project plan with clear stop-and-recheck signals. If compression, timing alignment, valve movement, and early stability metrics don’t match expectations, verify first before ordering more parts. When the build is aligned with measurement evidence, turnaround improves because you’re not forced into repeat teardown cycles caused by preventable assembly or spec mismatches.
Finally, compare options based on downtime and risk tolerance: OEM-equivalent refresh for predictability, quality aftermarket for cost and availability, and balanced performance-return machining when measurements show it is needed. Before committing to the rebuild scope, consult the qualified service manual for your specific model and confirm machining and parts lead times so your “fast” timeline is realistic.
As you finalize your plan, keep your operational mindset consistent with fast reliable dirt bike repairs—speed comes from disciplined decisions and verification, not from skipped inspection steps.
Updated May 2026