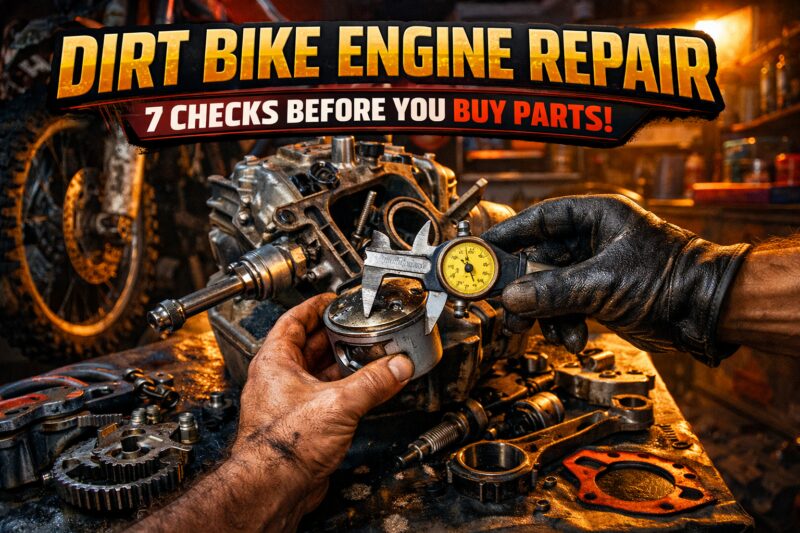
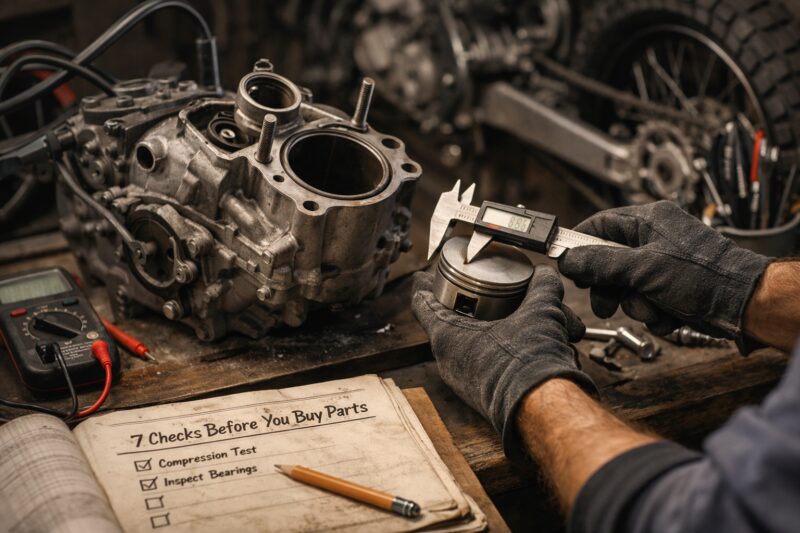
Before you order parts for Dirt Bike Engine Repair, you need a practical, commercial pre-purchase checklist that helps you verify what to buy and what to avoid. This Dirt Bike Engine Repair checklist helps you confirm which engine parts are actually needed for your failure—before you spend money on the wrong cylinder, top-end, or bottom-end components. The goal is simple: reduce returns, avoid wrong-part orders, and increase the success rate of repairs by confirming root cause and guarding against secondary damage.
This matters commercially because parts are rarely interchangeable across failure modes. Buying parts before verifying the root cause can waste money, delay riding, and sometimes create additional damage (for example, installing top-end parts while the true issue is valve timing, fuel starvation, or ignition weakness). The checks in this guide are ordered from fast and low-risk verification to deeper diagnostics, so you can decide what you can confirm at home and what must be tested by a shop.
In practice, you’ll use multiple independent indicators to converge on a component area. If at least two separate checks point to the same system, ordering parts becomes much more defensible. If they do not converge, you pause and diagnose further rather than guessing.
Pre-diagnosis: confirm symptoms and narrow the failure mode before ordering parts
Start by treating symptoms like evidence, not a diagnosis. For dirt bikes, “engine repair” parts requirements change drastically depending on whether the bike won’t start, starts but misfires, bogs under load, knocks, or runs briefly then fails. The pre-purchase step is to capture what happened, what changed, and how the engine behaves at different temperatures and throttle openings—because that information determines whether you should shop for fuel kits, ignition components, timing parts, or internal engine assemblies.
How it works is basically pattern recognition plus validation. Sudden failures often point toward ignition, fuel delivery interruptions, broken timing components, or catastrophic lubrication issues. Gradual degradation can suggest wear (rings/valves), air leaks, deteriorating filtration, or timing drive stretch. Your job is not to be 100% certain; it is to narrow the failure mode early enough to prevent expensive “throw parts at it” orders. If you can document “it ran fine until X” (a fuel switch, a maintenance lapse, a long water crossing, a storage period, altitude change, or oil type), you reduce guesswork and improve parts accuracy.
For practical application, follow a decision rule: only order parts after at least two independent checks point to the same component area. For example, if you suspect top-end wear, don’t buy pistons just because it has low compression—confirm with oil condition and (ideally) valve sealing via leakdown or at least a timing and valve clearance inspection. If the engine starts but has a sharp knock, low compression could be caused by timing slip or valve timing error, which would make piston/ring orders premature. Conversely, “won’t start” with spark present but no fuel likely routes you away from internal parts and toward carb/injection and air leaks first.
Tradeoffs and limitations matter here. Some failure modes mimic others: contaminated oil and water ingress can create sludge that looks like metal shedding; overheating from fuel starvation can later damage valves and cylinder walls; improper break-in or seized briefly can make a later compression test look like classic ring wear. The commercial mistake most owners make is confusing “engine won’t start” with “engine has mechanical damage.” Your symptom capture must separate electrical/starting issues from combustion and mechanical integrity before you order expensive components.
For shop workflows, this is where a Shop checklist before repairs becomes valuable—because it forces consistent symptom recording and reduces back-and-forth. You can also align with a Mechanic checklist for repairs style of documentation when you plan your parts list, especially if you are coordinating a quote or return authorization in the United States.
1) Compression & leakdown verification: measure before you assume cylinder/head wear
Compression and leakdown tests let you measure engine sealing integrity before you assume worn rings, valves, or head sealing are the real problem. In a commercial context, this matters because compression results directly change the parts list: it’s the difference between ordering piston/rings and ordering valve service, head sealing components, or timing verification first. If you only guess from symptoms, you risk buying top-end kits while the actual issue is valve timing, cam chain stretch, or a sealing surface problem.
How compression verification works is straightforward: you measure how well the cylinder can build pressure during the compression stroke. Leakdown adds a deeper layer by pressurizing the cylinder and estimating where leakage occurs (intake, exhaust, or crankcase). Pressure patterns correlate to likely wear locations: rings and piston sealing typically show higher blow-by and leakdown toward the crankcase, while valves often show intake or exhaust-side leakage. Conceptually, acceptable versus concerning results depend on the bike’s service limits in the OEM manual, but the key point is to treat “near the threshold” as “requires corroboration,” not as permission to skip further checks.
Practical application requires controlling variables. Ambient temperature, starter speed (especially if the battery is weak), and cranking technique all affect compression numbers. For electric starters, a slow crank can artificially reduce readings. Also, if the engine’s timing is off, the compression test can still appear abnormal because valve events are no longer occurring at the correct time. That’s why you must interpret compression with context and confirm with timing and valve clearance inspection before buying piston/rings.
Tradeoffs and limitations: compression alone cannot tell you whether the leak is rings, valves, head gasket, or timing events. A low compression reading can come from valve timing slip, cam chain/belt stretch, or incorrect lash—not just worn rings. Many “buy parts first” mistakes happen because guides treat low compression as a direct piston order. The deeper-than-obvious nuance is that timing issues can mimic classic wear symptoms, so you must inspect timing before you checkout a cart full of top-end parts.
Real-world scenario: a rider reports low compression on one cylinder and orders rings and a piston. After installation, the engine still shows low compression because the cam chain had stretched beyond safe limits, keeping valve events out of spec. The second order was expensive, avoidable, and delayed riding by weeks. By contrast, a test-driven approach changes the order list: valves or timing components first, pistons only if subsequent checks confirm ring/cylinder scoring.
2) Valve train & timing inspection: ensure cam timing and lash aren’t the real “engine repair” problem
Valve train and timing inspection prevents a costly pattern: ordering top-end internal parts when the root issue is actually incorrect cam timing or valve clearance. This is one of the highest-value pre-purchase checks because timing problems can produce low compression, hard starting, misfires, and even detonation-like symptoms—yet the parts you need may be cam drive components, tensioners, or valve lash-related service rather than piston/ring replacement.
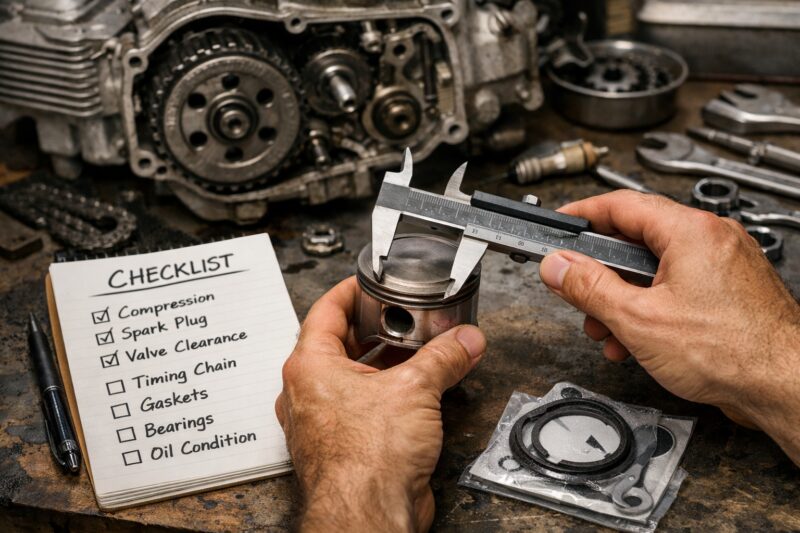
How it works: on most dirt bikes, cam timing depends on the cam chain or belt condition and correct alignment of timing marks at a known crankshaft position. If the cam drive is stretched, skipping marks, worn sprocket teeth, or tensioner components are failing, valve opening/closing events shift. That shift can cause reduced cylinder sealing performance and combustion inefficiency. It can also increase the chance of abnormal combustion (including detonation under certain conditions) which may later damage pistons or valves—creating secondary failure that looks like “wear,” even though the initial cause was timing.
Practical application starts with visible and measurable checks. Inspect cam chain/belt wear, check alignment of sprocket marks, inspect tensioner operation, and confirm cam timing marks according to the OEM procedure. Next, verify valve clearance/lash using the correct method and feeler gauges (or, where applicable, the correct adjustment procedure). Even if you plan to order parts, clearance verification can prevent ordering parts for the wrong cause. If clearance is out of spec after a “fresh top-end” assembly, it may indicate incorrect service steps, gasket thickness issues, or wrong parts—leading to repeated failure.
Tradeoffs and limitations: some owners assume lash is “set once” and skip verification, especially after replacing parts. Common mistake: skipping valve clearance measurement after servicing. Another mistake is confusing symptoms: detonation or misfire from timing error can lead people to replace carburetor or top-end parts unnecessarily. If you’re rebuilding and the cam chain drive is already suspect, replacing timing drive components can be cheaper than repeating a full top-end teardown.
Deeper insight: advanced failure patterns include stretched cam drive that causes repeat symptoms after a “successful” top-end rebuild. For example, a bike may run briefly after a piston replacement but soon develops low compression again because the valve events never return to correct timing. This is why timing inspection must sit alongside compression verification in your diagnostic sequence.
For alignment with shop processes, using a Mechanic checklist for repairs style of inspection helps ensure timing/lash checks aren’t overlooked. It also supports faster quotes when you share measurements and photos with a US-based mechanic, which can reduce friction during parts sourcing and return windows.
3) Oil condition, filtration, and metal debris check: verify internal damage risk before buying costly components
Oil condition and metal debris checks help you estimate whether the engine has internal damage that goes beyond the symptom you see today. Commercially, this matters because metal contamination can indicate bearing failure, crank damage, or rotating assembly wear—where replacing only the top-end would leave the true damage untouched. If you order internals based on compression and skip debris and filtration evidence, you risk repeat disassembly and returns.
How it works: you examine oil color and smell, inspect the oil filter (if the engine has one), and look for metallic particles. Fine metallic “paste” can indicate bearing material breakdown, while larger shavings can indicate more severe wear or scored components. Magnetic inspection is also a key concept: ferrous particles typically indicate steel bearing or gear wear, while non-magnetic glitter can sometimes point to clutch material or aluminum from piston/cylinder components. The exact interpretation depends on your engine’s materials and what usually wears in that model, so treat debris analysis as a risk classifier rather than a guaranteed identification.
Practical application: drain the oil into a clean container and inspect immediately. Look for water contamination (milky oil), burnt odor (overheating), and evidence of long storage sludge. Then inspect the filter element and any screens. If you see chunky debris, you escalate your plan toward deeper inspection rather than ordering parts as if it’s “just valves” or “just rings.” Conversely, relatively clean oil with minimal debris may mean the damage is localized, which can support safer reuse of certain rotating assemblies after measurement and cleaning.
Tradeoffs and limitations: improper oil viscosity, incorrect oil type, or long storage can create sludge that looks like “damage” but isn’t. That can cause a false escalation where you replace unnecessary components. Another limitation is that debris may have been cleaned out partially by riding after the initial damage event—so you still need compression/timing and, ideally, teardown confirmation.
Commercial outcome example: if debris is consistent with bearing wear and you find elevated scoring in the cases, you should stop and plan for crankcase-related checks rather than ordering a top-end kit alone. If debris suggests mostly top-end wear but timing and compression converge on valve sealing issues, you may prioritize valve service and head sealing components over pistons.
This is also where avoiding “band-aid” purchases helps—check oil and filters first before you assume what to replace. An Avoid costly dirt bike mistakes mindset is useful because the parts you order should reflect your confidence level and evidence weighting, not just what seems common online.
4) Ignition and spark system checks: eliminate electrical causes that look like mechanical engine failure
Ignition and spark checks prevent expensive misdiagnosis where electrical problems mimic mechanical engine failure. If the bike misfires, won’t start, or runs rough under certain conditions, weak spark can create symptoms that resemble carburetor issues, compression problems, or top-end wear. For commercial parts purchasing, confirming spark health first often protects you from ordering internal components unnecessarily.
How it works: your ignition system controls spark timing and energy. Even with correct timing mechanically, a weak spark (or intermittent spark) can produce misfire-like behavior. That misfire can be mistaken for fuel starvation or valve issues. A practical sequence is to verify starter behavior and battery health, confirm spark presence using appropriate testing, inspect coil/wiring/grounds, and check spark plug condition and gap. You’re not only checking “is there spark,” but also whether spark is strong and consistent under real-world conditions like heat and vibration.
Practical application: start with the simplest checks. Verify battery voltage and starter response (especially for electric-start models), ensure the kill switch and wiring harness integrity, inspect grounds, and examine plug condition. A sooty or oil-fouled plug can indicate combustion issues, but it can also be caused by misfire or rich running from fuel problems. If spark appears weak only after the engine warms up, you may be seeing heat-soak coil failure or moisture intrusion—issues that do not require top-end parts.
Tradeoffs and limitations: a spark test is not a complete “proof of correctness.” Many intermittent faults won’t show during a quick bench test. Also, weak spark can create “misfire-like” symptoms that testers attribute to carb tuning or top-end wear. To reduce wrong orders, you should pair ignition findings with fuel readiness checks and compression/timing evidence before selecting which parts to buy.
Real-world scenario: a rider replaces a carb kit after seeing rough running and hard starting. After ignition testing, the spark was weak under load due to a failing coil/ground connection. The carb replacement did not fix the root cause, and the engine was effectively never receiving stable ignition energy. The correct commercial decision was electrical repair first, then re-evaluate combustion and compression afterward.
To maintain an organized and defensible buying process, it's essential to adopt a checklist approach that includes specific queries to confirm the root cause of issues before service. This strategy aligns well with the questions you should ask before repairs, allowing you to share essential information like “spark test results + plug photos” with the mechanic. By doing so, you can expedite the diagnosis and minimize the chances of receiving incorrect parts. Additionally, being prepared with the right questions ensures that you are well-informed throughout the repair process.
5) Fuel delivery and combustion readiness: validate carbs/injection basics before purchasing internal parts
Fuel delivery and combustion readiness checks determine whether the engine is getting the correct fuel/air mixture before you order internal engine components. Hard starts, bogging, surging, overheating, and dead-cold starting are often fuel subsystem problems, not piston or valve wear. Commercially, this matters because service kits (gaskets, jets, filters, seals) are far less expensive than internal assemblies, and correcting fuel delivery early prevents secondary overheating damage.
How it works depends on whether your dirt bike uses a carburetor or fuel injection, but the principle is the same: validate fuel quality and flow, verify intake air sealing, and confirm that the engine can sustain combustion under load. For carburetors, float/needle condition, clogged jets, and fuel filter restriction can cause symptoms that look mechanical. For injection, fuel pressure, injector function, and sensor-related readiness issues can produce similar confusion. Add intake leaks—air leaks can lean the mixture and contribute to overheating and detonation risk.
Practical application is symptom-to-subsystem correlation. Dead-cold start that improves with choke often points toward fuel/starting circuit or choke function (carb) rather than cylinder wear. Only running at certain throttle positions can suggest clogged jets or airflow restrictions. Overheating after a fuel starvation event may later damage valves or piston surfaces, so your parts plan must account for both the root cause and any secondary damage risk. If you see evidence of lean operation (excessive overheating signs, abnormal plug reading trends), you may need to inspect top-end components even if the original issue was fuel starvation.
Tradeoffs and limitations: fuel systems can be contaminated by water ingress, tank debris, or improper storage. Sludge may mimic mechanical damage by changing oil condition later. Also, tuning that was slightly off can trigger overheating and carbon buildup, then later “looks like wear.” The commercial mistake is to jump straight to internal repairs because the bike sounds “wrong.” Validate fuel delivery readiness first, then revisit mechanical checks.
Commercial outcome example: you may prioritize a service kit (fuel filter/lines, carb cleaning and jets, intake gaskets) before buying pistons. Only order internal parts if compression/leakdown/timing/debris evidence confirms wear or if overheating indicators suggest secondary mechanical damage.
If you plan to coordinate with a shop, keep your documentation tight—symptom timeline, what fuel/oil was used, and what tests you performed. That’s aligned with a Shop checklist before repairs process and makes US shop quoting more accurate and faster.
6) Cooling, exhaust, and air-flow indicators: confirm overheating hasn’t already changed what parts you need
Cooling, exhaust, and air-flow checks determine whether the engine has already suffered heat damage that changes which parts you must buy. Overheating is not just a “warning sign”—it can lead to piston/ring damage, valve face deterioration, and cylinder wall scoring that only appear after the fact. Commercially, this matters because you can easily waste money replacing components that are not the heat-affected ones or reuse heat-stressed parts after a severe event.
How it works: dirt bikes rely on airflow and coolant (on liquid-cooled models) to keep operating temperatures stable. Blocked radiator fins, missing airflow ducting, damaged hoses, coolant leaks, and thermostat/fan faults (where applicable) reduce heat rejection. Exhaust restrictions—such as a clogged spark arrestor, carbon buildup, or damaged exhaust packing—can also contribute to poor breathing and abnormal operating temperatures. These conditions can mimic mechanical loss of power and lead to misdiagnosis.
Practical application: inspect radiator/hoses/ducting integrity, check for coolant leaks or inconsistent temperature behavior if you can measure it, and verify that the fan and thermostat function according to the OEM procedure (for liquid-cooled models). For exhaust, inspect the muffler internals and spark arrestor where applicable. Then connect overheating indicators to buying logic: if overheating was severe and prolonged, you should treat valve and piston/cylinder inspection as non-negotiable even if other tests seem “borderline.”
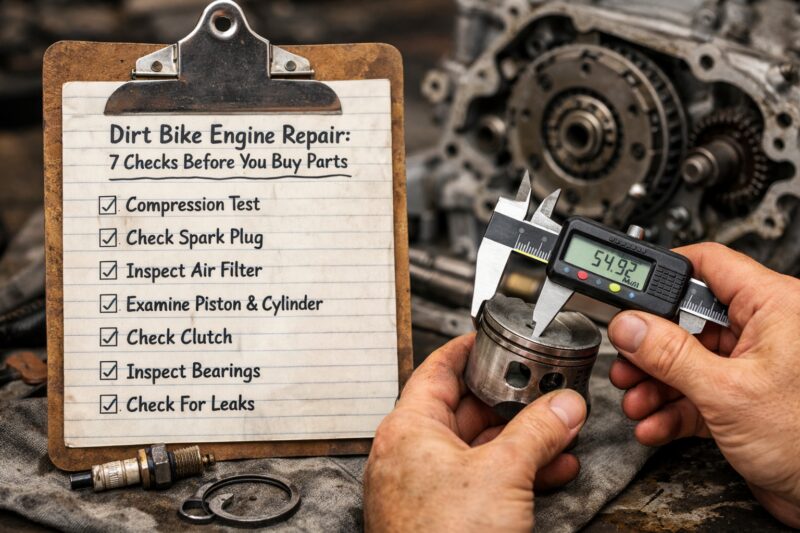
Tradeoffs and limitations: not all overheating causes immediate mechanical failure, and some sensors are unreliable without proper measurement equipment. Also, carbon buildup can be caused by rich fuel or misfire events unrelated to cooling. The deeper-than-obvious nuance is that some owners replace only visible parts after overheating while reusing heat-stressed components, leading to repeat failures. Your job is to decide whether overheating is a root cause (cooling failure) or a consequence (fuel starvation/misfire), then evaluate secondary damage risk accordingly.
Commercial outcome example: if the bike was run low on coolant or had a blocked radiator and now shows low compression plus oil debris, you likely need both heat-affected component inspection and sealing checks—not just a gasket and carb cleaning. Conversely, if there’s no evidence of overheating and fuel/ignition issues are confirmed, you may avoid unnecessary internal purchases.
As you prepare parts for a shop, document temperature behavior and any cooling system work performed. This complements a Mechanic checklist for repairs exchange and can help US mechanics justify repair categories and parts list priorities.
7) Teardown triage: when you must inspect—and how to do it in a way that prevents wrong orders
Teardown triage is the point where measurement beats assumption and prevents wrong-part purchases. You don’t necessarily jump straight to a full engine rebuild; instead, you remove only the minimum to inspect the suspected areas, verify wear patterns, and check mating surfaces before ordering costly components. This approach is commercially efficient because it reduces return risk and avoids paying for parts that are still serviceable after correct inspection.
How it works is a stepwise verification hierarchy. Based on your symptom capture and earlier tests, you decide what to open first: cylinder/head area for suspected top-end wear, cam drive/timing components for suspected timing errors, or crankcase access for suspected bearing damage. Then you inspect with decision-making criteria: cylinder wall scoring/honing marks, piston crown condition, ring end gap (if rings are suspected), valve face condition, and crank bearing surface evidence. Gasket condition and sealing surfaces matter too—often leaks are caused by damaged surfaces or incorrect reassembly, not just “bad parts.”
Practical application: compare what you find to service limits from the OEM manual. Measure clearances (not just visual condition), and focus on the tolerances that determine whether a part is truly reusable. For example, new rings can still fail if cylinder wear and clearance issues exceed spec, and valves can still burn if clearance/lash and seating are wrong. Before you buy, confirm both sides of the symptom. Low compression from valve leakage requires valve sealing checks, not just piston/ring replacement. Bearing-related debris requires crankcase and rotating assembly evaluation, not just top-end seals.
Tradeoffs and limitations: teardown requires time, proper tools, and careful cleaning. You must avoid reusing old gaskets and consider correct sealant and torque/sequence procedures. Another common mistake is ignoring crankcase sealing surfaces or reusing fasteners that should be replaced, leading to leaks that “feel like an engine problem” but are actually assembly integrity issues.
Failure mode to avoid: relying on “it looked okay” without clearance measurement. Many incorrect purchases happen because guides emphasize appearance over tolerances. A deeper inspection may show that the engine needs valve work and head sealing but not pistons, or that the rotating assembly needs replacement due to bearing wear that early oil inspection suggested.
To reduce wrong-part orders during coordinated repairs, keep a photo and measurement log. That aligns with a Avoid costly dirt bike mistakes approach and supports clear communication if you use a US-based shop later.
Decision path: how to create a parts list that matches your verified engine diagnosis (not just symptoms)
A correct parts list is built from evidence convergence, not symptom guessing. Your decision path should take you from symptom → low-risk tests → converging evidence → parts category selection → recheck before checkout. This is the commercial backbone of successful Dirt Bike Engine Repair because it forces consistency: you only buy when multiple indicators support the same component area, and you include both the root cause and any likely secondary damage.
How it works is evidence weighting. Compression results, leakdown direction, oil debris type, timing inspection, spark/fuel readiness, and overheating indicators each have different reliability. Some results override others. For example, if compression/leakdown point to valve leakage and oil debris suggests minimal bearing damage, you prioritize valve service and head sealing components. But if debris indicates bearing failure and oil was contaminated, you escalate toward crankcase-related inspection and stop assuming top-end-only fixes.
Practical application: after each test phase, update a running “parts category shortlist” rather than a full cart. Then do a compatibility check to protect your purchase from model/year variance. Even when bikes share a name, there can be differences in bore/stroke, jetting baseline, intake/exhaust variations, and gasket thickness that affect clearances and assembly results. For carb bikes, jet kits and airbox setups can vary by generation; for injection bikes, harness and sensor packaging can vary too. Confirm part numbers or cross-references against your exact VIN/model variant.
Tradeoffs and limitations: mixed failures are real. A clogged fuel supply can cause overheating, which then damages valves; a weak ignition can lead to misfires and carbon buildup; timing stretch can cause detonation risk and later top-end wear. Your parts list must cover both root cause corrections and consequences, otherwise the repair works briefly and fails again. This is why you should not treat “one symptom” as “one part category.”
Real-world scenario: a rider sees hard starting and overheating. The first impulse is to order a top-end kit. After evidence weighting, you find fuel restriction and weak spark plus borderline compression. The correct list includes fuel cleaning/service, electrical repair, and an inspection-based decision for top-end components depending on heat damage confirmation.
To keep the process shop-ready in the United States, document what you measured and what you photographed, then share that summary using Questions to ask before service when you engage a mechanic. The clearer your evidence, the faster a shop can quote, source parts, and reduce return cycles.
Common mistakes that ruin successful Dirt Bike Engine Repair and lead to wasted part purchases
The most expensive mistakes in Dirt Bike Engine Repair come from replacing parts based on incomplete evidence. People often assume that because a symptom is common online, the cause must match the common story. Commercially, that mindset increases wrong-part orders and returns because it ignores evidence convergence, compatibility requirements, and secondary damage chains.
One major mistake is ordering parts based solely on guesswork (like sound-only diagnosis or “common failure” assumptions). Another is replacing only one side of a symptom—such as installing a fresh top-end while reusing suspect bearings or timing components. When the true root cause remains, the engine may start and run briefly, then fail again with similar symptoms, effectively doubling cost and labor.
Another frequent error is incorrect fluids/filters or skipping oil contamination cleanup steps after internal damage. If bearings were damaged, the engine may continue shedding debris even after you replace a top-end component, leading to rapid wear recurrence. This is why oil debris and filtration evidence deserve early attention. Also, “band-aid diagnostics” happen when someone treats a quick spark check as proof, without confirming fuel/air readiness and sealing integrity. Weak spark can mimic misfire-like symptoms that people incorrectly attribute to carb tuning or worn valves.
Edge cases are where most guides mislead you. Engines that were run low on oil, seized briefly, or stored improperly can produce misleading compression and oil findings. Storage sludge can appear like metallic contamination, and brief seizure can damage bearings in ways that look like top-end wear once the engine is partially disassembled. If the evidence does not converge, you pause and inspect rather than ordering.
Tradeoffs to consider: teardown is work, but it’s cheaper than repeated shipping and returns. Returning parts can also stall downtime, especially if you’re on a tight riding schedule. A better commercial approach is to follow a Avoid costly dirt bike mistakes checklist that combines measurement discipline with evidence weighting before purchase.
If you plan to outsource diagnosis or coordinate with a shop, use a structured approach like a Shop checklist before repairs to prevent missing steps that lead to wrong-part orders.
Parts options and realistic alternatives: how to choose between servicing, rebuilding, and replacing assemblies
The best parts option depends on how much verified damage exists and how confidently you’ve identified the root cause. For many dirt bikes, “parts shopping” isn’t a single decision between new and old—it’s choosing between targeted servicing (like valves and sealing), a top-end rebuild, a bottom-end rebuild, or an engine swap. A realistic plan prioritizes evidence: if tests and inspections show localized wear, targeted service can minimize cost and downtime; if debris and sealing failures show broader damage, rebuilding or replacement may be economically smarter.
How it works is a severity-to-risk match. Evidence such as low compression with valve leakage can route you toward valve service and head sealing parts first. Oil debris indicating bearing damage pushes you toward bottom-end inspection and potential rebuild. Timing chain/belt issues often require timing components rather than new pistons. Overheating with secondary damage risk may require inspection and parts selection for heat-affected components, not just “whatever is cheapest.”
Practical application: you should compare solution categories after your 7-check convergence system narrows the diagnosis. Consider time budget and risk tolerance too. If you’re repairing for immediate riding, you might prefer the lowest-disassembly option that still corrects root cause. If you have the ability to do measured teardown and follow service limits closely, you can choose targeted servicing with higher confidence.
Tradeoffs and limitations: refurb/used assemblies can reduce initial cost but require inspection discipline to confirm wear limits and sealing integrity. “Engine swap” is not automatically safer—compatibility, hidden damage, and correct break-in procedures still determine success. Also, if you don’t correct the root cause (fuel contamination, ignition weakness, valve lash, timing stretch, oil quality), even a swap can fail quickly.
| Option | When it fits (evidence-based) | What you still must verify | Typical commercial tradeoff |
|---|---|---|---|
| Top-end service | Valve leakage or localized wear; debris suggests minimal bottom-end damage | Valve clearance, timing marks, sealing surfaces, cylinder condition to service limits | Lower cost, faster turnaround—if root cause is corrected |
| Full top-end + valve work | Heat or wear affects valves/piston; leakdown confirms sealing issues | Cam timing drive health, ring/cylinder clearance readiness | Moderate cost; reduces repeat failures from mixed sealing issues |
| Bottom-end rebuild | Oil debris indicates bearing/gear damage; crankcase inspection confirms wear | Crank bearing clearances, case sealing surfaces, contamination cleanup | Higher labor; best when internal damage is proven |
| Engine swap (used/refurb/new) | Damage is widespread or inspection confidence is low; compatible engine available quickly | Compatibility verification, correct oil/cooling readiness, break-in procedure | Fastest path sometimes, but risk shifts to hidden damage and compatibility |
For realistic alternatives, it helps to keep a “documentation request” mindset. Before paying, request inspection results and measurements, and ensure there are clear return/warranty terms for used or refurbished components. If you want faster quotes and fewer wrong-part purchases, provide your test log and pictures, and align your documentation with a Mechanic checklist for repairs approach.
Commercial outcome: the correct category selection happens only after your checklist converges. If thresholds are exceeded (for example, severe debris evidence, timing drive failure, or clearance out of spec), you escalate to the next category rather than forcing a cheaper option that won’t survive.
Advanced considerations: what most guides miss for higher-confidence engine repair outcomes
High-confidence Dirt Bike Engine Repair is less about replacing parts and more about preventing repeat failures by verifying root causes and closing the loop on consequences. Many guides focus on “what to replace” but miss “how to confirm the fix worked” and “what could still be broken under the surface.” The advanced goal is to ensure your repair actually resolves the failure chain, not only restores function temporarily.
Repeat failure prevention starts with root cause correction. If timing drive was stretched, replacing pistons without correcting cam timing and valve clearance risks recurrence. If fuel starvation caused overheating, installing heat-affected top-end parts without addressing filtration, fuel delivery, and air leaks can lead to another overheating cycle. If oil was contaminated, you must perform contamination cleanup and change fluids and filters correctly, not just refill with the “right brand.”
Measurement discipline is another missing piece. Service limits, re-torque sequences, correct gasket replacement, and sealing surface prep matter because clearances determine whether new parts survive. Many wrong orders happen because someone measures nothing and assumes “new equals perfect.” But even new parts can fail if clearances, lash, gasket fitment, or assembly steps are incorrect.
Failure chaining is the deeper nuance: one wrong diagnosis creates secondary damage that your original parts plan didn’t include. Example chain: misfire (ignition/fuel) → overheating → valve damage → cylinder scoring. If you only replace valves and ignore the ignition/fuel root cause, the engine can burn valves again. That’s why your evidence weighting must treat root cause fixes as non-optional.
Objection handling is also relevant. Someone might say, “my buddy had a similar symptom and bought X.” Similar symptoms do not guarantee identical causes. Riding conditions, oil history, and maintenance practices change the correct parts list. That is why your checklist emphasizes multiple independent checks and why you should avoid jumping to a parts category based on anecdote.
Commercial success metrics should be specific: verified compression baseline after reassembly, stable idle, no abnormal noises, correct starting behavior hot and cold, and clean plug readings consistent with expected mixture. Keep your documentation so that if a shop is involved, they can compare your pre- and post-repair baselines.
If you want more structured planning, revisit a Shop checklist before repairs style approach and ensure you have evidence of root cause correction before you order additional parts.
Geography anchor (US): aligning engine repair checks with typical availability, manuals, and shop workflows in the United States
In the United States, the quickest path to accurate Dirt Bike Engine Repair parts selection is aligning your checks with how US shops use OEM service manuals, torque/spec sheets, and return-friendly purchasing workflows. This matters commercially because nationwide parts availability can vary by model variant, and lead times can affect whether you diagnose first or rush to buy. When you follow the same measurement discipline US mechanics expect, you reduce back-and-forth and improve the chance that your parts list matches what the bike actually needs.
How it works in practice: you reference OEM service procedures for compression/leakdown limits, valve lash specs, and timing mark alignment. US shops typically rely on those numbers during quoting. Because dirt bikes can have emissions-related or configuration differences by year and region, “same model” sometimes does not mean “same diagnostics baseline.” For example, intake/exhaust configuration changes can affect fuel/air readiness, and jetting baselines can shift. That can alter how you interpret plug readings and tuning results.
Practical application: prepare a diagnosis summary for a US-based mechanic that includes symptom timeline, your test results (compression numbers, leakdown direction if available, oil debris observations), and photos of spark plugs, filters, and any visible timing components. This speeds up quoting and helps the shop determine whether parts should be sourced from OEM or aftermarket listings with clear return policies. It also helps you avoid ordering incompatible items that look similar on catalog pages.
Tradeoffs and limitations: aftermarket parts catalogs can be less precise than OEM parts, and compatibility mistakes are common when there are minor version differences. Lead times can tempt buyers to “order now” before diagnostic completion—yet that increases return risk. Better commercial behavior is to keep your cart limited to parts categories justified by evidence, then expand only after thresholds are met and timing/fuel/ignition readiness are confirmed.
For authoritative reference on safety and maintenance principles that shops often emphasize, consider OEM service manuals and general maintenance guidance like USDA Forest Service Off-Highway Vehicle guidance and torque/spec discipline supported by NHTSA vehicle maintenance and safety resources for general compliance thinking. For diagnostic fundamentals around engine testing principles, SAE International publications on engine systems and diagnostics can be useful context, even if you rely primarily on your OEM service data.
Frequently Asked Questions About Dirt Bike Engine Repair (Buying Parts After Diagnosis)
What compression numbers mean I need piston rings for dirt bike engine repair?
Low compression can indicate ring wear, but it is not proof on its own. If compression is low, you should confirm sealing and leakage direction with leakdown and verify cam timing, because valve timing errors can lower compression without ring failure. If oil debris suggests top-end wear and cylinder inspection shows scoring beyond service limits, piston rings become a more defensible purchase. Always compare against your bike’s OEM service limits before ordering rings.
How do I know if my valves are causing low compression after dirt bike engine repair checks?
Leakdown helps separate valve leakage from ring leakage by pointing toward intake or exhaust side leakage. You can also check valve clearance/lash and cam timing marks to ensure valve events occur correctly. If spark plug readings and teardown show valve face damage or poor sealing patterns, prioritize valve service and head sealing checks. Skipping clearance verification is a common reason wrong parts get ordered.
Should I replace the cam chain before buying top-end parts for dirt bike engine repair?
You should replace the cam chain (or timing belt/related components) when inspection shows stretch, wear, or tensioner issues beyond OEM guidance. Timing drive problems can create low compression and misfire symptoms that mimic top-end wear, so confirming timing health before ordering pistons/rings is high-value. If you have any repeat-symptom history after a fresh top-end, inspect cam drive components before spending again. Use OEM timing procedures to avoid installing top-end parts on incorrect valve timing.
What oil debris types indicate bearing damage versus top-end wear for dirt bike engine repair?
Fine metallic particles can indicate bearing material breakdown, especially when present in the filter and magnetic components. Larger ferrous shavings often point to more severe rotating wear, while non-magnetic glitter can sometimes be associated with non-bearing materials like clutch components or aluminum from lighter scoring. Oil color, smell, and water contamination help you judge overheating or ingress events that can compound damage. If debris risk is high, do not assume top-end-only repairs will fix the problem.
Can a weak spark cause misdiagnosis in dirt bike engine repair parts ordering?
Yes. Weak or intermittent spark can cause misfire-like symptoms that make owners think the carb, valves, or compression are the issue. If spark energy is inconsistent, the engine may run poorly, foul plugs, or struggle to start, all of which can mislead mechanical diagnosis. A proper electrical sequence—battery/starter behavior, spark presence, plug condition, and wiring/ground checks—reduces wrong-part orders.
How can I verify fuel delivery issues before replacing internal engine components?
Start by correlating symptoms with fuel behavior: hard starting only when cold, surging under load, or running better with choke often indicates fuel circuit or filtration problems. If you have carburetion, inspect float/needle condition and clean/verify jets and air leaks at intake connections. If you have fuel injection, verify fuel pressure and injector function using appropriate tools and test procedures. Correct fuel delivery first prevents secondary overheating damage that later forces expensive top-end parts.
What are common mistakes when ordering dirt bike engine repair parts without measuring clearances?
The most common mistake is replacing parts based on appearance or “it should be fine,” rather than measuring valve lash/lash, piston-to-cylinder conditions, or other service-limit clearances. New parts can still fail if clearances are out of specification or if mating surfaces and gasket thickness are incorrect. Skipping clearance measurements after servicing is specifically risky because it can produce premature valve face damage or recurrent compression problems. Always verify clearances to OEM specs before checking out parts.
Is an engine swap ever better than rebuilding for dirt bike engine repair—and how do I compare costs?
An engine swap can be better when damage is widespread, inspection confidence is low, or you need faster time-to-ride. To compare costs fairly, consider parts price, labor time, risk of hidden damage, and the cost of re-diagnosis if the swap fails. A rebuilt engine with correct measurements and documentation can be safer than an unverified swap, especially if root cause was not corrected. If you swap, confirm compatibility and implement the correct break-in and fluid readiness procedures.
What should I ask a shop to reduce wrong-part purchases for dirt bike engine repair?
Ask for the exact measurements they performed (compression/leakdown results, valve clearance, timing inspection findings) and what they used as service limits. Request that they explain their parts category logic—root cause versus secondary damage—and provide a parts list rationale tied to your evidence. Also ask about return/warranty terms for parts sourced through the shop. Good documentation reduces the chance you receive incorrect parts or repeat disassembly.
How do I create a parts list after diagnostics so I don’t miss secondary damage in dirt bike engine repair?
Use a failure-chaining approach: identify the root cause (timing, fuel restriction, ignition weakness, oil contamination) and then list potential consequences (valve damage, cylinder scoring, bearing wear). Weight evidence using your test results and oil debris analysis rather than just symptom severity. Include root-cause correction parts and at-risk consequence parts based on overheating and leakdown/timing evidence. Finally, recheck that the corrected system conditions match expected behavior before ordering additional components.
Conclusion
To prevent wasted money in Dirt Bike Engine Repair, treat parts purchasing like a decision system: verify first, then order. This article’s 7 checks create an evidence-based pathway—starting with symptoms, then moving through compression/leakdown, valve train and timing verification, oil and metal debris risk, ignition and spark readiness, fuel delivery basics, cooling/exhaust indicators, and finally teardown triage when thresholds require it. When results converge, you can confidently select the parts category that matches the verified diagnosis rather than guessing from symptoms alone.
Commercial success depends on protecting against secondary damage too. If overheating, fuel starvation, weak spark, or timing slip occurred, the correct parts plan includes both root cause fixes and the consequences that can follow. Measure clearances, confirm sealing and timing health, and verify that the system conditions after repair match expected behavior rather than stopping at “it runs.”
Document everything: test results, photos, and your evidence log. That documentation makes it easier to communicate with a shop, supports faster and more accurate quoting, and reduces return cycles—especially in the US where OEM spec sheets and torque procedures are the norm. If any threshold is exceeded (for example, evidence of bearing damage, valve sealing failure, or timing drive issues beyond safe limits), don’t try to force a cheaper parts category.
Next step: gather your bike’s exact model/year and service specs, then run the checklist again in the ordered sequence described here. If you are uncertain at any stage, pause parts checkout until at least two independent checks converge on the same component area.
Updated May 2026