

If your ATV’s idle is surging, hanging, or hard to stabilize, this step-by-step ATV Carburetor Cleaning checklist will walk you through confirming the real cause, cleaning the correct passages, and doing a warm-start test that proves the fix. ATV Carburetor Cleaning (and the related idle-circuit work) matters because varnish from stale fuel and partial clogs in the pilot/idle passages often mimic ignition or “mystery” problems—but this is a troubleshooting-and-cleaning checklist, not a guaranteed cure for every idle issue.
Below you’ll find inspection criteria for “clean the carburetor now” vs. “check fuel/air/filters first,” the exact cleaning sequence to avoid damaging jets, reassembly checks that prevent immediate re-clogging, and post-clean adjustment logic to restore a smooth idle. For 2026, the key theme is the same as always: verify symptoms, clean the right circuits in the right order, and confirm airflow, fuel flow, and baseline settings before you assume the carburetor is the culprit.
ATV carburetor cleaning checklist: confirm the idle problem before you tear anything down
A successful ATV carburetor cleaning starts with confirming that the symptoms are truly fuel/idle-circuit related rather than caused by an air leak, weak ignition, or throttle/air-control mismatch. If you skip this step, you may clean perfectly good passages while the real issue remains—so the idle continues to surge, stall, or refuse to settle.
Why it matters: a clogged pilot/idle circuit (or tiny varnish blockage in an idle air bleed route) typically shows up as unstable idle rpm, stalling when you come off the throttle, or “lean” behavior after warming. Conversely, air leaks at the intake boot or vacuum fittings often cause a high, inconsistent idle and make mixture screws respond oddly (for example, turning the screw changes pitch briefly but never achieves stability). ignition problems can mimic carb symptoms too; misfires and weak spark can look like lean surge because the engine is literally skipping combustion at low rpm.
How it works: the carburetor’s idle circuit is sensitive because it relies on small jets, passages, and metering orifices that go into “slow flow” mode at closed throttle. When fuel varnish forms inside those passages, you can get intermittent fuel delivery—enough to start, but not enough to maintain a stable idle. Practical application: before you open the carb, note what the ATV does across a few states: cold start vs. warm idle, response to brief throttle blips, and whether the choke/enricher changes behavior in a predictable way.
Tradeoffs and limitations: cleaning won’t reliably fix problems that originate upstream or downstream of the carb. For example, a torn intake boot or hardened manifold gasket can cause the engine to pull extra air, making the cleaned mixture circuit behave “wrong.” A stuck thermostat or cooling fan issue can affect warm-up behavior too, but that is less common than air leaks and contamination.
Edge case to watch: if your idle is unstable only after a few minutes of running, and you smell fuel or notice a wet area near the carb, the issue may be float height, a leaking needle seat, or fuel level instability rather than a simple clog. Another edge case is an “it runs, so the carb must be fine” assumption—partial clogs can still pass enough fuel to keep the engine alive, but they fail to meter properly under steady closed-throttle airflow.
Decision criteria to decide “clean the carburetor now”: long storage with stale fuel, visible debris in the bowl, recent use of fuel with high ethanol content, frequent surging after the ATV has sat, or idle stability that improves temporarily after you tap or move the choke linkage. If the symptoms strongly suggest an air leak (hissing intake noise, rpm rises when spraying a suitable cleaner at joints), check those areas first. And if you’re unsure where the mixture screw or pilot circuit belongs for your model, consult the service manual and set baseline adjustments before changing anything; you may also want to ask a shop like “choose a trusted ATV mechanic” when access is tight or specs are critical.
Tools, supplies, and prep: what you need for reliable ATV carburetor cleaning in 2026
You need the right tools and compatible chemicals to perform ATV Carburetor Cleaning without enlarging jets, damaging rubber, or missing critical passages. A reliable setup reduces rework and helps you verify the idle circuit is genuinely restored.
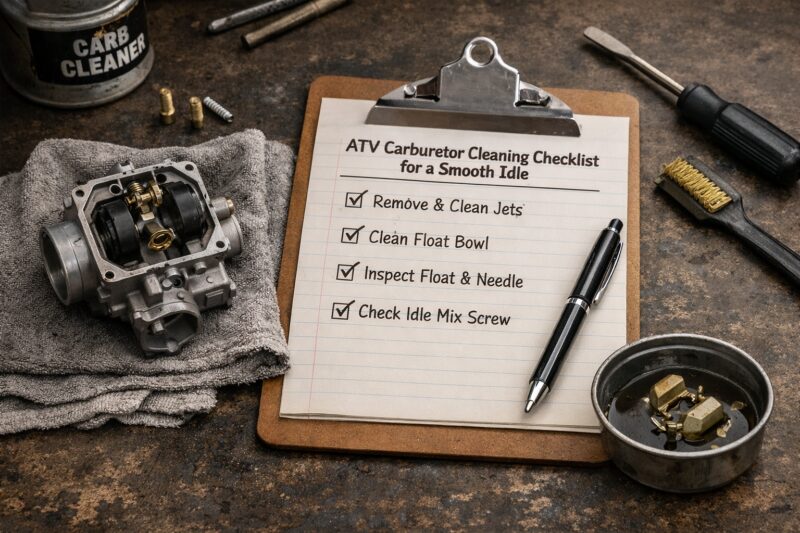
Start with tools you can count on: basic hand tools (sockets, screwdrivers, pliers), a clean workspace, small containers to hold screws/bolts, and soft brushes for external deposits. Depending on the carb style, you may need a bowl wrench, a correct hex/bit for the bowl screws, and a way to remove throttle/choke linkage without bending parts. For inspection, use good lighting and a flashlight; a simple magnifier helps when you’re checking jet openings and needle seats for corrosion.
Supplies should be categorized by what they clean and what they must not harm. Carburetor-safe sprays are common for removing light varnish, but for heavy deposits you may need a soak solution that is explicitly gasket-safe and compatible with the carb’s plastics/diaphragm materials. You should also plan for replacement parts readiness: gaskets, bowl seals, float bowl O-rings, and any small washers that are likely to tear during disassembly. If your carb uses a diaphragm or vacuum-operated slide component, choose fluids labeled as safe for those materials; many aggressive solvents can soften or swell diaphragms.
Prep steps matter more than most guides admit: drain the fuel safely, capture hardware, and keep the area ventilated. If the ATV has an electrical system you may expose during disassembly, disconnect the battery when appropriate to avoid accidental shorts. Before you loosen anything, take photos of hose routing, vacuum lines, and linkage positions—this is the fastest way to prevent misassembly and “mystery” idle behavior later. Model-aware prep: confirm jet types and note the location of mixture/idle screws before touching settings. Recording current screw positions is essential because reassembly with unknown settings leads to repeated adjustment cycles that look like ongoing clogging.
Gasket/diaphragm compatibility caution: some cleaners attack rubber and internal elastomers even if they clean metal parts well. A practical approach is to verify the label for compatibility (especially regarding neoprene, nitrile, or the specific elastomer your carb uses) and do not soak diaphragms unless the product explicitly permits it. If you need upstream guidance, it can help to review a wider maintenance flow like the ATV maintenance checklist to ensure filters, fuel quality, and storage practices are addressed in the same session.
For the broader service context, many owners benefit from a structured “pre-clean baseline” similar to a full ATV tune up checklist so you can distinguish carb-related issues from ignition, compression, or air filter problems. If access or specs are unclear, a small engine repair shop checklist can keep you from missing the safety and documentation steps that protect both you and the ATV.
Disassembly order and inspection points: clean what matters, don’t miss what causes idle
Disassemble in a logical order so you can inspect and clean every idle-related component without damaging parts, and so you can catch issues that a “quick spray” will never fix. The best ATV carburetor cleaning targets the pilot/slow circuit first because it controls the transition and stability where most idle complaints originate.
Start the sequence the same way for most carbs: remove the airbox/filter to access the carb, shut off or disconnect the fuel supply safely, drain the bowl if possible, and then remove the carb to access the float bowl and jets. Keep track of vacuum lines, overflow hoses, and any idle air components—misrouting a single hose can create a persistent lean or high-idle condition even after a perfect clean. Disassembly order prevents missed passages: you can’t reliably verify bleed routes or idle air passages when components are still in place and you can’t properly inspect the sealing surfaces.
Inspection targets should be deliberate. Check the main jet and pilot/slow jet, the idle mixture circuit passages, and the emulsion/needle area where applicable (depending on carb type). Inspect idle air bleed routes and any transfer passages linked to the pilot circuit. Look for varnish layers, corrosion, or embedded debris. Also check the float and needle seat area for sticking or wear that can destabilize fuel level at idle.
Deep insight: partial clogs are the trap. A pilot jet may appear unobstructed when you poke it from one side, but fail under fuel flow through the specific metering direction and under real suction/pressure conditions. Use visual inspection plus a method to confirm passage continuity (without enlarging or scratching the orifice). If you see flakes of varnish bridging a tiny passage, assume there are other varnish pockets in nearby channels—even if they are not obvious.
Replacement vs. cleaning criteria: if a jet is deformed, the orifice is visibly rounded or chemically etched, or a seal/gasket has hardened, you should replace rather than “make it work.” Likewise, if rubber parts are cracked or stiff (especially near the carb base gasket and any diaphragm), cleaning won’t restore elasticity or sealing. This is where a service manual saves time: it provides exact replacement part callouts and baseline adjustment points.
Real-world scenario: an owner reports a stable idle when the ATV is cold, but after warm-up it surges and then stalls. During inspection you may find a pilot passage partially blocked by varnish that temporarily dislodges, or fuel level instability from a sticky float. If you only clean the jet tops and ignore bleed routes or the needle seat area, the symptoms often return immediately.
Cleaning sequence that restores a smooth idle: jets, passages, floats, and seals in the right order
Use a controlled cleaning sequence—soak if appropriate, then route-by-route passage cleaning—because the idle circuit’s small passages require internal de-clogging, not just surface spray. This ordered approach is the core of effective ATV Carburetor Cleaning for a smooth idle.
Start with deposit type. If varnish is likely (long storage, old fuel), a soak may be necessary before you dislodge material. If you skip soaking, deposits may smear deeper into channels, making the clog harder to remove and increasing the chance you’ll reassemble a partially blocked circuit. However, soaking is not universal: do not soak diaphragms or mixed-material assemblies unless the product explicitly allows it. If you use a soak, follow the product’s time guidance and inspect the results before moving to finer cleaning steps.
Next, clean without altering jet sizing. Use appropriate soft tools (like carb cleaning brushes) and ensure you can remove debris from the path the fuel travels. Passage cleaning must ensure cleaner reaches internal channels; a practical method is to do controlled, repeated clearing while monitoring whether flow appears consistent through the specific passage routes. Avoid metal wire or “drilling” techniques that can enlarge jets. The goal is clearing, not resizing. After each stage, rinse or re-clean according to the cleaner’s directions, and blow dry carefully if allowed by the manufacturer.
Floats and the needle seat get special attention. Clean the inlet/needle seat area so varnish cannot prevent full sealing or consistent fuel level. Inspect float operation basics: the float should move smoothly and not stick from residue. If your fuel level fluctuates, you may still have idle instability even after perfect jet cleaning. Seals and O-rings: replace where specified, especially if they are swollen or flattened. Use compatible lubrication only if the manual or seal instruction calls for it; otherwise, keep parts clean and dry to avoid swelling or contamination.
Deeper insight on immediate re-clog prevention: debris can re-contaminate passages the moment you reassemble if upstream fuel supply still carries contamination. That’s why you should confirm fuel filter condition, fuel line condition, and any tank sediment before buttoning everything up. If your ATV has a screen filter at the carb inlet, clean it thoroughly and consider replacing it if it’s deteriorated. Without that upstream step, you can do “perfect” ATV carb cleaning and still get the same surging two rides later.
Tradeoffs: targeted cleaning saves time, but it risks leaving behind varnish in idle air bleed routes, float bowl venting paths, or small transfer passages. Full disassembly with careful inspection is more work, yet it’s the best choice when symptoms persist after an initial clean. If you’re dealing with repeated re-clogging or you suspect internal corrosion, it may be smarter to move toward rebuild or professional service rather than cycling cleaner repeatedly.
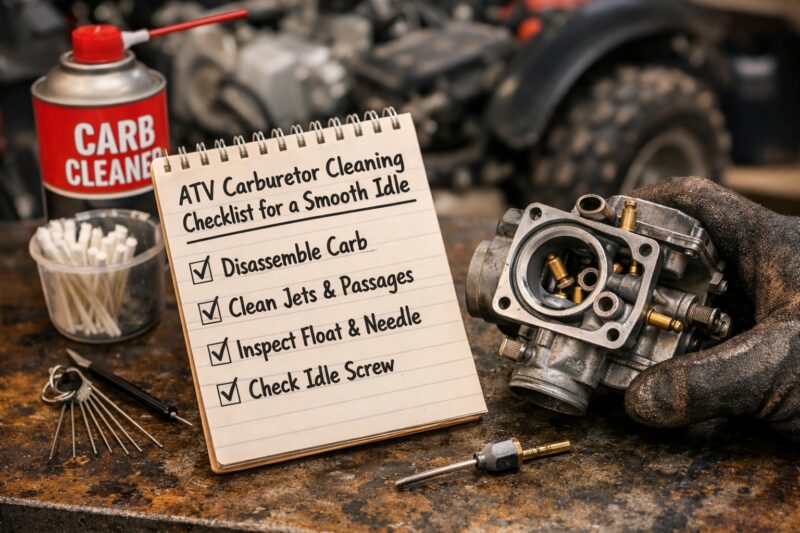
Idle mixture and adjustment after cleaning: set baseline, then fine-tune for stability
After cleaning, you must set an accurate baseline idle mixture and idle speed before you fine-tune, otherwise your adjustments may chase a symptom caused by air leaks or fuel level instability. Proper tuning is what turns “clean passages” into a stable, smooth idle.
How it works: the pilot/slow circuit and mixture screw control the fuel-air ratio at idle and low throttle openings. If you adjust mixture without restoring correct airflow (no air leak at the intake boot) or without correct fuel level (float and needle seat), the engine will respond inconsistently and you may overshoot into rich or lean surge. Practical application: record screw positions before moving anything, then return to the manual-specified baseline (or a known reference like “lightly seated then back out X turns,” if your manual uses that method).
Warm-up matters for stable tuning. Many carbs behave differently cold vs. warm because of choke/enricher operation and engine temperature effects. A good approach is to start the ATV, warm it to the temperature specified by the service manual, then adjust mixture until idle is stable and throttle blips recover cleanly without bogging or hanging. If you observe lean surge (a “hungry” oscillation or rpm that climbs and falls rapidly), you may need a small mixture adjustment toward richer, but do it in small increments.
Interaction with other settings is where guides often underperform. Throttle stop position, throttle cable free play, choke linkage function, and even the air filter condition all change the effective idle airflow the mixture screw must compensate for. If throttle cable binding or incorrect free play exists, you can’t tune around it. If the choke/automatic plunger is not returning fully after warm-up, mixture tuning will look “wrong” and the idle may continue to surge.
Deeper insight: “perfectly clean carb” can still idle poorly due to an air leak. A diagnostic loop can prevent wasted time: (1) return to baseline settings, (2) check for intake seal leaks and ensure clamps are tight, (3) verify choke fully off when warm, and (4) only then fine-tune mixture. If adjusting the screw improves idle temporarily but stability never fully returns, assume there’s an airflow or fuel delivery problem rather than a pure carb cleanliness issue.
Real-world scenario: an owner cleans the pilot circuit, sets mixture aggressively rich to stop stalling, and then sees a high idle that slowly hunts as the ATV warms. Instead of re-cleaning, the likely fix is verifying the intake boot seal and float level stability. The mixture screw should fine-tune around correct mechanical conditions, not compensate for faults.
Common mistakes and misconceptions in ATV carburetor cleaning (that lead to worse idle)
Most worse-idle outcomes come from avoidable errors like losing baseline settings, using the wrong tools, or skipping reassembly checks that cause air leaks. A clean carb does not guarantee a smooth idle if the process introduces misassembly or leaves a non-carb fault untouched.
Mistake #1: over-relying on visual cleanliness. Jets can look clear from the bowl side yet be partially varnished in internal channels. Carburetor passages are interconnected; deposits can block an idle air bleed while the pilot jet appears unobstructed. Mistake #2: using incorrect tools. Metal wires can enlarge jets or scratch metering orifices, and that can shift fuel metering permanently. High-pressure blasting can dislodge debris into other circuits or deform soft components; controlled cleaning beats aggressive spraying.
Mistake #3: losing baseline settings. Without recording screw positions and idle stop positions, you may unknowingly start far from correct mixture. This can create the illusion that the carb is still clogged, causing repeated “cleaning cycles” that never solve the true issue. Practical defense: document before touching, then adjust with small increments after warm-up. When you get stuck, compare your observations to the service manual procedure rather than guessing.
Mistake #4: skipping reassembly checks. This includes vacuum line routing, clamps tightness, choke linkage seating, and fuel line routing. Even small air leaks can make the engine respond as if the mixture is wrong, which tempts you to adjust mixture in the wrong direction. After reassembly, verify that the intake boot mates correctly and that the carb base gasket surfaces are clean and intact.
Deeper insight: “carb cleaner always fixes varnish” is a misconception. Some varnish requires soak time to dissolve fully; if you only spray, you might soften deposits that later break loose and re-clog the idle circuit during the first ride. Other deposits are corrosion byproducts that may not fully dissolve; in those cases, replacement of corroded jets or seals may be the correct repair. If you repeatedly clean and the idle returns unstable, use a repeat-clean failure logic: confirm upstream contamination, confirm air sealing, confirm correct reassembly of bleed routes and choke operation, and verify float fuel level behavior before opening the carb again.
If you’re new to diagnosis, it can also help to align your approach with a structured maintenance workflow; using an ATV tune up checklist alongside this carb checklist helps you avoid missing air filter issues, ignition condition, or clogged fuel filters that mimic carb problems.
Options and alternatives: choose the right approach to ATV carburetor cleaning for your situation
Choose the cleaning scope based on how severe the contamination is and whether the symptoms match an idle-circuit fuel metering problem. The right approach saves time and reduces risk of damage—especially when dealing with delicate diaphragms and tiny passages.
Approach A: full carburetor cleaning (complete disassembly). This is best for long storage, heavy varnish, and persistent idle issues that do not improve after targeted cleaning. Full disassembly lets you inspect pilot/idle passages, bleed routes, needle seat condition, float operation, and sealing surfaces—so you’re not depending on chance that spray cleaner reached internal channels.
Approach B: targeted cleaning (bowl and idle circuit focus). This can be effective for minor symptoms like temporary idle instability after sitting, when the rest of the carb is likely clean and you can confirm blockage in pilot-related passages. The limitation is that you may miss deposits in emulsion/needle areas or idle air bleed routes, which can keep the idle unstable even after you clear the obvious jet.
Approach C: professional rebuild/service. Outsource when model-specific details are unknown, when passages are inaccessible, or when repeated attempts fail. If you find corrosion in jets, damaged seals, or you suspect internal wear that cleaning cannot reverse, a rebuild can be more cost-effective than repeatedly buying cleaner and gaskets. Using a local shop—“choose a trusted ATV mechanic”—can also help you avoid the hidden time costs of misdiagnosis.
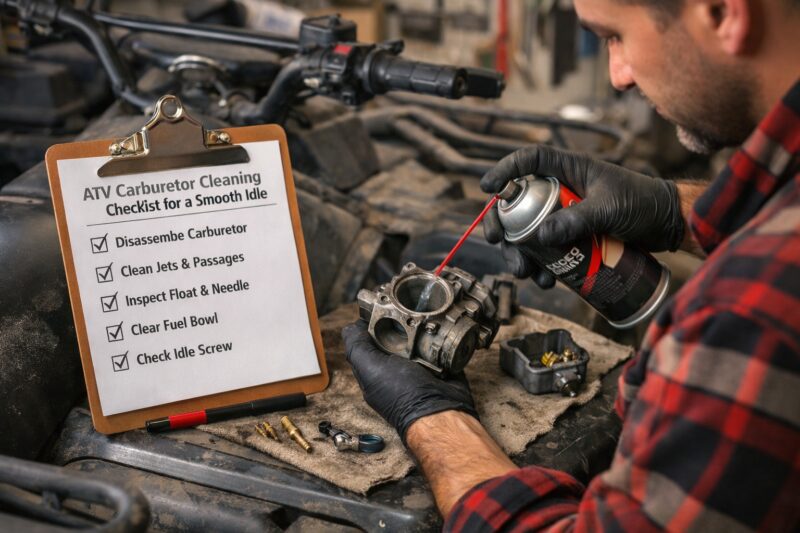
Approach D: troubleshooting-first fuel system plus air leak inspection. This option is best when symptoms point to suction leaks, fuel starvation, or contamination upstream. For example, if the idle surges only after the airbox/filter is disturbed, the intake leak theory becomes more likely. If you see sediment in the bowl repeatedly after cleaning, the tank, fuel line, or filter needs attention before you open the carb again.
Deeper insight decision criteria: if the ATV’s idle problem started right after fuel changes or prolonged storage, a full or soak-based cleaning is often justified. If the ATV has a known intake boot age issue or you recently reassembled the carb, focus on sealing and linkage first. If you’re trying to decide between cleaning and deeper work, it helps to consult a broader “before you replace” routine in your small engine repair shop checklist or a local service guide to avoid unnecessary disassembly.
Advanced edge cases: what most guides skip for smooth idle performance
Smooth idle performance can fail even after carb cleaning if air leaks, diaphragm variations, or fuel-system contamination sources remain unresolved. Advanced edge cases are where owners typically lose the most time.
Residual air leaks and intake seal issues: how to validate after carb removal. If you can reproduce idle instability by lightly disturbing intake clamps or boots, you likely have a leak. Symptom patterns help: high idle that cannot be tuned down, mixture screws that have minimal effect, or rpm changes with throttle movement often indicate extra air being introduced upstream of the metering circuits. Practical verification is to inspect sealing surfaces and replace any hardened or damaged gaskets rather than reusing them “because they look okay.”
Diaphragm/carb type variations: carb cleaning steps depend on design. Some carbs use vacuum-operated mechanisms or diaphragms that are sensitive to incompatible cleaners or aggressive soaking. You should avoid soaking assemblies that contain diaphragms unless the cleaner label clearly allows it, and you should not poke fragile components with tools that can tear them. If your carb uses an accelerator pump or related circuits, contamination there can affect transition and make idle feel unstable even if the pilot circuit is clean.
Altitude, temperature, and seasonal storage considerations: after cleaning, tuning is not always one-and-done. In 2026, many owners store seasonally and return to different ambient conditions; mixture that was “perfect” one month can act off-season due to temperature density changes and fuel composition changes. For long storage, stale fuel handling is essential: drain old fuel, address tank contamination, and prevent future varnish formation by using fuel stabilizer appropriate to your engine or by following manufacturer storage guidance.
Deeper insight: contamination sources like ethanol residue and tank rust can defeat every cleaning. If the carb re-clogs quickly, the problem may be upstream. Criteria to act: recurring varnish after a short period, sediment visible in the bowl again, or degraded fuel line that flakes. In those cases, you should clean or replace upstream filters/screens and consider tank inspection depending on ATV model design.
Repeat-clean failure checklist: systematically determine why it’s still unstable. First, confirm you set baseline correctly and that screws are at recorded positions. Second, check mechanical sealing (intake boot, base gasket, overflow/vent routes as relevant). Third, confirm fuel level behavior via float/needle seat and ensure fuel delivery is consistent. Fourth, verify choke function returns fully after warm-up. If these checks pass and idle remains unstable, then consider non-carb causes like ignition misfire or weak spark, and decide whether to consult a service manual or a qualified professional.
Frequently asked questions about ATV carburetor cleaning and achieving a smooth idle
How long should an ATV carburetor soaking process take?
Soak time depends on varnish severity and the specific cleaner chemistry. Light residue may clear in a short window, while heavy stale-fuel varnish often needs longer soak time followed by inspection before you proceed to passage cleaning. Follow the product label and stop early if parts appear softened or swelling begins—especially around any rubber components.
Can I clean an ATV carburetor without removing it from the ATV?
You can clean the exterior, bowl area you can access, and some reachable passages without full removal, but it is difficult to reliably clear internal idle circuits and bleed routes. The minimum checks still include confirming fuel is drained safely and that you can remove the bowl/jet access where applicable. If your idle issue is likely pilot-circuit varnish, removal is often required to do this correctly.
What parts usually need replacement after ATV carburetor cleaning?
Common wear items include bowl gaskets, O-rings and seals, and any float bowl rubber pieces that harden or flatten. If your carb has a diaphragm, the diaphragm gasket or diaphragm itself may need replacement if it shows stiffness, cracking, or solvent damage. Also replace any parts that were deformed during disassembly or that no longer seal tightly after cleaning.
How do I know if the pilot jet is clogged after cleaning?
Even after cleaning, verify passage continuity for the pilot circuit and correlate it to symptoms. If idle still surges or stalls at closed throttle, a partial clog may remain inside an idle passage or bleed route even when the jet top looks clear. Confirm with careful inspection and ensure reassembly is leak-free; misassembled choke/air routes can mimic a clogged pilot.
Should I adjust the idle mixture screw before or after cleaning?
Adjust after cleaning, but always record the original screw position before you change anything. Set a baseline per the service manual once the ATV is warmed up, then fine-tune in small steps until idle is stable and throttle blips recover cleanly. Doing mixture changes before cleaning can hide the true cause and lead to repeated, unnecessary adjustments.
Why does my ATV still surge at idle after carburetor cleaning?
Idle surge after cleaning commonly points to an air leak at the intake boot, a float/fuel level issue, or an idle air bleed route still contaminated. It can also be mixture misadjustment that occurred because baseline settings weren’t restored correctly. If surge is unchanged after you verify sealing and baseline, re-check choke/enricher return and consider ignition misfire as a mimic problem.
What is the safest ATV carb cleaner to use on carburetor parts?
The safest cleaner is the one labeled as compatible with your carb’s materials, especially plastics and any diaphragms. Always verify the label states it is safe for gasket/diaphragm components and do not soak parts unless the product explicitly permits it. If you’re unsure, use manufacturer-recommended chemicals or perform targeted external cleaning while keeping sensitive parts protected.
Do I need to synchronize throttle or choke settings after cleaning?
Some carbs require checking throttle stop position and cable free play so the slide truly returns to the closed-throttle idle position. Choke or enricher settings should be verified so the choke fully engages when needed and fully returns off when warmed. Synchronization is model-specific, so use the service manual procedure and confirm linkage seating during reassembly.
How often should ATV carburetor cleaning be done for smooth idle?
There is no single universal interval; cleaning frequency depends on fuel quality, storage time, and how often the ATV is used. As a symptom-driven trigger, clean or service when you notice surging, hard starting after sitting, or idle that becomes unstable over days with the same fuel. For long-term storage in 2026, preventive steps like handling stale fuel and maintaining upstream filtration matter more than frequent full disassembly.
ATV carburetor cleaning checklist for long-term storage: what changes?
For storage, start by addressing fuel: drain stale fuel or use an appropriate stabilizer and run the engine per the product guidance so treated fuel reaches the carb. Protect against contamination by ensuring the tank is clean, the fuel filter/screen is in good condition, and any venting is correct. When you restart after storage, warm up properly and verify idle stability; if surging appears, prioritize sealing checks and pilot/idle passage cleaning before aggressive “repeat” measures.
Conclusion
The fastest path to a smooth idle is a disciplined ATV Carburetor Cleaning checklist: confirm the symptoms match the fuel/idle-circuit behavior, clean the correct circuits in the correct order, then verify sealing integrity and restore baseline settings before fine-tuning. Most idle failures come from partial clogs in pilot-related passages, air leaks that tuning cannot compensate for, or reassembly errors that introduce extra air or fuel level instability.
Use verification as your safety net: inspect what you can, reassemble with correct seal condition, adjust mixture and idle speed after warm-up, and test under real conditions (idle stability and response to blips). If the problem persists, follow the repeat-clean failure logic before you open the carb again—check for air leaks, float/fuel level behavior, upstream contamination, and choke return function.
If you’re uncertain about model-specific settings or you suspect damage to jets or diaphragms, consult your ATV service manual or consider professional help. For many owners, building a routine around an ATV maintenance checklist and related service steps (like fuel quality and filter health) prevents the same idle symptoms from returning next season, which is the real goal for long-term smooth performance.
For further authoritative reading on small engine maintenance and safe fuel handling practices, see US EPA, OSHA, and NFPA.
Updated May 2026