
To get a fast, honest ATV Repair estimate, come prepared with clear symptom evidence, your model-year (or VIN/engine info), and a timeline of what changed right before the failure—then ask for a written diagnostic authorization that explains what will be tested and how the diagnostic fee (if any) applies. A credible shop will triage quickly using standardized mapping of common failures, leverage photos/video and digital inspection forms, and communicate scope boundaries so you do not get vague pricing or surprise “discovery” charges. In 2026, many repair businesses can move much faster than in the past by using intake photos/video, recorded test results, and consistent parts/labor breakdowns tied to the ATV’s platform. If you want an estimate that holds up, you need both sides working from the same evidence: you provide observable facts; the shop provides a transparent workflow.
To get a fast, honest ATV Repair estimate, ask for an evidence-based diagnostic plan first, not a guess-and-quote. If the shop can’t explain what they will test, how long they need, and how they’ll document findings, your “cheap quote” may become expensive through repeat labor.
This matters because transactional shoppers typically want speed and certainty. When pricing is vague—“probably the carb,” “maybe the stator,” or “could be the clutch”—the shop is transferring risk to you. You may also fear upsells: unrelated wear items proposed as replacements without showing how they connect to the failed symptom. A good shop prevents that by separating (1) triage, (2) diagnosis, (3) parts/labor estimate, and (4) approval checkpoints.
In 2026, the reality is better than many people assume. Many shops use photo/video submission for remote triage, standardized inspection forms (digital or tablet-based), and labor/parts mapping that ties your ATV’s platform to typical failure paths. That means you can often speed up quoting simply by sending clear evidence before you call: intake/exhaust area photos, battery/charging area photos, and a short video showing the exact symptom (won’t start, cranks but stalls, weak power, overheating, strange noises, or warning lights).
What you should walk away with is a checklist + decision path: what the shop suspects, what tests will confirm or rule out those suspects, what parts they expect to replace if confirmed, and where they will stop to request approval before committing major labor. This approach is also aligned with consumer-protection principles: you should be able to understand the basis of charges and authorize work with clear scope. For broader guidance on avoiding repair misunderstandings, review Consumer Advice From the FTC and the general “what to do if a repair goes wrong” posture. For safe technical practices, refer to the U.S. Department of Transportation’s general vehicle safety messaging as a reminder that safety-critical systems should not be “estimated” casually.
Tradeoff: fast estimates are easier when symptoms are consistent and evidence is complete. If the problem is intermittent or heavily modified, even the best shop may need repeat testing. The honest move in that case is a staged plan with explicit time windows and stop points—rather than pretending certainty.
ATV repair intake checklist: what to gather before you request a quote
Bring the right details up front, and you dramatically reduce diagnostic churn—so you get a faster ATV Repair estimate with fewer surprises. The fastest way to help a shop quote accurately is to provide identifying info, a clear symptom timeline, and photos/video of the likely failure area.
Why it matters: when you share incomplete information, the shop has to spend time reconstructing context, which pushes diagnosis cost up and estimate confidence down. It also invites “guess descriptions,” where the shop substitutes generic assumptions for observable facts—leading to quote changes after teardown. If you are trying to keep transactional risk low, aim for evidence that narrows the failure path early.
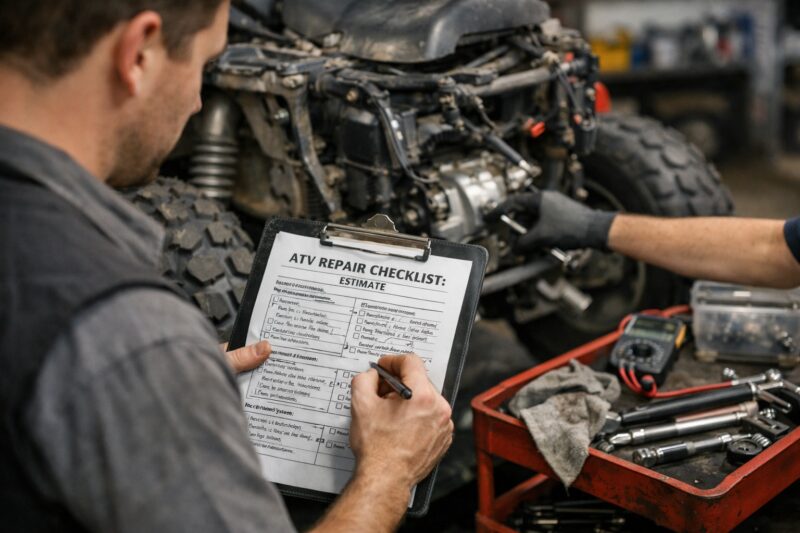
How to work it: prepare a pre-call packet. Include the model/year (or VIN if you have it), current mileage/hours, and any engine/build identifiers you can find. Add the symptom timeline: when it started, whether it was sudden or gradual, what the ATV did immediately before failure, and what changed in your routine (fuel type change, storage, battery age, aftermarket parts, or recent repairs). If there are warning lights, note what they are and whether they appear while cranking, idling, or under load.
Practical application: document symptom behavior precisely. Describe start behavior (cranks strong or weak), noises (clicking, grinding, ticking), smoke type (none, blue, white, black), and leaks (location and what it looks like). Even one clear photo of a suspected leak spot or the area around the intake/exhaust can shorten time-to-cause. Battery/charging area photos are especially useful for electrical, starting, and charging faults because corrosion, damaged terminals, or harness rubbing often reveal themselves visually. Your goal is to give the shop “evidence assets” that they can compare against standard failure patterns.
Estimate-impact factors to include: tell the shop if the ATV is safety-critical (brakes/steering issues, wheel bearing noises, overheating that could damage hoses, or any driveline binding). Also mention parts availability concerns: if you suspect a backordered component, the shop may quote labor sooner but must disclose parts lead times. Deeper insight: avoid guess descriptions like “needs a new carb.” Instead, offer observable facts that the shop can test against—fuel starvation signs, air filter condition, throttle response, fuel smell, or whether the symptom changes with choke or throttle position. This aligns with an effective ATV repair shop checklist approach and helps ensure you are not repeatedly revisiting the same theory.
Internal reference: For a broader evidence-first approach, use the ATV repair shop checklist as your preparation template.
Fast and honest estimates: the shop workflow you should expect in ATV Repair
Fast and honest ATV Repair estimates come from a predictable workflow: triage first, diagnosis authorization next, then a parts/labor breakdown only after testing. If a shop jumps straight to parts pricing without describing tests, you are paying for uncertainty.
Why it matters: transactional customers want clarity about where money is going. A credible workflow prevents “scope drift,” where additional items appear later as if they were always part of the plan. It also protects you from upsells by ensuring the shop explains why a component replacement is connected to the confirmed cause, not just because it is worn.
How it works in practice: the ideal process is triage → diagnostic authorization → parts/labor breakdown → approval checkpoints → final estimate confirmation. During triage, the shop assesses basics quickly: visual inspection, quick functional checks (as safe), and initial symptom categorization (starting, charging, fuel delivery, cooling/overheating, drivetrain, or electrical fault). For the diagnostic authorization, you should expect a diagnostic fee policy: when it’s credited toward repair, when it is not, and typical time windows (for example, “up to 2 hours of testing” or “one day” depending on severity).
Practical application: request transparency in labor. The shop should describe what “labor” includes: testing, teardown for access, measurement (compression/airflow/fuel pressure/voltage/charging output where applicable), reassembly, and verification runs. Labor should usually be communicated as ranges when variables exist (like hidden damage after opening an engine case), but the shop should explain what creates the range and when it becomes firm.
Tradeoffs: parts quotation credibility improves when the shop uses OEM or manufacturer-equivalent specs and can show part numbers where possible. In 2026, many shops can also generate a more traceable quote by using standardized parts catalogs and digital work orders. Still, hidden damage scenarios can change the estimate after teardown. Honest shops address this via approval checkpoints and documented findings—so you only pay for further work after you confirm.
Many guides overlook important aspects of the repair process by only advising you to “ask for a quote” without addressing the diagnostic fee structure, stop points, and necessary documentation. To truly empower yourself during the conversation, it’s crucial to focus on test results and maintaining control over the scope of work. Understanding the key elements of what to ask before you pay helps ensure that you are fully informed about costs and necessary actions, so you can make confident decisions as a consumer.
Internal reference: Use guidance inspired by what to ask before paying when you request your diagnostic authorization boundaries.
Decision path: how to choose between diagnosis, teardown, and repair estimates for ATV Repair
Choose between diagnosis, teardown, and repair estimates by matching your symptoms to the most likely failure path, then authorizing only the testing needed to confirm it. If the shop offers teardown immediately without preliminary rulings-out, you risk overpaying for access labor.
Why it matters: different symptom categories require different decision paths. A no-start issue pushes the shop toward battery/charging/injection/fuel delivery and ignition checks, while overheating suggests cooling system verification before replacing major internal components. Drivetrain failures can require clutch/belt inspection, while stalling at idle often starts with fuel/air calibration and sensor signals. A correct decision path helps keep your ATV Repair estimate fast and realistic.
How it works: imagine a decision tree. If it doesn’t start, a good shop verifies safe electrical basics first (battery voltage under load, starter behavior, and charging output). If it starts but stalls, the shop focuses on fuel/air and sensor signals. If it overheats, diagnosis should prioritize coolant flow restrictions, thermostat function (if applicable), fan operation, and hose integrity before assuming internal engine damage. Electrical faults that appear intermittent often require voltage and continuity checks plus harness inspection for chafing or loose grounds.
When teardown is justified: authorize teardown when the symptoms strongly indicate internal failures or when access is required to inspect a component you can’t validate externally. Common scenarios include suspected internal engine damage, failed seals, seized components, or driveline components that must be measured. A credible shop should propose a teardown plan that begins with the lowest-risk access and includes stop points to prevent blind replacements.
Clarify approval gating: you want at least two layers of confirmation—first callback with diagnosis findings and expected parts/labor, and second approval for the specific replacement components. For major labor, a third confirmation may be appropriate once teardown reveals hidden damage risk. Stop points during diagnosis should be explicit: compression/airflow tests, fuel pressure checks (where applicable), and electrical voltage/charging verification. Deeper insight: symptoms can mimic each other—weak battery vs. failing charging stator vs. ignition module issues. Require ruling-out steps so the shop cannot justify a misaligned quote with a “similar symptom” rationale.
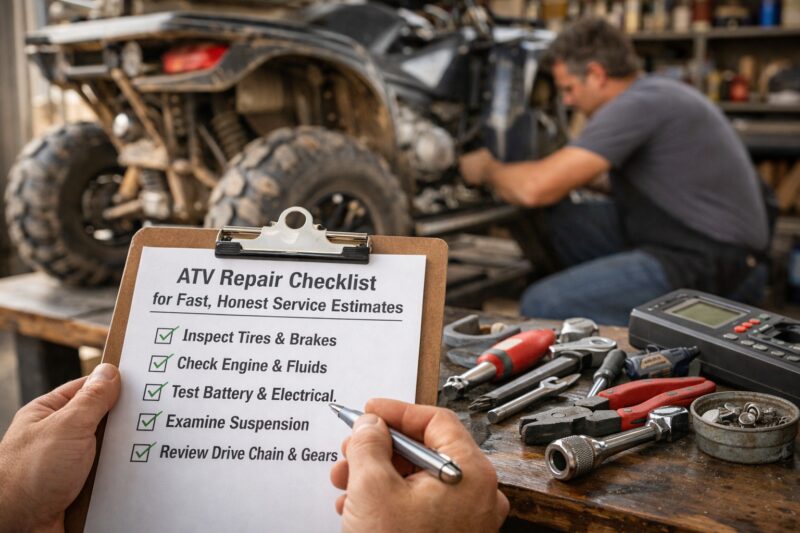
What most guides miss: they don’t teach you to require evidence-based confirmation before ordering parts. If the shop can’t say what result will confirm the failed component, you are still in guess-quote territory.
Internal reference: If you want a structured “what to test first” mindset, review the ATV engine repair checklist to align your expectations with real diagnostic sequencing.
Common ATV Repair estimate pitfalls: misconceptions that cause slow quotes or surprise costs
Most slow quotes and surprise ATV Repair costs come from misconceptions: vague symptom descriptions, missing baseline history, skipping diagnosis, or unclear hidden-damage communication. Avoid those pitfalls, and you will get a faster estimate that is more likely to stay accurate.
Why it matters: a repair estimate is a prediction based on information available before work begins. If you provide poor inputs, the shop must widen assumptions to cover uncertainty. That usually means longer diagnostic time, wider labor ranges, and greater risk that the final scope changes after teardown.
How it happens in the real world: first, vague symptom claims—“it won’t run right” or “it needs a carb”—force the shop into broad testing buckets. Second, refusing to document photos/video can erase key clues like intake restrictions, soot patterns, frayed harness segments, or leak origin. Third, skipping service history (“I don’t remember when the last oil change was”) blocks the shop from making evidence-informed decisions about likely wear items, fuel quality, and maintenance-related failures.
Another common pitfall: the “parts-only” mindset. People assume that replacing the most common part will fix the problem. But without diagnosis, you can trigger multiple return visits and repeat labor, especially for failures that share symptoms across systems (charging vs. ignition vs. fuel delivery). Similarly, diagnostic time can look longer than expected. Good shops may quote a longer diagnostic window to avoid guessing, because guessing is what creates expensive “surprise costs.”
Hidden damage scenarios are real, but honesty is about disclosure. Ask how the shop handles rusted fasteners, stripped threads, harness chafing, contaminated fluids, or compromised gaskets discovered after opening components. A transparent shop will explain risk areas and update you with approval checkpoints. Deeper insight: detect upsell patterns by asking what evidence ties each proposed replacement to the confirmed failure. If a shop wants to replace unrelated wear items without showing cause/effect, request the diagnostic result that justifies each item.
Tradeoffs: if you need the fastest possible turnaround, the shop may recommend an abbreviated diagnostic approach—but that should come with explicit limits and staged testing. The worst outcome is a “fast” quote that ignores ruling-out steps and then tries to charge you later to correct the guess.
Options and alternatives for ATV Repair: what to compare besides the cheapest quote
Compare ATV Repair options by evaluating scope control, warranty terms, and how the shop confirms the root cause—not just the lowest price. “Cheapest” often means the most uncertainty, the fewest stop points, or the weakest warranty coverage.
Why it matters: you are paying for outcomes (safe, reliable operation) and risk reduction (less repeat labor). Different repair approaches can deliver the same symptom resolution but vary in durability, compatibility risk, lead time, and total cost. A credible shop will present options in a way that ties each option to verified failure cause.
In practice, the most useful comparison categories are: OEM-spec parts repair, manufacturer-equivalent components, rebuild/overhaul vs. replacement, and used/refurb parts where appropriate. Request what each option includes: sourcing method, part numbers where possible, and warranty terms for both parts and labor. Also compare labor differences. For example, a rebuild may involve additional inspection steps, while a component replacement might shift cost to parts and still require verifying supporting systems.
Scope control is a major lever in real estimates. Ask what’s included in the quote: fluids, gaskets/seals, torque-to-spec procedures (where applicable), testing/verification runs, and cleanup. Exclusions matter: a low estimate might omit re-testing or post-repair diagnostics, meaning the problem could recur without warranty protection. Deeper insight: long-lead parts create downtime. You can often negotiate staged repairs—like restoring temporary drivability safely while waiting for a backordered component—without compromising safety, but only if the shop sets written boundaries for what is being made safe and what will be corrected later.
Internal reference: Use an “options comparison” mindset from your broader planning based on ATV maintenance checklist work so you can evaluate whether proposed replacements align with preventive service intervals, not just sales pressure.
| ATV Repair option to compare | What to request in the written estimate | Tradeoffs to consider |
|---|---|---|
| OEM-spec parts | OEM part numbers, warranty length, and included verification tests | Often higher parts cost; best compatibility certainty |
| Manufacturer-equivalent parts | Equivalent spec details, part numbers/brands, and warranty terms | Can be cheaper; must confirm fitment and compatibility |
| Replace vs. rebuild/overhaul | Scope of inspection, what gets measured, and what triggers failure warranty coverage | Rebuilds can vary based on tolerances; replacements may be faster |
| Used/refurb parts (where appropriate) | Source, condition grading, testing performed before installation, warranty limits | Lower upfront cost; higher risk if compatibility or wear is underestimated |
| Staged repairs for long-lead parts | Written safety boundary, interim test plan, and confirmation timeline | Reduces downtime; requires trust in follow-up scheduling and documentation |
What to ask before you approve ATV Repair work: questions that produce accurate, honest pricing
Before you approve ATV Repair work, ask questions that force specificity: what evidence confirms the failed component, what tests will be performed, and what approval boundaries exist for additional parts/labor. The right questions turn uncertainty into documented decision points.
Why it matters: approvals are where estimate accuracy is protected. If you approve broadly (“go ahead and fix it”), you may pay for diagnosis expansions, risk mitigation labor, or additional replacements that were not truly connected to the confirmed cause. A strong “ask list” helps you keep scope control.
Start with diagnosis basis. Ask what testing will be used to confirm the cause and what results will be communicated to you. Require part-number specificity where possible: “Which parts will you replace, and what are their part numbers or sourcing specs?” Then ask for labor hours ranges with definitions of what’s included: teardown access, measurement/verification, reassembly steps, and test ride or run verification (where safe and applicable). If the shop offers ranges, ask what changes the range up or down.
Safety-critical components must be explicitly addressed. Ask how they verify brakes, tires, steering linkages, wheel bearings, and any guards or protective components that affect ride safety. Even if the symptom is “engine-related,” safety checks should not be treated as optional when drivability or control is impacted. Deeper insight: ask an evidence-for-parts question—“What evidence will you use to confirm the failed component before ordering parts?” This prevents guess-based quoting and reduces diagnostic churn.
Approval boundaries should be explicit in writing. Ask whether they need new approval if hidden issues appear and how they will communicate those findings. Clarify communication cadence: when you get updates, how delays are handled, and whether those updates are documented. What most guides get wrong is skipping the authorization boundaries and assuming the shop will automatically call you before additional cost; that assumption is where surprises happen.
Internal reference: If you want a more general payment and authorization framework, base your question set on the principles in what to ask before paying.
Advanced and edge cases in ATV Repair estimates (what most checklists miss)
Advanced ATV Repair estimate issues usually happen with symptom clusters, intermittent faults, and compatibility gotchas. The shop should handle these with repeat testing, documented ruling-out steps, and clear communication about uncertainty—so your estimate stays honest even when certainty is harder.
Why it matters: edge cases are where vague quotes become most costly. Electrical + starting + charging interactions can create a chain where each component “looks guilty,” but the root cause is one failure that drags others into failure symptoms. Overheating paired with coolant or oil contamination can similarly create misleading cues—like assuming the cooling system is at fault when contamination indicates a deeper internal or sealing issue.
How it works when symptoms are complex: a good shop proposes a structured testing sequence with stop points. For electrical clusters, they may verify grounds, battery voltage under load, and charging output before ordering parts. For overheating, they should check cooling flow, fan operation (where applicable), thermostat function (if relevant), and hose integrity, then interpret what contamination suggests. If the fault is intermittent, require a plan for repeat testing or logging—without promising unrealistic certainty. Logging might include recording sensor behavior, observing under-load conditions, or noting when warning lights appear. The key is that the plan is testable and documented.
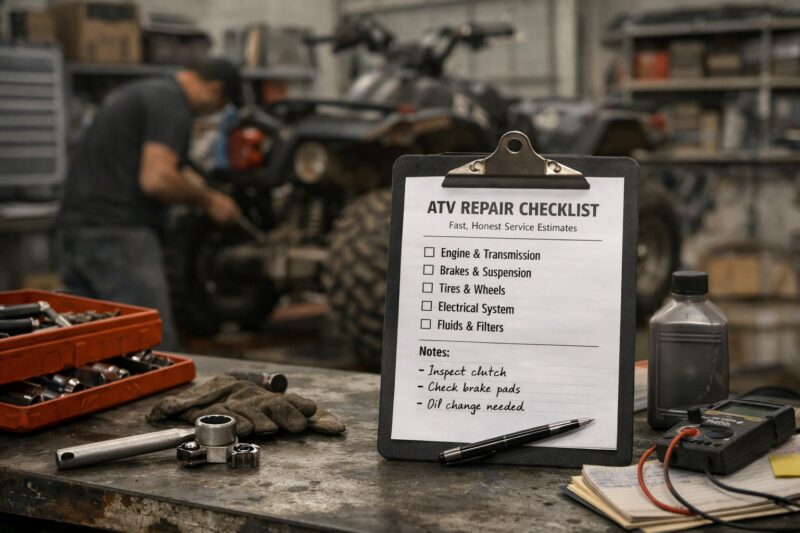
Compatibility gotchas: model-year variations, upgraded ECUs, harness revisions, and aftermarket modifications can change diagnostic assumptions. Ask what documentation they will use to confirm compatibility and what they do when part cross-references differ. For regions where fuel/emissions configurations vary, the shop may need to confirm spec differences before recommending certain test paths or component replacements.
Balancing “I just need it fixed fast” with proper testing is another edge case. Fast can be defined as time-to-safe-drivability, not time-to-guaranteed-perfect certainty. The best shops propose a safety-first staged plan: they test enough to prevent immediate risk, restore controlled function if possible, and then schedule deeper correction once the parts or additional diagnostics are complete. The limitation is trust—stage plans require clear documentation and follow-through commitments.
Geography anchor: getting reliable ATV Repair estimates in your area (without guessing)
Get reliable ATV Repair estimates locally by verifying shop policies, reviewing recent evidence-focused reviews, and confirming how they handle parts lead times and documentation—then match their workflow to your urgency level. You do not need to guess the best shop; you need criteria.
Why it matters: local parts availability and turnaround time can change “true cost” even when the diagnostic approach is excellent. A shop may quote labor accurately but cannot finalize parts pricing or arrival timelines if a component is backordered. That is normal in 2026—what you must avoid is a shop that hides those realities or refuses to document them.
How to verify credentials without getting trapped by marketing: look for recent reviews that mention estimate transparency, documentation, and clear communication. Confirm the shop’s approach to warranty handling and approval checkpoints—ask whether diagnostic fees are credited and how they document findings. Practical application: choose between mobile service, dealer service, and independent shops based on the best fit for accurate diagnosis and turnaround. Dealers may have the strongest OEM parts mapping; independents may be faster for diagnostics; mobile services may be efficient for triage if the fault is accessible.
Steps for faster local quoting: if the shop offers it, bring your ATV for inspection when possible, because in-person visual checks reduce uncertainty. If not, submit standardized photos/video so remote triage can still produce a more credible estimate. Deeper insight: parts availability varies by region, so ask what substitution policy they follow (for example, OEM only vs. equivalent approved parts) and how they keep the estimate accurate as parts arrive. In short, “honest” locally means they will update you with specific evidence and written changes—not with vague add-ons.
If you are building a repeatable process for choosing shops, align your selection criteria with an evidence-based mindset from ATV maintenance checklist planning.
Frequently Asked Questions About ATV Repair
How do I get a fast ATV Repair estimate without overspending?
Provide model-year info, a symptom timeline, and clear photos or video before you call so the shop can triage without guessing. Ask for a diagnostic authorization that includes what tests will be done, how long diagnosis may take, and whether the diagnostic fee is credited toward repair. Then require an approval checkpoint before ordering parts, especially for safety-critical systems.
What should be included in an ATV Repair labor quote?
A credible labor quote should list labor hour ranges and define what those hours include, such as testing, measurement, teardown access (if needed), reassembly, and verification runs. It should also indicate what is excluded, like additional parts not yet identified or further diagnosis if hidden damage is discovered. If the quote is a range, ask what conditions cause the range to widen.
Is a diagnostic fee for ATV Repair worth it?
It can be worth it when the shop uses the diagnosis to confirm the failed component and provides documented results you can use to approve parts. Look for a diagnostic fee policy that states whether it is credited toward repair and typical diagnostic time windows. To prevent repeat diagnostics, ask what evidence they will gather before ordering parts.
Why does an ATV Repair estimate change after inspection?
Estimates change when inspection reveals hidden damage, additional failed components, or safety/access issues that were not visible from the outside. Common examples include rusted fasteners, harness damage found after teardown, or contamination discovered inside the system. A transparent shop will communicate the change with documented findings and request approval for the new scope.
What questions should I ask to confirm the cause of my ATV problem?
Ask what specific tests will confirm or rule out each likely cause and request the results the shop will report back to you. Require part-number specificity for any replacement and ask what evidence the shop uses before ordering parts. If symptoms are intermittent or mimic other faults, ask how they will validate the root cause with repeat checks.
Can I approve partial ATV Repair work for a staged estimate?
Yes, but you should define written scope limits and safety boundaries for each stage. For example, you can authorize initial diagnostic and safety-restoration work first, then approve major component replacement after confirmation and parts availability. Make sure the shop explains warranty coverage for each stage and when follow-up repair will occur.
What’s the difference between OEM and equivalent parts in ATV Repair?
OEM parts are made to the manufacturer’s original specifications, while equivalent parts are alternatives designed to match function and fitment. For either option, ask for sourcing method, compatibility confirmation, and warranty terms. The safest comparison is total cost with warranty and documented compatibility rather than parts price alone.
How do I handle backordered parts when requesting an ATV Repair estimate?
Ask for a lead-time disclosure and the shop’s substitution policy before you approve. If you need to keep downtime low, request a staged plan that restores safe operation temporarily while waiting for the exact backordered component. Make sure the estimate updates are communicated in writing as parts arrive.
What are common reasons shops misquote ATV Repair costs?
Common reasons include vague symptom information, skipped diagnostic ruling-out steps, and missing baseline service history. Another reason is poor communication about scope, such as not defining approval boundaries for hidden damage after teardown. Shops that refuse to document evidence or testing often create the largest estimate drift.
How do I know if an ATV Repair shop is being honest with me?
Honesty shows up as clear diagnostic and approval policies, documented findings, and transparency about uncertainty through defined test stop points. Red flags include vague causes without test results, refusal to provide part-number details, and no written boundaries for additional work. A practical verification step is asking what evidence confirms the failed component before ordering parts.
Conclusion: what to do next to lock in a credible ATV Repair estimate
To lock in a credible, fast ATV Repair estimate in 2026, focus on three themes: prepare evidence for speed, demand a credible shop workflow with scope control, and compare repair options based on verified cause plus warranty—not just the lowest price. When you bring clear photos/video, a symptom timeline, and model identifiers, the shop can triage and diagnose with fewer detours.
Then, push the shop to explain the process: triage first, diagnostic authorization second, and parts/labor breakdown only after tests confirm likely causes. If hidden damage is possible, require written communication and approval checkpoints so the estimate stays honest even after teardown begins.
For your next step, send your checklist items—photos/video, symptoms, and model info—to the shop and request a written breakdown that includes diagnostic approach, parts list (with part numbers where possible), labor hour ranges, and warranty terms. Choose a shop that documents findings and uses stop points before ordering parts or expanding scope, so you get speed without guesswork.
Updated May 2026