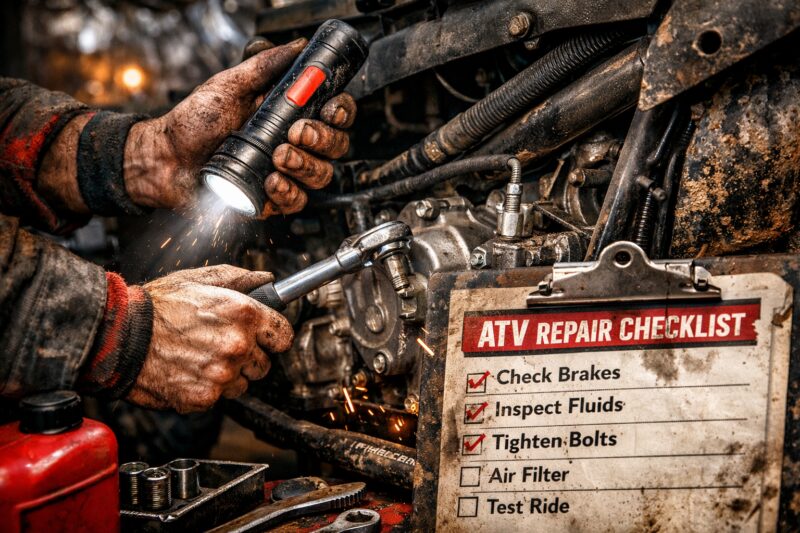
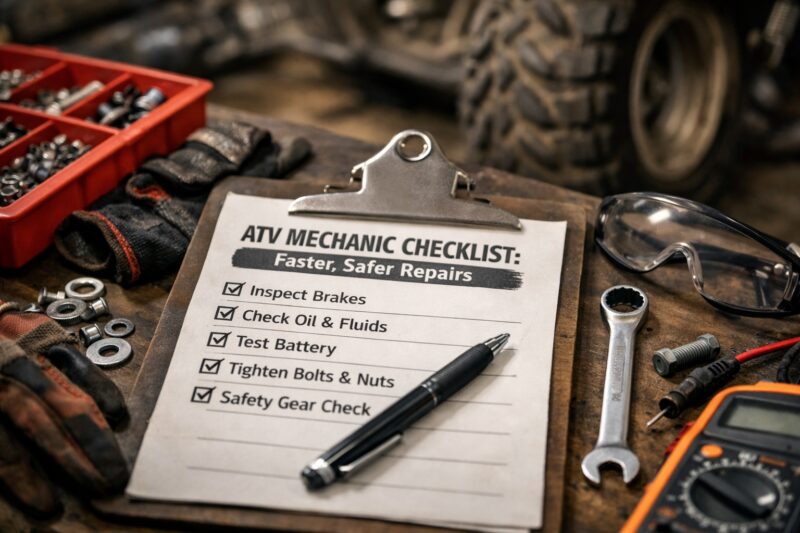
An ATV Mechanic checklist accomplishes one key commercial outcome: it turns every diagnosis into a repeatable, evidence-first workflow that reduces comeback risk and shortens downtime. For an ATV repair shop or off-road fleet, the right “intake-to-deliver” standard helps technicians identify the real cause earlier, document it clearly for customers and service managers, and avoid wasting labor on guesswork. In practice, the ATV Mechanic checklist workflow is a structured chain—diagnose, inspect, repair, verify, deliver—so repairs start right the first time instead of becoming a multi-visit troubleshooting cycle. That matters commercially because the same bay time that could restore one machine can instead get consumed by rework, warranty disputes, and parts re-orders caused by incomplete root-cause proof.
This article is a shop-ready checklist workflow, not a generic ATV repair guide. It is designed for independent ATV repair businesses, service managers, and technicians managing multiple machines who need consistency across multiple bays and skill levels. You will get intake gates, pre-repair safety checks, a teardown sequencing plan, repair execution standards, post-repair verification stages, and “advanced edge case” handling for the faults that commonly create long delays.
To keep it grounded in safety expectations and diagnostic discipline, this checklist aligns with widely published safety practices and manufacturer-style documentation habits referenced by OSHA lockout/tagout principles, CDC guidance on preventing chemical exposure during work, and SAE-style considerations for OBD/scan limitations from EPA/OBD program context. Use the checklist as an internal process standard; always follow the specific ATV service manual and local regulations.
How does an ATV Mechanic checklist reduce comeback risk and downtime for commercial work?
A well-run ATV Mechanic checklist reduces comebacks by preventing “unknown-unknowns” from entering the repair cycle and by forcing verification against the original complaint. It reduces downtime by shrinking diagnosis-to-repair time and by standardizing the evidence technicians need before ordering parts or closing the job.
Commercially, comebacks are not just inconvenient; they directly impact throughput, customer retention, and labor margins. A checklist helps a shop capture the right intake details before teardown, classify urgency, and document likely versus confirmed causes. That matters because many ATV failures are cascading (for example, a cooling issue can lead to secondary engine damage), and many intermittent faults only reveal themselves under specific operating conditions. Without a standard workflow, technicians may replace a part that seems plausible but does not match the documented evidence, resulting in rework and a “second diagnosis” visit.
How it works is simple but strict: the checklist forces a sequence of gates. First, intake captures symptom timeline, operating conditions, and what was already replaced. Next, gate checks confirm basics (battery/charging, fuel delivery basics, scan data where applicable) before deeper disassembly. Then the teardown plan prioritizes high-yield inspections to avoid repeated labor. Finally, staged testing and before-versus-after comparisons prove the repair addressed the original issue. That last step is critical—shops that test only for “it starts” often miss the failure mode that triggers the complaint (for example, the stall happens under load, or brake fade appears after a few minutes of riding).
In real-world fleets, this becomes an operational advantage: service managers can read job tickets and know what was checked, what was found, and what will be tested before release. Technicians also benefit because the checklist reduces process debt—relying on memory instead of standardized steps. For related process improvements, consider building a parallel workflow around customer communication and estimates using a structured “what we know so far” update model, similar to how shops improve scheduling and transparency in service operations.
Tradeoffs exist. A checklist cannot eliminate uncertainty; it can only structure it. For vague complaints (such as “it runs bad” with unknown conditions), the shop may need a scope-limiting approach: document discovery steps, request approval for expanded diagnosis, and only replace parts when evidence supports the decision. If you ignore that limitation and promise certainty too early, you increase the risk of replacing the wrong parts.
To help your team operationalize this, you can pair your intake workflow with a broader “commercial service process” standard—especially if you’re looking to book repairs faster by improving job ticket clarity and reducing back-and-forth approvals. For more about service workflow and documentation habits, explore how disciplined intake and approvals reduce delays in related off-road repair processes at https://nrtoffroadperformance.com/offroad-repair/.
What intake data must a shop capture before any teardown for an ATV Mechanic diagnosis?
Before teardown, the ATV Mechanic checklist should capture intake data that lets you test and prove the root cause logically rather than guessing. The goal is to create a diagnostic “evidence packet” that future technicians (or a second opinion) can follow without repeating the same work.
Why this matters: teardown is labor-expensive and increases risk. If you pull plastics, covers, or components without clarifying symptom timeline and conditions, you can destroy the clues that distinguish one failure mode from another. For example, an owner who reports “it dies after 10 minutes” is giving you a thermal or fuel delivery clue; someone who says “it died right after the last repair” points toward harness routing, connector damage, or wrong fluid/torque. Commercially, missing that intake structure often leads to rework, because the shop later realizes a key condition was never tested or documented during the first visit.
How to apply it in practice: record the complaint in three layers. First, capture the “what” (stall, hard start, no spark, low power, vibration, grinding, overheating, brake squeal, weak reverse). Second, capture the “when” (cold start only, after warm-up, after water crossings, after highway speed, after refueling, after previous service). Third, capture the “where” and “how” (at idle, under throttle, under braking, when turning, on a slope). Then document operating conditions: terrain type, rider behavior (quick launches vs steady), recent weather exposure, and any signs noted (smell of fuel, burning odor, coolant level changes, unusual noise location).
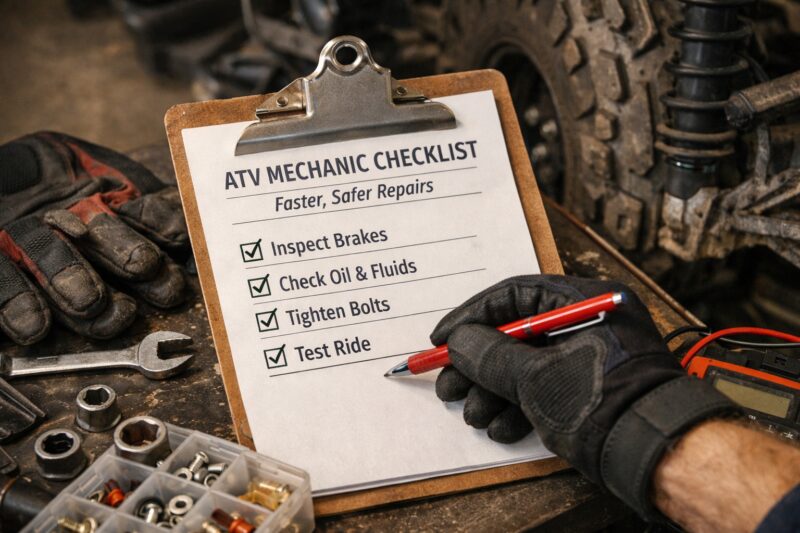
Include recent work history before teardown: what parts were replaced, which fluids were used, whether any connectors were disturbed, and whether any troubleshooting steps were already attempted. If the machine has a recent history of aftermarket parts, note what brands or part numbers were used and whether the parts were compatible with the model year and engine code. This is where shops can reduce internal variance: two technicians may interpret the same symptom differently, but strong intake data narrows the search space.
Tradeoffs and uncertainty handling: the checklist should explicitly separate “likely causes” from “confirmed causes.” Use “likely” only when the evidence is consistent (for example, scan codes plus a matching harness connector condition). Use “confirmed” only after verification steps connect the cause to the symptom under controlled testing or measurement. A practical trigger for expanding scope is when the current hypothesis cannot reproduce the complaint conditions, or when the measurements contradict the expected behavior. That is how you decide when to stop and recommend more advanced diagnostics, a second-opinion review, or component replacement.
Commercial deliverables should be part of the intake gate: technicians must provide a written diagnosis summary and a recommended repair plan approval process. If you’re improving operational cadence, pairing evidence-based diagnostics with your service workflow can help less downtime faster fixes happen by preventing “parts-before-proof” cycles. You can reinforce these standards alongside your repair workflow at https://nrtoffroadperformance.com/atv-repair/.
What pre-repair safety and compliance checklist steps protect technicians and the shop?
An ATV Mechanic checklist should include pre-repair safety gates that prevent injury, contamination, and unsafe test conditions before you energize, lift, or test the machine. These gates protect technicians and reduce costly interruptions from avoidable hazards.
Why it matters: commercial repairs often involve multiple bays, shared tools, and technicians with different experience levels. Without a standardized safety checklist, small inconsistencies compound into real risk: a poorly secured ATV can fall during inspection, a battery connection can cause a short, or a “quick test” can create a hazardous situation when a leak is suspected. Safety documentation also matters for customer trust and liability reduction—especially when the shop is dealing with brake systems, steering integrity, fuel leaks, or suspected electrical faults.
How to run the checklist: start with shop safety procedures—secure the machine with appropriate stands or lift points, use proper PPE (eye protection, gloves suitable for chemicals, and protection from rotating components), and ensure ventilation when working around fuels, solvents, or combustion byproducts. If your shop uses any lockout/tagout equivalents for charging equipment or other energy sources, document the energy isolation step. For chemical exposure prevention, incorporate safe handling practices referenced by CDC/NIOSH chemical safety guidance.
Then require “must-fix before test” items. Before any start attempt, inspect brake function, steering play, tire condition, wheel security, and obvious structural damage. This prevents the classic mistake where the technician “tests to see if it runs” while steering or braking is compromised—creating a safety-critical risk and potentially causing additional damage that complicates diagnosis.
Power handling is another critical gate. Follow a battery disconnect rule: disconnect before probing harnesses or servicing exposed electrical components, and follow safe capacitor discharge considerations if the ATV uses modules that can retain charge. Use proper charging practices—avoid overcharging, verify charger settings, and prevent arcing near fuel vapors. To prevent hazardous test cycles, set explicit stop criteria: do not run the engine if you suspect an active fuel leak, if cooling is compromised and overheating is likely, or if safety interlocks appear bypassed or damaged. These are not theoretical; they show up as recurring failures after “test shortcuts” in busy shops.
Deeper insight: documentation expectations should include photos and short notes of the machine’s baseline condition (fluid levels as found, any visible leaks, abnormal wear, and connector condition). A checklist that captures “what was observed” before disassembly lowers disputes when customers later ask why certain parts were necessary. For additional safety grounding, reference OSHA lockout/tagout principles as a conceptual model even if the ATV shop context differs.
How should an inspection teardown plan be sequenced to reduce labor hours?
An ATV Mechanic should sequence teardown to maximize information gained per minute of labor, using a high-yield inspection order that avoids repeated disassembly. The checklist teardown plan should inspect without disassembly where possible, then remove components in a logical hierarchy.
Why it matters: labor time is often the hidden margin killer. A common shop failure mode is removing plastics or covers early “just to get access,” then repeatedly reassembling because the diagnosis wasn’t complete. Teardown sequencing prevents wasted cycles and makes it easier to keep a clear evidence record for customers and service managers.
How the teardown sequencing should work: use “inspect-first” logic. Start by confirming external conditions—coolant level/condition, oil contamination, boot integrity, loose fasteners, connector condition, and any visible wear or structural damage. Where feasible, check for drivetrain play, abnormal movement at pivots, and obvious leaks without removing major assemblies. Then remove in a logical order that preserves access: guards and covers first, then subsystem components. This also helps technician safety—moving from lower-risk inspections to deeper disassembly after gate checks pass.
System-relevant checks should reflect common ATV failures. For cooling, look for overheat signs, degraded hoses, incorrect coolant mixture, thermostat behavior indications, and fan operation evidence. For drivetrain, inspect CV/axle boot integrity, look for grease sling that signals boot failure, check for play in driveline components, and verify alignment-related damage. For electrical, inspect harness routing and connector pin condition, corrosion, and heat damage patterns. For intake/exhaust, check condition of intake tract, airbox seals, and exhaust restrictions signs.
Measurement-based verification is where checklist maturity shows. Torque-spec checks matter for fasteners you loosen; endplay/backlash indicators can confirm wear beyond visual inspection. For electrical, use voltage/resistance baselines where appropriate and confirm that scan data is consistent with physical measurements. Because many ATV issues are intermittent, the checklist should define how to decide when to stop testing and rebuild evidence. For example, if a fault appears only after heat cycling, you may continue controlled tests only if safety gates are met; document the conditions, record connector observations, and re-check after specific heat/soak steps.
Criteria for escalation should be explicit. Escalate to advanced diagnostics or expanded scope when measurements contradict the hypothesis, when the fault cannot be reproduced under controlled conditions yet the symptom history indicates repeatability, or when evidence suggests multiple contributing causes. In practice, you can recommend more advanced diagnostics, parts replacement with strict verification gates, or a second-opinion review rather than endlessly replacing components.
What most guides get wrong is treating teardown as the beginning instead of the evidence step. In a commercial setting, teardown should be an information strategy that supports proof. This approach also aligns with improving documentation habits and can support service planning for book repairs faster by ensuring the shop’s diagnostic path is consistent from the first visit.
What repair execution standards should an ATV Mechanic follow for parts, torque, and reassembly verification?
An ATV Mechanic checklist must define repair execution standards that ensure parts and fasteners are installed correctly and that reassembly doesn’t introduce new failure paths. Commercially, this is one of the biggest levers for preventing comebacks.
Why it matters: many callbacks are not caused by the original failure—they are caused by “fast fix” errors introduced during repair. These include misrouted cables, pinched wiring, incorrect fluid type or level, reused degraded seals, or incorrect torque that changes clearances and causes vibration or intermittent faults. A checklist prevents these errors by turning reassembly into a verification process rather than a completion step.
Parts and consumables should follow a clear standard. When using OEM versus quality aftermarket, set rules for when OEM is required (for critical components, safety-critical systems, and parts with tight tolerances) and when aftermarket is acceptable (for non-critical wear items where fitment is verified). Define which consumables must always be replaced: gaskets, seals, crush washers, and critical wear items that degrade during removal. Document warranty implications—if your shop offers any guarantee, align parts choices and documentation so warranty disputes are minimized. Also log part numbers, lots, and serials when relevant for traceability.
Torque/fitment rules must be explicit. Require thread condition checks (clean threads, replace damaged fasteners when needed), apply lubrication where the procedure calls for it (and avoid lubricating fasteners when dry torque is specified), and enforce alignment steps for components like calipers, guards, and engine mounts. Use a “do-not-mix” fastener guidance: do not substitute similar-looking bolts without confirming length, grade, and application. This prevents mismatched fasteners that later back out or strip under load.
Reassembly verification should be by subsystem. Before any test mode, confirm harness and hose routing, correct clearances, and that moving parts have adequate freedom and no interference. Confirm that connectors are fully seated and that any protective covers are restored. Then add a technician QA gate: what must be confirmed before the machine returns to test—brake linkages secure, steering free-play within spec, coolant level corrected, electrical connections protected, and all covers fitted to prevent abrasion.
Deeper insight: the checklist should directly address the “common callback drivers.” Misrouted cables and pinched wiring create intermittent faults that appear only after vibration or heat. Wrong fluid type/level causes overheating or poor performance. Reused degraded seals lead to leaks that escalate over time. Treat these as mandatory checks, not optional “nice to do” steps.
For operational documentation and approvals, pair execution standards with a customer communication gate so you can ask before service when expanded work is needed. That discipline is especially important when parts selection or scope changes mid-repair; align your process with https://nrtoffroadperformance.com/offroad-repair/ so the shop’s “what’s next” is clear and documented.
How do you test, verify, and document post-repair results to prevent comebacks?
An ATV Mechanic checklist should define staged testing and verification that directly matches the original complaint. Post-repair documentation then proves the repair resolved the symptom and helps defend the work if anything changes later.
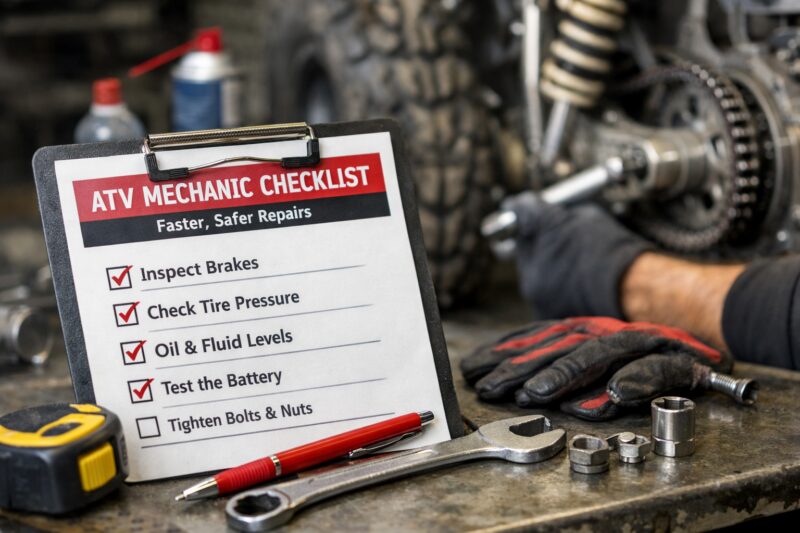
Why it matters: testing isn’t one step; it is a sequence that reduces risk while building evidence. If you only run a static test and the failure is load-dependent (for example, engine stalling under throttle or brake fade under prolonged use), the machine may appear “fixed” while the true issue persists. That increases return visits, customer dissatisfaction, and wasted labor. A staged approach with explicit acceptance criteria protects your customers and your shop’s margin.
How to structure the test stages: begin with static checks—startup quality, smoke/leak inspection, idle stability, and immediate abnormal noises. Then progress to controlled ride or bench testing only after safety-critical items pass. For charging and electrical concerns, verify charging voltage under load and confirm that voltage stays stable under typical operating demands. For cooling and thermal concerns, run enough time to confirm temperature stabilization and observe for leaks or abnormal temperature rise.
Include verification metrics aligned to the complaint. Braking performance should be measured in practical ways: pedal feel, stop consistency, and any signs of fade if applicable. Acceleration behavior should be evaluated as originally reported (cold start vs hot, idle vs mid-throttle). Also perform leak checks with the correct fluids and surfaces cleaned so you can identify new leaks clearly rather than chasing residue.
“Before vs after” comparisons should be required. Use intake notes: if the complaint was intermittent and time-based, document whether the fault appears after the same time or operating condition. If the repair addressed likely causes but not fully confirmed ones, state what changed and what will be monitored. For unknown history (for example, previous incorrect repairs), incorporate edge-case verification: cold-start behavior, load handling, and abnormal noises. If the machine was returned after a prior repair, treat the checklist as a “repair verification and risk assessment” job, not just a “replace the part” job.
Documentation expectations should be commercial-grade. Update the job ticket with what was found, what was done, and what tests were passed. Capture and retain test results (values, time, and observations) and log parts used with traceability. Require customer sign-off for acceptance criteria—especially when the shop recommends scope changes or sets monitoring expectations. This documentation is also how you support repeat business: customers trust what they can see and read.
To operationalize faster turnaround without skipping quality, align your post-repair verification with your service throughput goals so you can deliver less downtime faster fixes while still meeting safety gates. If you also improve how you schedule and close jobs, you can connect this testing discipline with https://nrtoffroadperformance.com/atv-repair/.
What are common ATV Mechanic mistakes and misconceptions that slow shops down?
The biggest ATV Mechanic checklist failures come from skipping measurements, replacing parts by guess, and not verifying root cause before reassembly. Misconceptions about diagnostic tools and “quick tests” also slow shops down and increase comebacks.
Why this matters: shops lose time in two ways—wasted labor and duplicated diagnosis. When technicians rely on memory or informal “common sense,” the shop becomes inconsistent across bays. That means one machine gets a complete evidence packet, while another gets a partial check and a guess, and both machines can appear “fixed” until the customer experiences the same failure mode again. Process debt grows when checklists are absent; every missed step later becomes a time cost.
Common mistakes include skipping measurement steps. For example, a brake complaint may seem like pad wear, but without checking rotor condition, caliper slide function, and fluid contamination, you risk reassembly without addressing the underlying cause. Another mistake is replacing parts before verifying that they match the failure mode. If the symptom is intermittent, replacing a sensor without confirming the harness condition and connector integrity can repeat the fault even after the part swap.
Misconceptions around diagnostic tools are also common. Scan data can point you to a category (misfire, overheat, voltage issue), but it does not prove the physical cause in many ATV systems—especially when sensors are faulty, wiring is intermittent, or the scan PID set is incomplete. That is why manual checks (voltage under load, continuity checks, visual inspection for corrosion/heat damage) remain essential. A mature checklist uses scan tools as one evidence source, not the only source.
Safety-check pitfalls often slow shops down after the fact. For instance, testing after a repair without brake/steering validation can lead to a bench-start that “passes,” then a real-world test where braking fails under load. Small leaks that appear minor can escalate into major failures because fluid loss changes heat handling and can damage components.
Deeper insight: what most guides get wrong is treating checklists as paperwork. In a commercial environment, checklists are a performance system. If you enforce a consistent decision path—intake evidence, gate checks, inspection sequencing, repair execution QA, and staged verification—you reduce technician variance and make training faster. Countermeasures include checklist training, a “stop-and-document” culture when evidence conflicts, and internal QA gates before test mode.
If you want to reduce turnaround variability, incorporate checklist discipline into your service cadence so you can improve approvals and communication. That also supports ask before service behavior when the scope expands due to what was discovered during measurement-based verification.
What diagnostic depth options should an ATV Mechanic choose by job type (without guessing)?
An ATV Mechanic checklist should offer diagnostic depth options so technicians can choose the right level of effort by job type—without guessing or infinite troubleshooting. The checklist should define when to stop, what evidence is needed, and when to expand scope.
Why it matters: “one size fits all” troubleshooting wastes time on simple faults and delays resolution on complex ones. Commercial shops need predictable labor planning. A structured diagnostic depth model protects margin and improves customer communication because you can explain why additional diagnosis is necessary and what it will likely confirm.
How the options work in practice: define four categories. (1) Quick triage: fast gate checks to identify safety risks and obvious basics (battery/charging basics, fuel delivery basics, spark basics, and scan steps where applicable). (2) Standard diagnostic workflow: intake-to-inspection sequencing with measurement verification aligned to the complaint. (3) Deep-diagnosis tear-down: when evidence suggests multiple contributing causes or when intermittent faults require controlled condition replication. (4) Parts-forward strategy with strict verification gates: used when evidence strongly indicates a component is the cause but confirmation requires part replacement; success still depends on post-repair verification tied to the complaint.
Tradeoffs and limitations: the deepest diagnostic level can be economically optimal only if the fault is repeatable and evidence quality will improve. In ambiguous cases, a shop may need scope-limiting estimates and staged approvals. For parts-forward strategies, the risk is replacing components without confirmation—so the checklist should require a verification gate before releasing the machine. This is how you avoid “budget guess” behavior that leads to comebacks.
Real-world scenario: a fleet ATV reports intermittent overheating. Triage checks reveal coolant level fluctuations and possible airflow restriction signs. Standard workflow confirms temperature rise behavior and checks cooling system components. Deep diagnosis might be needed if evidence suggests both airflow issues and a thermostat problem. If budget sensitivity is high, you can propose a scoped repair plan that addresses the most likely cause while setting strict test acceptance criteria and documenting what remains uncertain.
How to avoid scope creep while staying fair: document discovery steps and update estimates only with evidence. The checklist should require a “why we need more work” statement and a brief list of what was checked. This is also where your process supports faster book repairs faster outcomes—because your job tickets become clearer, and scheduling depends on evidence rather than uncertainty.
For shops that manage customer communications, align diagnostic depth approvals with your “repair authorization standards” so you can ask before service when expanded tear-down or advanced diagnostics become necessary.
What advanced edge cases should an ATV Mechanic checklist cover for complex repairs?
An ATV Mechanic checklist should cover edge cases that create misleading evidence—intermittent electrical faults, contaminated fuel systems, overheating with multiple contributors, and drivetrain vibration sources that can mask the true cause. Checklists earn their keep in these scenarios because they force structured evidence gathering and failure cascade thinking.
Why it matters: in complex ATV repairs, the failure cascade problem is real. One failed component can mask another. For example, neglecting a cooling restriction can overheat an engine and damage sensors, then lead you to replace electrical components while the real cause was thermal. If your checklist doesn’t explicitly ask “what else could be harmed,” you can waste parts and labor and still deliver a machine that fails again later.
Intermittent electrical issues: the checklist should define connector/harness inspection thresholds and documentation requirements. Corrosion grading (light surface oxidation vs deeper heat damage patterns) should determine whether you rework a connector, repair wires, or replace a harness section. For intermittent faults, plan condition-based testing—vibration, heat, and movement—while maintaining safety gates. Record what changed (connector wiggle outcome, voltage drop observed during movement) and when the fault appeared.
Contaminated fuel systems: include evidence-first checks for fuel quality and delivery. A checklist should address cleaning steps, filter inspection, and verifying that fuel system repairs resolve symptoms under the complaint conditions. If you suspect contamination, include guidance on when to stop rebuilding based on evidence and when you must escalate scope to flush or replace system components.
Overheating causes with multiple contributors: your checklist must treat overheating as a system problem—airflow restriction, coolant mixture and level, thermostat behavior, fan function, and potential combustion blow-by if applicable. Verify that coolant temperature stabilization occurs after the repair, not just that the engine “starts.” Track before-versus-after temperature behavior and leak checks to prove the fix.
Drivetrain vibration sources: vibration may originate from balance issues, worn CV/axle boots, bearing wear, misalignment, or fastener/tension problems. The checklist should prioritize inspection of boot integrity, torque verification, and alignment-related clearances. Do not stop at replacing a single component if vibration persists under load; escalate based on evidence.
Deeper insight on time-to-restore planning: define a point where continued troubleshooting stops being economically optimal. For example, if intermittent faults cannot be reproduced after multiple safe condition tests and the customer’s downtime cost outweighs further diagnosis labor, you can recommend a scoped repair with strict verification gates or a parts-forward approach. Present the plan as “evidence-based next steps” rather than indefinite searching, and document what remains uncertain.
For reliability and warranty-minded work, your checklist proof reduces disputes. When technicians can show evidence of inspection, measurements, and test results, it is easier to defend the repair logic. If you want to strengthen the operational system around this evidence-first approach, connect it to your service workflow so you can less downtime faster fixes happen without trading away reliability. That same discipline supports consistent service delivery at https://nrtoffroadperformance.com/atv-repair/.
How should you build a geography-ready ATV Mechanic checklist for shops and fleets in 2026?
An ATV Mechanic checklist should be geography-ready by separating location-specific variations (regionally common inspection expectations, customer communication norms, and parts availability) from the universal safety and documentation steps. The result is a consistent process that scales nationally.
Why it matters: shops and fleets often operate across states, rural areas, and different service environments. Even when the ATV platform is the same, customers might have different expectations around inspection documentation, and shops might face different supply-chain timelines. A checklist that only works in one shop bay becomes a bottleneck when the business expands or contracts fleets. A geography-ready approach ensures your safety gates and evidence requirements stay consistent even when you cannot get parts immediately.
How to tailor without losing consistency: keep the core workflow fixed—intake evidence packet, safety gates, inspection sequence, repair execution QA, staged verification, and documentation. Then allow controlled variation in scheduling language and update cadence. For example, when a region experiences longer freight times for a specific OEM seal or harness, the checklist should define what “safe verification” can still be completed while waiting for parts (such as baseline inspections, leak verification, harness checks, and cleaning). You can also define what should not be done without parts (running tests that could damage a system with suspected fuel leaks or cooling failures).
Process scaling is essential for commercial adoption. The checklist should include training use cases: onboarding new techs into the same decision path, standardizing job tickets, and providing internal QA gates that reduce technician variance. If you manage multiple bays, define responsibility ownership—who performs intake gates, who approves expanded scope, and who performs final test documentation. This reduces delays caused by “handoff ambiguity.”
Supply-chain variability is common across the country. The checklist should support “verification-first” work that does not depend on parts arrival. For example, you can complete connector inspection, measure voltage baselines, check for corrosion patterns, and inspect boot integrity. When parts arrive, re-check critical measurements and verify outcomes against the original complaint to protect the shop’s time-to-restore.
Customer communication norms also vary. In some markets, customers expect frequent updates; in others, they prefer summary updates once per stage. Your checklist should require update cadence tied to gates: after intake, after gate checks, after teardown findings, before expanded scope, and after verification. Do not promise fixed times for uncertain faults; promise stage completion and evidence-based next steps.
Tradeoffs: geography-ready checklists take more setup time upfront because you must define what stays fixed and what can flex. However, that investment pays off when you scale or rotate technicians. A consistent ATV Mechanic process also supports better reporting and operational improvements, including scheduling changes that help book repairs faster while still meeting safety standards.
Frequently Asked Questions About ATV Mechanic Checklists
What should an ATV mechanic checklist include before starting diagnosis?
It should include intake data (symptoms, timeline, operating conditions, and prior work history) plus safety gate checks before teardown. Include basic gate verifications like battery/charging and fuel/spark basics where applicable. Require documentation of “likely vs confirmed” findings to avoid guess-driven parts replacement. Finally, define what qualifies as safety-critical urgency before any deeper disassembly.
How do you prevent ATV repair comebacks using a checklist?
Use staged testing and verification that matches the original complaint conditions (cold start, load, or temperature-dependent behaviors). Require before-versus-after evidence and document acceptance criteria. Add an internal QA gate that confirms brake/steering/leak safety before releasing the machine. This keeps repairs from being “start-only” fixes that later fail under real use.
What are the fastest checks an ATV mechanic can do first?
Start with quick gate checks: confirm battery health and charging behavior, verify fuel delivery basics, and perform scan/OBD steps where applicable. Also do immediate safety observations like brake/steering play and obvious structural issues. If the fault is intermittent, perform repeatability checks under controlled, safe conditions and document what changes. The aim is to rapidly separate safety issues, obvious basics failures, and true diagnostic complexity.
Is an ATV scan tool enough for accurate diagnosis?
Scan tools are helpful but not sufficient on their own because they may not capture intermittent wiring faults or the full sensor logic path. A checklist should pair scan data with manual measurements like voltage under load and connector inspection. Use scan results to guide inspections, but verify the physical cause with measurements and evidence. When measurements disagree with the scan hypothesis, escalate rather than assuming the code is correct.
How should technicians document findings for customers?
Document intake notes, what was inspected, measurements taken, and what the technician concluded as “likely” versus “confirmed” causes. Include photos and brief notes of baseline condition (fluids, leaks, connector condition) and final post-repair outcomes (test results and what changed). Record part numbers and fluids used, and require customer sign-off when repairs are completed or when scope expands. This reduces disputes and improves transparency.
What’s the safest way to test an ATV after repairs are completed?
Use staged testing: static startup checks first, followed by controlled bench or short test cycles only when safety-critical items pass. Confirm no smoke or active leaks during initial run, and verify charging voltage and temperature stabilization under load. Before any ride, re-check brake function, steering freedom, wheel security, and loose fastener signs. Stop testing if a new leak appears or if safety interlocks show abnormal behavior.
How do you handle intermittent electrical faults during ATV troubleshooting?
Capture evidence around when the fault appears and inspect connectors and harness routing with clear thresholds for corrosion or heat damage. Use condition-based testing like vibration, movement, and controlled heat application only when safety gates allow. Document each test iteration and record what changed, including connector wiggle outcomes and voltage drop readings. If it cannot be reproduced and evidence remains contradictory, escalate to deeper diagnostics or targeted harness repair.
Verify torque and fitment for driveline components, confirm boot integrity, and check for abnormal endplay/backlash or drivetrain play. Inspect for alignment-related damage and confirm clearances for moving parts during reassembly. Test under load to confirm the vibration or noise is resolved in the operating condition that originally triggered the complaint. If symptoms persist, avoid stopping after a single part replacement and escalate based on evidence.
Can a shop use a checklist to quote repair estimates more accurately?
Yes. A checklist helps scope discovery steps and sets thresholds for when the shop can confirm root cause versus when it must request approval for additional diagnosis. Document measurements and inspection findings so estimate updates are evidence-based rather than guess-based. Scope-limiting estimates also help manage customer budget expectations. The result is fewer surprise changes and clearer authorization decisions.
How often should a commercial ATV service checklist be updated in 2026?
Update it continuously when tools change, recurring failure patterns appear, or parts/manufacturer guidance evolves, rather than waiting for a yearly reset. Add technician feedback when a checklist step is frequently missed or when a gate should be tightened. Review recurring comebacks and identify which evidence steps were missing or insufficient. In 2026, treat checklist updates as an ongoing quality system with a defined cadence for review.
Conclusion: implement the ATV Mechanic checklist workflow to restore faster and safer
An effective ATV Mechanic checklist improves commercial results by accelerating throughput, strengthening safety before testing, reducing comebacks, and creating clearer communication between technicians, service managers, and customers. When your workflow follows diagnose → inspect → repair → verify → deliver, each step produces evidence that the next step can trust, which reduces rework and lowers downtime.
The core of the approach is evidence-first execution: intake documentation that captures symptom conditions, safety and compliance gates that prevent hazardous test shortcuts, inspection sequencing that prioritizes high-yield checks, and post-repair verification that matches the original complaint. This is how you prevent “looks fixed” situations from becoming return jobs.
Start implementation in the highest impact areas: intake/safety/testing gates, then expand into deeper diagnostic and edge-case sections. Train technicians to follow the same decision path and measure improvement through rework rates, test pass rates, and customer sign-off clarity. If you do this consistently, you can move toward less downtime faster fixes without sacrificing reliability.
CTA: Adopt the checklist workflow, train your team to use the same evidence standards, and track rework rates for continuous improvement. To support faster job handling, tie checklist execution to your scheduling and authorization process so you can book repairs faster and ask before service when scope changes. For next steps in building your shop’s broader service process, review related workflow guidance at https://nrtoffroadperformance.com/atv-service/ and https://nrtoffroadperformance.com/offroad-repair/.
Updated May 2026