If you’re searching for a 4×4 mechanic near me, you likely need an appointment that won’t waste time or money—and you need the right questions answered before work begins. This guide gives you a fast, call-ready checklist for choosing a shop, so your “4×4 Mechanic Near Me” inquiry turns into a clear diagnostic plan, transparent estimate, and evidence-based repair choices in 2026. Wrong decisions can lead to unnecessary diagnostics, mismatched parts, or missed 4WD-specific safety concerns (like drivetrain binding, transfer case wear, and overheating under load). Use this checklist to help the shop quote faster and more accurately, based on the symptoms, vehicle details, and usage context that actually drive diagnosis.
Find the Right 4×4 Mechanic Near Me Using This Call-Prep Checklist
The fastest way to get a good outcome from a 4×4 Mechanic Near Me search is to call prepared. When you provide the right minimum info up front, the shop can choose the correct diagnostic path (scan first vs. measure first), confirm 4WD architecture, and avoid guessing that drives up diagnostic labor. This matters because modern 4×4 systems mix electronics (module logic, sensors, actuators) with mechanical wear (bearings, chain/gear transfer case issues, differential backlash), so “it throws a code” is rarely the whole story.
Start by collecting “minimum info” before you dial. Have your make, model, year, trim (if relevant), mileage, and the drivetrain type ready (part-time 4WD vs. full-time AWD, locking hubs, electronic vs. mechanical engagement). Also note maintenance highlights: last transfer case and differential fluid service (and fluid type/spec if you know it), recent filter/service work, any recent drivetrain repairs, and whether you’ve had a lift, leveling kit, gear change, or tire size change. A mechanic cannot reliably estimate diagnostic time without knowing whether the issue is likely to be related to drivetrain speed/load logic, fluid contamination, or geometry changes.
Use symptom mapping to describe what you feel and when it happens—without trying to diagnose. For example, a vibration that increases with speed often points toward driveline balance, axle/differential wear, or u-joint/shaft issues; binding or popping when turning can suggest a geometry mismatch, worn components, or incorrect engagement behavior. If you experience warning lights or 4WD engagement problems, mention what the indicator does (flashes vs. solid, happens only in certain conditions, clears after restart or not). This framing helps the technician decide what to inspect first and prevents the common mistake of chasing only codes while skipping mechanical verification.
Go deeper by describing your real usage context. Tell the shop how often you tow, whether you drive off-road frequently, and if you’ve recently changed tire or wheel sizes, added a lift, replaced control arms, or altered driveline angles. These changes can shift diagnostic priorities and part selection because actuators, sensors, and driveline components are calibrated and designed to work within specific tolerances. If the shop expects “stock geometry” but your truck has aftermarket suspension and different tire circumference, their test results may be misleading.
Finally, use when to stop driving guidance to protect the drivetrain. If you feel hard binding, severe jerking during engagement, grinding/clicking that worsens under load, overheating, or you smell burnt fluid, treat it as a “do not continue” situation and ask for an urgent inspection. Even if the vehicle still moves, continued driving can turn a manageable repair into a major failure (for example, contamination accelerating wear inside the transfer case or differential). If the issue is intermittent, tell the shop how repeatable it is and what conditions trigger it so they can schedule a diagnostic that matches your symptom pattern.
When you’re ready to compare shops, you can also use a 4×4 shop selection checklist to ensure you’re verifying driveline competence—not just general automotive friendliness. If your vehicle is modified, pair this with off-road repair checklist questions so you can collect the extra details that affect parts fitment and safe testing procedures.
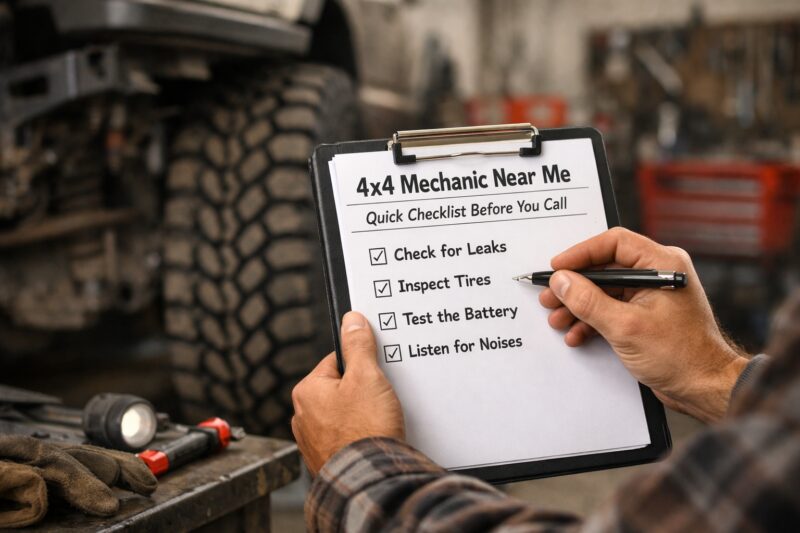
What to Ask Before Booking: Diagnostics, Estimates, and Turnaround
Before booking, require clarity on what the shop will diagnose and what the estimate covers. A good 4×4 diagnostic call doesn’t just promise “we’ll scan it”—it explains the inspection order, how they interpret results, and how they prevent unnecessary parts replacement. This is where many people lose money: they approve broad diagnostic labor without understanding the scope, then later get surprise charges after additional findings. In 2026, you should expect modern scan tools and more transparent quoting, especially for transfer case, AWD/4WD control modules, and related driveline sensors.
Ask how the shop will start. For many 4×4 complaints, they may begin with scan data (e.g., transfer case codes, actuator command vs. actual response, fault history), then perform visual checks (leaks, worn connectors, damaged boots, fluid condition), and finally conduct measurements (fluid level/spec, drive-line behavior, engagement verification). Your goal is to understand whether their “first steps” match your symptoms: a vehicle that binds during turning may require mechanical checks and road-test correlation, not just module reads.
Clarify exactly what “free estimate” means if it’s offered. Some shops apply the diagnostic fee to repairs; others use a basic visual estimate that doesn’t replace a real inspection. Request that they itemize diagnostic labor and parts/labor separately when they provide a quote, including diagnostic time if additional work is authorized. Also ask how they handle unforeseen findings: do they call for approval before replacing parts, and do they provide a breakdown of why an additional repair is recommended?
Ask for documentation standards. In an ideal process, the shop can show photos of leaks or wear points, include scan snapshots/readings, and summarize test results in a way you can understand. This “proof-of-work” approach is especially important for intermittent faults, where a shop that only relies on stored codes may miss the real cause. If they can’t explain what they eliminated and why (for example, “we verified fluid level and found contamination; actuator tests showed command mismatch”), you’re more likely to get a repeat diagnostic cycle.
Use a short anti–bait-and-switch script to test their decision logic. You can ask whether they replace components based on codes alone or whether they confirm condition/measured values first. Then ask how they verify that a repaired system behaves correctly after the parts install (not just that the code clears). Shops that do good 4WD work can usually explain the reasoning and test evidence clearly.
If your vehicle is lifted and your issue could be geometry-related, consider lifted truck service turnaround tips so you understand how scheduling and parts sourcing can change for modified setups. For deeper guidance on evaluating quotes and scope, use off-road mechanic choose fast to find shops that can confirm diagnostic steps quickly.
Common Mistakes People Make When Searching for 4×4 Repairs Near Me
One of the biggest mistakes is searching broadly and calling any shop that “works on 4WD” without verifying experience with transfer cases, differentials, and driveline systems. General automotive competence is helpful, but 4×4 repairs often require specific knowledge of engagement behavior, speed-sensor logic, actuator control, and internal wear patterns. If the shop treats your transfer case like any other component, they may miss the diagnostic nuance that prevents repeat failures.
Another common pitfall is relying only on warning lights or stored codes. Codes can be generic (or triggered secondarily by a mechanical issue), and a code does not confirm what’s worn, contaminated, or failing intermittently. For example, a vehicle might show an engagement-related code because of low/incorrect fluid level, a connector issue, a worn bearing affecting response, or a wheel-speed mismatch. If the shop doesn’t verify mechanical condition and fluid condition, you may pay twice: once for parts that didn’t solve the root cause, and again for the real fix.
People also choose solely on price and ignore diagnostic scope. Under-scoped diagnostics can create a cycle of comeback repairs, stacked parts costs, and delays while the shop orders more components. A better approach is to compare “what they will inspect” and “what evidence they will collect,” not just the initial quote. Tradeoffs are normal—complex internal driveline repairs can take longer—but you should still be able to understand the inspection logic and authorization boundaries.
Misconceptions cause additional mistakes. Some owners assume “it’s just a tire problem” when turning binding or 4WD engagement issues appear, but mismatched tire circumference can affect drivetrain stability logic and engagement/disengagement behavior. Others assume “it’s just a battery” for intermittent electronics faults, while the real culprit may be voltage drops affecting module command, corroded connectors, or failing sensors under load. The mistake isn’t thinking about basics; it’s skipping the 4WD-specific checks that connect symptoms to the correct system.
To reduce comeback risk, use a failure-mode checklist. Ask whether they verify fluid level and spec (not just replace a component), perform a post-repair road test to confirm engagement repeatability, and document what eliminated alternatives. If they can’t explain how they will prevent repeat failure (such as contamination control when reinstalling or rebuilding components), treat that as a red flag. A shop with proven driveline process will typically discuss what triggers failure and how their repair strategy addresses it.
If you want a simple way to confirm you’re not missing critical evaluation steps, your 4×4 shop selection checklist can serve as a practical filter when comparing multiple shops. For vehicles that see frequent off-road use, using Off-Road Repair checklist questions helps avoid under-informing the technician about how the system is stressed in your real environment.
Compare Your Options: The 4×4 Service Pathways You Can Choose
When you compare service options, choose the pathway that best matches your symptom complexity—not just what’s closest. For 4×4 problems, the four most realistic routes are dealer service, an independent 4×4-focused shop, a general automotive shop with confirmed driveline competence, and a mobile-first approach (when available) that performs inspection and documentation before deciding on repair. Each has strengths and tradeoffs related to cost predictability, speed, tooling, and depth of 4WD-specific experience.
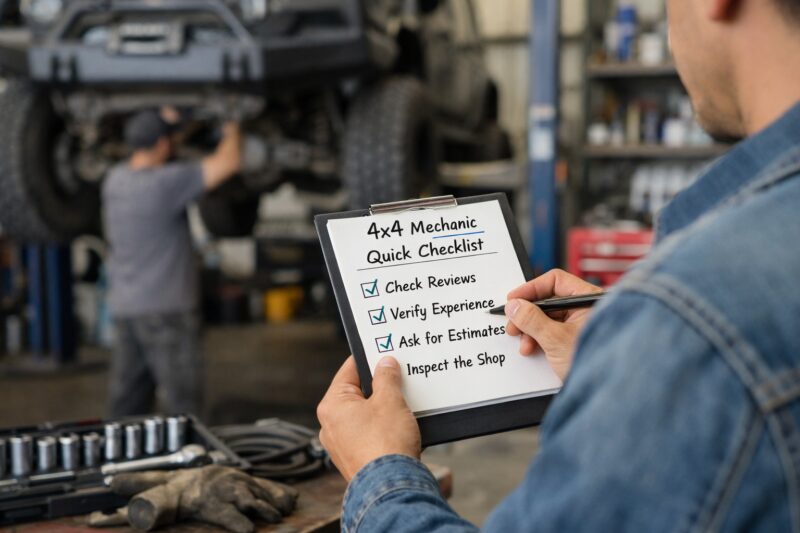
Dealer service typically excels at system familiarity, OEM parts sourcing, and manufacturer-aligned testing. If your vehicle is under warranty or you want strict OEM processes and documentation, dealer pathways can reduce uncertainty. However, dealer appointments can be slower, and diagnostic scope may be more standardized, which is sometimes less flexible for modified or heavily used vehicles. You should still ask about diagnostic scope, scan documentation, and authorization steps—regardless of brand loyalty.
Independent 4×4-focused shops often balance speed and expertise by prioritizing driveline-specific inspection order. These shops may have the scan tools needed for modern 4WD/AWD modules and also know when measurements matter more than codes. Their tradeoff can be variability: quality depends on the technician and shop process, so you still need proof signals like documented diagnostic steps, prior similar repairs, and willingness to explain findings clearly. If they can’t walk you through what was measured and why, that’s a limitation even if their marketing sounds specialized.
General automotive shops can sometimes handle 4×4 differential and driveline work, especially for straightforward items like fluid service, gasket/boot replacement, or certain sensor/suspension-adjacent repairs. But the moment your symptoms suggest internal transfer case or differential wear, you should confirm driveline competence and tooling before authorizing deeper labor. Ask whether they can perform engagement verification, interpret driveline module data appropriately, and execute safe road testing.
Mobile-first approaches can be helpful for early triage—capturing scan readings, photos, or initial measurements—especially if you need to reduce downtime before bringing the vehicle to a full facility. The tradeoff is that internal repairs and detailed measurements still require a shop bay and specialized time. When a mobile-first service is offered, ask how they document findings and how that documentation transfers into the repair authorization at the next stage.
Real-world decision logic helps: choose the dealer path for warranty/OEM strictness and complex OEM system interpretation; choose a 4×4-focused independent shop for driveline depth and evidence-based repair strategies; choose a general shop only when they can clearly demonstrate experience and tooling; and consider mobile-first triage when it reduces scheduling delay without sacrificing diagnostic evidence. If you’re verifying “off-road” marketing, look for proof of consistent diagnostic steps and similar repair history rather than broad claims.
| Service Pathway | Best For | Speed / Cost Predictability | Tooling & Documentation | Proof-of-Experience Signals |
|---|---|---|---|---|
| Dealer service department | Warranty-aligned OEM diagnosis, OEM parts certainty | Often slower; pricing may be more predictable | OEM scan capability; standardized inspections | Clear OEM test steps, documentation of module data |
| Independent 4×4-focused shop | Transfer case, differential, actuator/engagement behavior | Often faster with flexible diagnostic scope | Driveline scan + measurement emphasis | Photo/test evidence, explanations tied to measurements |
| General auto shop (confirmed driveline expertise) | Fluid service, sensor checks, external driveline repairs | Variable; can be cost-effective for simple issues | May have scan tools but not always measurement depth | Explicit experience with transfer cases/diffs |
| Mobile-first triage (if available) | Initial triage to reduce downtime | Fast initial findings; final repair depends on facility | Photos/scans; may not include full inspection depth | Documented results that support later authorization |
If you’re still sorting which option to choose, your Off-Road Repair checklist questions can help you compare shops based on diagnostic transparency and evidence, not just timing and price. This also aligns with how on-page SEO best practices often differ from “traffic-only” approaches—what matters is the underlying quality signals, not just the surface claim.
Advanced 4×4 Mechanic Questions Most Shoppers Skip (2026-Ready)
Ask advanced questions to surface how the shop tests 4×4 systems in the real world. Many shoppers stop at “Do you work on transfer cases?” but the better questions focus on how they verify mechanical engagement/disengagement, how they interpret module logic, and how they decide between repair strategies. A 2026-ready shop should be comfortable discussing actuator/solenoid checks, module readings, and the difference between an electrical fault and a mechanical wear pattern.
Start with testing methods. Ask how they handle modern 4×4 system testing: whether they compare commanded vs. actual response at the actuator/transfer case, check wiring connectors for intermittent issues, and validate engagement behavior during controlled conditions. Then ask how they decide whether scanning is sufficient or whether they must measure mechanical variables like fluid level/spec, component play, or driveline angles. A common mistake is assuming that scan tools alone can prove internal condition; often, the scan tells you what happened, but measurements tell you why.
Edge cases matter, especially on modified vehicles and on setups with geometry changes. Ask whether wheel/tire size mismatch could be influencing drivetrain stability logic, whether ABS/brake sensor readings can affect drivetrain behavior, and how lift kit geometry impacts safe testing and component wear patterns. Also ask about aftermarket tuning: changes to transmission/transfer case logic or calibrations can alter engagement thresholds, which can lead to confusing fault patterns if the shop doesn’t account for it.
Probe fluid and wear verification in a specific way. Ask what fluids they inspect, whether they confirm contamination (metal/debris) and verify correct specs and levels before concluding the problem. Then ask how they verify serviceability vs. replacement for components like bearings and internal gears, rather than defaulting to replacement based on a code. This is where a good diagnosis saves money: correct fluid/spec and contamination evidence can change the “repair strategy” entirely.
Finally, require documentation and “elimination” reasoning. Ask what before/after measurements they capture, whether they provide scan snapshots, and how they explain which alternatives were ruled out. For rebuild vs. replace decisions, ask what evidence supports each path (fluid condition, wear/clearance findings, contamination, and expected longevity). Shops that prevent repeat failure will talk about contamination control, seal integrity, and how they manage bearing preloads and installation quality—not just that parts were swapped.
If your vehicle has aftermarket suspension and you’re concerned about scheduling and parts timing, lifted truck service turnaround tips can help you anticipate lead times for specialty driveline parts. For broader evaluation standards, the 4×4 shop selection checklist provides a useful structure to verify process rigor.
Choose the Right Shop for Your Vehicle Type (Symptoms, Drives, and Setups)
Choosing the right shop depends on what your 4×4 is doing, not only on where it’s broken. Different symptoms suggest different systems: 4WD won’t engage can point toward control logic, actuator/wiring, fluid level/spec, or sensor feedback; binding/jerking can suggest mechanical engagement issues, geometry mismatch, or internal wear; clicking/grinding can indicate driveline and bearing problems. Leaks around the transfer case or diffs often require careful sourcing and sealing strategy, while drivetrain warning cluster behavior and overheating can signal a broader systemic fault that needs prioritized diagnostics.
Match questions to drivetrain architecture. Part-time 4WD systems, full-time AWD setups, and vehicles with locking differentials each have different engagement/disengagement behavior and different diagnostic implications. If you have locking differentials, ask how they test and verify lock/unlock operation and how they confirm safe function across the conditions that your vehicle normally uses. For full-time systems, the shop should explain how stability logic and torque distribution interact with sensor readings and driveline condition.
Clarify AWD vs. 4WD terminology confusion. Owners often describe “AWD behaving like 4WD” or “4WD won’t engage” when the system is actually full-time with a transfer case that behaves differently. Ask the shop to confirm the vehicle’s actual system type based on VIN/service data, not just your description. That small correction can dramatically change diagnostic expectations, and it prevents unnecessary parts replacement.
Account for modified vehicles so the shop doesn’t assume stock conditions. If you have a lift, different wheel offsets, mismatched tires, or aftermarket tuning, the shop must know to avoid incorrect recommendations and unsafe test procedures. Real-world scenario: a lifted truck may show intermittent binding because driveline angles and rotating assemblies changed; a shop that tests like the vehicle is stock could misinterpret vibration sources or stress the wrong components during test drives. Ask whether they will confirm driveline angles and alignment-related factors, and whether they can safely load-test or road-test based on your setup.
Use symptom severity to decide next steps. If symptoms include hard binding, severe grinding, repeated failure to engage with audible stress, overheating, or fluid loss, schedule an inspection immediately and consider limiting driving until evaluated. If symptoms are minor and intermittent without drivability concerns, you can often schedule a planned diagnostic window—but you should still ask the shop how they will reproduce the fault and confirm engagement behavior with documentation.
If you want a structured approach to evaluating shops based on your symptom severity and setup, off-road mechanic choose fast can help you shortlist candidates that can respond quickly and still do evidence-based inspections. For deeper vehicle-specific preparation, Off-Road Repair checklist questions helps ensure your call includes the setup details that change diagnostic priorities.
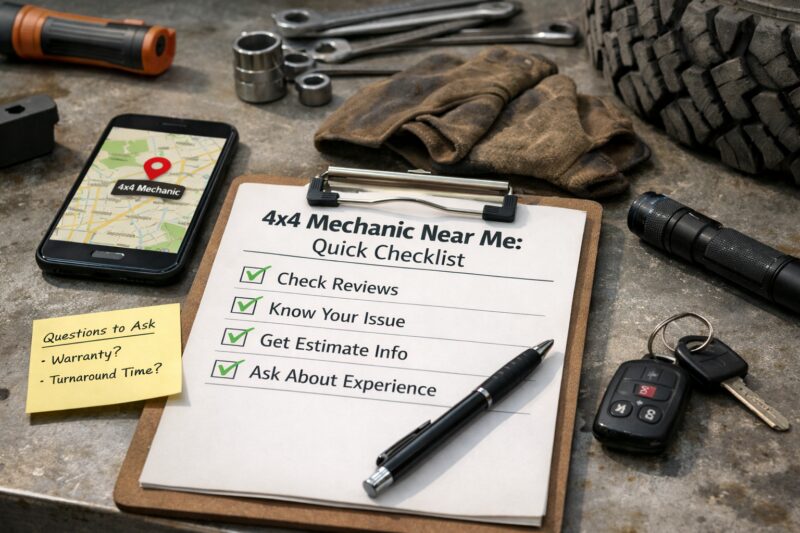
What to Confirm on the Day You Call: Availability, Parts, and Warranty
When you call, confirm availability, parts sourcing, and warranty terms so you avoid delays and unclear billing. For many 4×4 issues, scheduling is urgent because driveline damage can progress quickly if driven hard while failing. Ask about the scheduling window, whether they can inspect the vehicle immediately upon arrival, and how they handle urgent safety concerns. A strong shop will be able to tell you what they can do that day (inspection, initial scans, visual checks) and what requires parts ordering or additional test time.
Parts verification is critical because incorrect components can create repeat labor. Ask how they source correct parts (OEM vs. equivalent), and whether they verify fitment for your exact drivetrain configuration. For example, transfer case components and sensor assemblies can differ by production date, drivetrain calibration, and vehicle configuration. A common mistake is ordering the “right” part for the model name but wrong for the exact transfer case variant—this wastes diagnostic time and can delay repairs while parts are re-ordered.
Get warranty clarity upfront. Ask what warranty length covers (labor, parts, diagnostics), and what may void it (improper use, missed follow-up, or repeated operation after a known fault). Also clarify whether diagnostic time is billable if you decline repairs after inspection. In 2026, you should expect a written estimate/authorization process and a clear explanation of how diagnostic billing works if no repair is performed—this helps you budget and prevents disputes later.
Require a “paper trail” communication checklist. Ask who calls with updates, how they report progress, and what they need from you for approvals when additional work is found. If they can’t provide a written estimate and authorization steps, it often leads to confusion about what was authorized and what wasn’t. Ask whether they document findings with photos and scan evidence so you can confirm the why, not just the what.
Finally, confirm their communication style and timeline realism. Ask for typical diagnostic-to-repair turnaround for your symptom category and whether they can provide parts lead-time ranges. If you’re dealing with a lifted or specialty setup, mention it early so the shop can anticipate longer parts sourcing and confirm safe test procedures. lifted truck service turnaround tips can help you plan around these realities without waiting on uncertainty.
If you’re comparing multiple shops, use a 4×4 shop selection checklist to make sure you verify documentation standards, warranty terms, and diagnostic scope every time—not just once.
Frequently Asked Questions About 4×4 Mechanic Near Me
How do I choose a 4×4 mechanic near me fast?
Fast selection comes from ranking shops by documented driveline experience, a clear diagnostic process, and estimate transparency. Call 2–3 candidates and ask what they inspect first (scan + visual + measurements) and whether they can show scan snapshots and photos. Prioritize reviews that mention transfer case, differential, or 4WD engagement work rather than only general “brake service.”
What should I say when I call about 4WD not engaging?
Provide the symptom timing (“only when cold,” “only under load,” or “intermittent”), what the indicator light does, and whether the vehicle engages in specific conditions (straight line vs. turning, low speed vs. highway). Mention any recent changes like a lift, tire size change, towing, or fluid service. Also ask them to confirm whether they will check actuator/solenoid response and fluid level/spec before replacing parts.
Do I need scan tools for 4×4 transfer case problems?
Scan tools help interpret actuator commands, fault history, and module logic, but they are not always sufficient by themselves. Many transfer case issues require mechanical inspection and measurements such as fluid condition/level and verification of engagement behavior. Ask the shop how they combine scan data with visual checks and road-test confirmation before concluding the repair.
How can I tell if a shop has real experience with 4×4 repairs?
Look for proof signals: they can explain their diagnostic order, discuss how they verify mechanical condition, and describe what alternatives they ruled out. Experienced shops can also talk about transfer case/differential symptoms in practical terms (contamination, wear patterns, engagement repeatability). Ask what documentation they provide—scan snapshots, measurements, and photos—and whether they can show before/after evidence.
What questions should I ask about the estimate and diagnostic fee?
Ask whether the diagnostic fee is itemized, whether “free estimate” includes a full inspection or only a visual review, and how authorization works if additional issues are found. Request a breakdown of parts vs. labor and diagnostic labor scope. Also confirm what happens to diagnostic charges if you decline repairs after inspection.
Should I rebuild or replace my transfer case?
The decision usually depends on evidence: fluid contamination, measured wear/clearances, and whether seals or internal components are compromised. A rebuild may be more cost-effective when wear is localized and contamination is controlled, while replacement can be faster with more predictable timing in some cases. Ask the shop to explain what data supports the strategy and what warranty applies to the chosen path.
Why does my 4WD work sometimes and not other times?
Intermittent behavior is commonly linked to actuator/solenoid response issues, wiring/connector problems, speed-sensor feedback, or fluid level/spec variations. It can also be influenced by conditions like temperature, load, or wheel/tire mismatch affecting drivetrain logic. Ask the shop how they reproduce the fault and confirm the mechanical engagement/disengagement behavior—not only the stored codes.
Can a general auto shop handle 4×4 differential and driveline work?
They can sometimes handle it if they confirm driveline competence, have appropriate scan capability for 4WD/AWD modules, and perform measurements that validate mechanical condition. For internal transfer case or differential work, the shop must be able to explain safe test procedures and evidence-based repair decisions. If they provide vague answers or rely only on codes without verification, consider a 4×4-focused shop.
What are the top mistakes to avoid before bringing my 4×4 in?
Avoid driving when you suspect binding or overheating, because it can worsen internal wear. Don’t withhold key info like tire size changes, lift modifications, or towing history, since these affect diagnostic priorities. Also avoid authorizing broad repairs based only on codes; require inspection evidence, fluid verification, and a post-repair test that confirms engagement behavior.
How long does 4×4 diagnostic usually take in 2026?
It varies by symptom complexity, but many shops target a same-day or next-day inspection for clear engagement faults that are reproducible. Complex internal symptoms or intermittent issues may take longer because they require controlled test conditions, documentation, and parts sourcing to confirm the diagnosis. Ask the shop for a realistic diagnostic window and what they can complete immediately during intake.
Is a road test necessary after 4×4 repairs?
In most cases, yes—road testing confirms engagement repeatability, verifies that the system behaves correctly under load and speed changes, and helps confirm that codes or faults won’t return immediately. The shop should document what they observed during the test and how it aligns with the original symptom pattern. If they skip road testing entirely, ask what alternative verification they performed.
Conclusion
To get the best result from your 4×4 Mechanic Near Me search in 2026, focus on four themes: prep the right vehicle and symptom information, insist on transparent diagnostics and estimates, compare service pathways based on evidence and tooling, and verify true driveline/4WD competence. A good call produces faster quoting because the shop can match your symptoms to the correct scan/inspection order and avoid wasteful guesswork. It also reduces the risk of misdiagnosis by ensuring mechanical checks, fluid verification, and documentation are included—not just code reading.
Before you authorize any work, build a short shortlist of 2–3 shops you can reach quickly. Then use this call-ready checklist to confirm diagnostic scope, how they document findings, and what their authorization and warranty process looks like. If the shop can’t explain their inspection logic clearly, or if they avoid answering about measurements, documentation, and post-repair verification, keep looking.
Next step: schedule a diagnostic/inspection and request evidence (photos, scan snapshots, and readings) so your decisions are based on verification, not assumptions. Finally, note turnaround time, how they source parts, and what warranty covers so you can plan confidently—especially for lifted or off-road-ready setups.
Updated May 2026