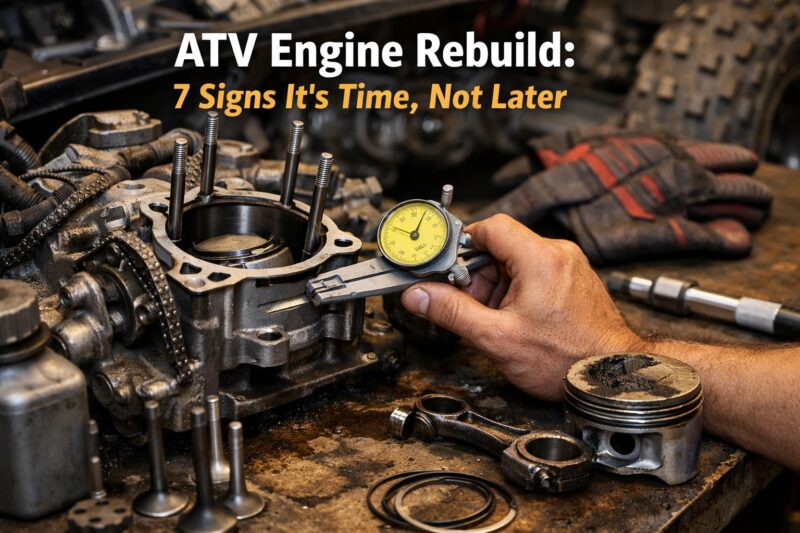
An ATV engine rebuild means disassembling the engine and restoring worn internal components to correct clearances and sealing surfaces, usually after measurement confirms wear. Buyers should think about an ATV Engine Rebuild when symptoms point to internal mechanical wear rather than a temporary fuel, ignition, or cooling issue—because delaying can turn a localized problem into broader scoring, overheating, or bearing failure that raises total cost. In 2026, the commercial goal is simple: help you identify 7 signs that it’s time, not later, and decide what to do next with confidence.
This guide is built for commercial intent: it helps you match symptoms to likely root-cause categories, understand what verification tests to ask for, and avoid overspending on “maybe” repairs. Because ATV engines vary widely by make/model (and whether they’re EFI, carbureted, or liquid-cooled), the article uses decision rules that work broadly while still emphasizing verification before committing to parts and labor. You’ll learn what each sign typically means, what to check to confirm it, and when rebuild tends to be the most cost-effective option compared with replacement or extended troubleshooting.
If you want a practical starting point, use a quick checklist before booking any appointment so the shop sees the right evidence first: https://nrtoffroadperformance.com/atv-engine-repair/ .
1) The 7 signs point to a rebuild—so you don’t keep paying for temporary fixes
An ATV engine rebuild is typically warranted when internal wear is driving the problem, not when the issue is limited to service items like filters, fluids, or spark components. The biggest cost mistake is repeating external fixes while the underlying mechanical problem keeps progressing, often turning a repair that could have been “smaller” into one that requires machining, bearings, and top-end or bottom-end replacement.
Here’s the decision lens this article uses: symptoms first, then verification, then scope/cost comparison. Symptoms tell you “where to look” (compression, fueling, cooling, lubrication, ignition behavior), but verification tells you “what’s actually worn.” A credible shop should base an ATV Engine Rebuild recommendation on measurement results (compression/leak tests and internal inspection), not just on how the ATV currently feels on the trail or in the garage. This is especially important because similar symptoms can share root causes across systems—like weak compression that mimics fuel delivery issues.
To keep your diagnosis focused, map symptoms to categories: compression issues affect starting and power delivery under load; fueling problems often show up as hesitation, lean/rich misbehavior, or spark plug patterns; cooling issues show overheating and recurring thermal failure; lubrication issues show metal debris, oil loss, or rapid oil darkening; and ignition/timing symptoms can create misfire-like behavior. Some “deeper-than-obvious” cases: ring seal loss can produce reduced compression and poor combustion, which can look like a misfire or carb/EFI fault. Likewise, excessive combustion heat from timing or mixture errors can resemble cooling-system failure, leading to unnecessary coolant work when the real driver is internal wear or valve damage.
Before you call a shop, use a quick framework: note when symptoms occur (cold vs warm), under what load (idling vs hill climbing or sustained throttle), and what changed after prior repairs. Then request diagnostics that match the symptom category—so you’re not paying for repeated trial-and-error. If you’re looking for related service planning, it may help to review faster fixes less downtime in context of how the shop schedules work and which inspections come first: https://nrtoffroadperformance.com/atv-repair/ .
2) Sign #1: Compression loss that shows up under load (not just at idle)
Compression loss under load is one of the clearest commercial triggers for an ATV Engine Rebuild, because it points to internal sealing or wear in the cylinder and valve train. Idle compression might feel “good enough,” but as load rises the engine needs consistent cylinder pressure to maintain power and combustion stability.
How to recognize true compression problems: you’ll often see hard starting, loss of power when you open the throttle, bogging during climbs, and a tendency to stall sooner when ridden hard. If the ATV only struggles at sustained throttle or hills, that’s a clue that cylinder sealing and valve sealing are compromised—either from ring/bore wear, worn valves/valve seats, or gasket sealing failures that open under heat and pressure. Practical application: document exactly when it happens (for example, “works for 10 minutes then bogs on acceleration”), because shops use that pattern to choose the right tests before teardown.
Verification approach matters. A compression test gives a baseline, while leak-down concepts (where applicable) help distinguish where pressure is escaping—toward the intake/exhaust (valves/seats) or past the rings (cylinder/ring sealing). Instead of chasing universal numbers, focus on trends and repeatability: a consistent low reading across cylinders, or a big gap between cylinders, is more decision-relevant than a single snapshot. Common rebuild-related causes include worn piston rings and cylinder wall scuffing, valve sealing degradation, and head gasket failures that allow combustion leakage.
Tradeoffs do exist. If compression is only slightly reduced and the shop identifies a specific, measurable sealing issue (like a gasket problem) without major scoring, the intervention might be smaller than a full internal rebuild. But if compression loss correlates with internal inspection findings and worsened leak paths, the cost/benefit usually shifts toward rebuilding because external tune work can’t restore ring/cylinder or valve seating geometry.
A common mistake is letting an “easy fix” mask the compression truth. A fresh battery and strong spark can temporarily improve starting and make you think the problem is electrical, while the engine still can’t hold pressure under load. What should override first impressions is evidence: repeatable compression results, leak test direction (if performed), and teardown inspection that confirms wear surfaces or sealing damage. For disciplined planning that reduces waste, prevent costly breakdowns maintenance thinking often starts with confirming the root cause early: https://nrtoffroadperformance.com/atv-maintenance/ .
3) Sign #2: Metal in the oil or excessive engine wear indicators
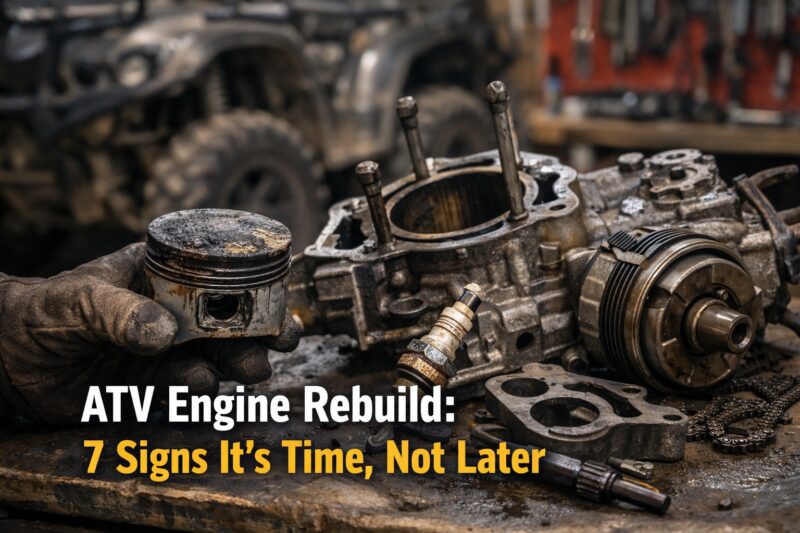
Metal in the oil is a strong rebuild-adjacent indicator because it often means internal bearing wear or scoring on crankcase/cam surfaces rather than a simple serviceable fault. When the rotating assembly starts shedding material, continued operation can rapidly expand the damage and raise the eventual repair scope.
What to check before concluding an ATV Engine Rebuild is needed: oil color/consistency, visible particulate in the oil or on the drain plug, and filter material condition if your model uses a serviceable filter. Also watch for oil consumption patterns—if oil levels drop between intervals, that can support internal wear in ring control or crankcase sealing. Commercially decisive evidence is debris that includes fine metallic particles rather than just darkened oil from normal friction, and debris that keeps increasing after short rides.
Wear indicators tie directly to failure modes. If metal is present and the engine has symptoms that align (low compression, overheating, roughness under load), it points toward irreversible damage—like bearing journal wear, cam/rocker contact scoring, or crankcase abrasion. A shop that’s serious about rebuild decisions will treat metal evidence as a “stop guessing” signal and plan for internal inspection and measurement, because minor service typically cannot reverse journal scoring or restore proper clearances.
Edge case: not all “debris” is automatically catastrophic. Clutch friction material contamination can show up in oil, and some break-in wear can appear as mild, short-term particle presence. What separates non-critical cases from true engine internal damage is context and trend: if metal debris correlates with overheating, compression loss, knocks, or rapid oil-darkening after normal intervals, it’s more likely the engine is shedding from internal wear surfaces. Also consider whether the engine already had prior work; repeated symptoms with new oil quickly darkening can suggest ongoing internal metal generation.
Tradeoff in your decision: if metal indicates localized damage but the shop confirms limited wear (for example, a cam contact issue) and clearances remain within acceptable ranges, the rebuild scope might be limited. But if metal is broad or measurements show out-of-spec clearances, rebuilding becomes the rational path to prevent reoccurrence. A credible shop should explain the evidence and not treat “oil was dark” as a rebuild conclusion without inspection—this is where a quick checklist before booking can prevent wasted estimates: https://nrtoffroadperformance.com/atv-engine-repair/ .
4) Sign #3: Overheating you can reproduce—because cooling isn’t the only factor
Reproducible overheating is one of the strongest signs it may be time for an ATV Engine Rebuild, particularly when overheating returns after cooling-system service. Cooling problems can be external, but when heat keeps building under the same load conditions, internal friction, combustion issues, or oiling capacity problems often become the root cause.
To apply this sign commercially, note your overheating “reproducibility.” Record what you were doing when it happens: trail speed, uphill grade, ambient temperature, and duration until the fan/overheat light activates (if equipped). If the ATV overheats at the same point every time even after you confirm coolant level/airflow and basic cooling components, that’s a signal to widen diagnosis beyond external cooling fixes. The reason this matters is that the engine’s heat balance depends on correct internal sealing, proper oil film, and combustion efficiency—internal wear can increase friction and reduce heat transfer effectiveness.
Diagnostic checks related to rebuild decisions often include verifying oil level and oil condition, and checking that oiling paths aren’t compromised (for instance, by damaged pump performance or clogged passages). Compression and combustion sealing matter too: a poorly sealing cylinder can burn less efficiently and increase localized temperatures. Tradeoff: if the overheating was clearly caused by a thermostat/fan/radiator blockage and resolves fully, rebuilding is usually unnecessary. But if overheating persists—especially with pressure/compression-related symptoms—persistent internal wear becomes a likely driver.
A common misconception is that “it runs after bleeding coolant, so it’s fixed.” Some cooling-system repairs temporarily reduce temperature while combustion inefficiency or internal friction still produces excess heat. Another edge case is overheating that’s actually caused by fuel/air mixture issues or ignition timing problems. That’s why your verification should include checking relevant combustion and ignition behavior before you authorize teardown: you want to avoid paying rebuild labor for an externally adjustable tune or sensor issue.
From a buyer’s perspective, ask the shop how they will rule out cooling system causes before recommending internal work. If you’re planning maintenance intervals or diagnosing patterns earlier, prevent costly breakdowns maintenance thinking can help you avoid heat-driven damage progression: https://nrtoffroadperformance.com/atv-maintenance/ .
5) Sign #4: Persistent oil leakage/consumption that doesn’t normalize
Persistent oil leaks or oil consumption that doesn’t normalize after basic repairs can justify an ATV Engine Rebuild because they may reflect internal geometry issues or worn sealing surfaces. External seals can fail, but repeated seal failure or ongoing consumption often means the crankcase, cylinder walls, or crankshaft condition is no longer controlling oil as designed.
How to gather evidence: identify where the oil comes from (breather area, around crank seals, valve cover/head gasket region, stator/side covers if applicable), and observe whether the leakage changes with riding load. Shops should also check crankcase pressure behavior conceptually, because a stuck or restricted breather can increase pressure and force oil out through seals. Oil consumption that drops steadily during normal intervals supports the idea of ring control issues or valve guide/valve sealing problems, depending on engine design.
What supports rebuild vs external fixes is whether the shop can pinpoint the failure source and whether internal measurements are required. Replacing a seal may stop a leak temporarily, but if the engine’s bore is worn, or the crank journal is damaged, the new seal can fail quickly again. That’s the “false confidence” scenario: you spend parts and labor on seal replacement while the underlying cause remains—leading to escalating rebuild scope later. The commercial criteria for a quote should include leak characterization and an explanation of why the shop expects seals alone to solve it, or why measurements indicate the need for machining and internal parts replacement.
An important edge case: oil loss can sometimes be blamed on leaks when it’s actually mis-measured level, overfilled crankcase oil, or oil draining after shutdown from a line routing issue. That’s why the shop should inspect the drain-back and confirm true oil control problems. Also, oil contamination or overheat cycling can accelerate seal wear, meaning what looks like “seal-only” damage may be the symptom of deeper overheating or internal friction.
Practically, treat repeated leak/consumption as data that should influence quote scope. If the shop can’t explain the likely internal cause, demand that they plan measurement-based verification instead of “try new seals” only. For a disciplined approach to scheduling repairs and reducing wasted downtime, faster fixes less downtime includes getting the right diagnostics before parts start replacing parts: https://nrtoffroadperformance.com/atv-repair/ .
6) Sign #5: Hard starts, stalling, or rough running—because internal wear changes how the engine behaves
Hard starting, stalling, and rough running can come from electrical or fuel/air issues, but when they’re consistent and correlate with mechanical evidence, they can indicate that an ATV Engine Rebuild is needed. Internal wear changes how compression builds, how combustion stabilizes, and how the engine responds under throttle, which often shows up as inconsistent behavior that simple tune work can’t fully resolve.
To apply this sign, look for symptom patterns. Does the ATV start fine cold but deteriorate warm? Does stalling occur during acceleration or immediately after throttle changes? Compression-related issues often show a relationship between load and running quality, while purely electrical issues might show more randomness or correlate to specific ignition events. You can also use observation: a mechanical compression or sealing issue can make the engine “try” harder on starting or produce unstable rpm under load because cylinder pressure isn’t consistent.
Before authorizing rebuild work, the diagnostics a credible shop should include align with the symptom categories: compression trend checks, inspection indicators related to valve sealing (where applicable), and combustion consistency observations. The key is to avoid skipping tests because “it runs sometimes.” Intermittent operation can still be a sign of wear progressing toward a catastrophic failure—especially if cylinder sealing is marginal and becomes worse as components expand with heat.
Tradeoff: sometimes rough running is primarily a tune or sensor issue, and a teardown would be wasteful. That’s why the practical decision rule is: request verification that rules out the easy categories (spark, fuel delivery/air leaks, basic calibration) before you commit to internal work. If verification repeatedly fails and symptoms persist across conditions, internal wear becomes more probable and an ATV Engine Rebuild becomes a rational cost-control strategy.
A common mistake most guides get wrong is focusing on “what it sounds like” rather than verifying compression and sealing evidence. Sounds can mimic misfire, but if the engine can’t hold pressure or has valve seating problems, no amount of spark plug swapping or carb/EFI cleaning fully resolves the mechanical root cause. If you’re building a plan for repeatable diagnosis rather than repeated repair attempts, five quick checks first can help you prepare for the right conversation with a shop: https://nrtoffroadperformance.com/atv-service/ .
7) Sign #6: Loss of power, poor acceleration, or bogging that returns after servicing
Loss of power, poor acceleration, or bogging that returns after servicing is a commercial red flag that the original root cause may be internal mechanical wear. If you’ve already done oil service, cleaned carb/EFI components, replaced spark parts, or adjusted basic items and the same performance issue returns under similar load, an ATV Engine Rebuild may be the correct escalation path.
What “returns after servicing” means in practice: the ATV improves briefly, then develops the same bogging behavior again—often within a time window consistent with continued internal wear or sealing degradation. For example, you might see strong starts and idle after a tune, but uphill acceleration falters again after the engine warms up and internal clearances/pressure patterns settle into their worn state. That repeated pattern suggests external servicing isn’t addressing compression integrity, valve sealing, or cylinder wear that affects combustion.
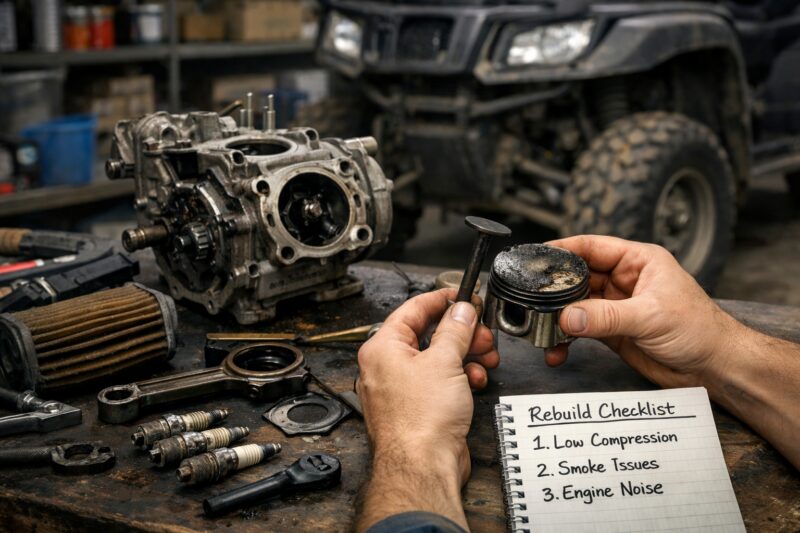
How to verify mechanical vs calibration causes: request evaluation of power under load behavior, and seek compression correlation rather than only spark/fuel checks. If the shop can show that compression is low or sealing is poor, the likelihood that the issue is mechanical rises sharply. Also look for evidence from combustion-related observations like plug condition trends after controlled riding. While you shouldn’t overfocus on brand-specific tuning advice, you can still ask the shop how they ensure they’re not misdiagnosing a mechanical issue as a fuel/air or ignition calibration problem.
Typical rebuild-related causes include worn cylinder walls (affecting ring seal and oil control), weak valve sealing (reducing effective compression), and timing or mechanical wear issues that affect combustion efficiency. Tradeoff: if there’s a specific repair target identified during diagnostic verification—like a clogged fuel delivery path with a measurable restriction—the shop may fix it without rebuilding. But if the ATV repeatedly returns to a similar performance failure and internal inspection confirms wear surfaces, rebuild becomes more cost-effective than continuing to pay for “no-fix” servicing cycles.
A common deeper problem is misattributing engine power loss to drivetrain components. Clutch wear, belt issues, and drive train slip can mimic engine bogging. The draft should separate engine symptoms from drivetrain symptoms by verifying whether the ATV pulls under load and whether rpm behavior matches engine compression and combustion changes—without expanding the article beyond rebuild intent. If you’re trying to reduce wasted spending from repeated troubleshooting, a disciplined plan is key, similar to quicker appointment triage guided by five quick checks first: https://nrtoffroadperformance.com/atv-service/ .
8) Sign #7: Unusual noises (knock/grind) or vibration that indicates rotating assembly damage
Knock, grind, or abnormal vibration strongly suggests internal rotating assembly damage and often pushes toward an ATV Engine Rebuild because internal clearances may be unsafe for continued operation. These symptoms typically reflect bearing or journal wear, damaged contact surfaces, or scoring that requires measurement and replacement parts—not just lubrication or tuning.
Practical buyer action: stop riding thresholds matter. If noise is present, record the conditions: whether it appears only under throttle, only when cold, or under deceleration; whether frequency changes with rpm; and whether it’s getting worse quickly. A commercial shop should ask for this evidence because it helps plan a teardown inspection that focuses on the most likely damaged areas. Continuing to run can turn limited wear into extensive scoring, meaning the rebuild may expand from top-end only into a full internal scope.
What a credible shop should do before quoting rebuild: present a teardown inspection plan and explain how they will measure tolerances. For rotating assembly noise, measurements may determine bearing fit, crank/cam journal condition, and whether parts are salvageable or must be replaced. A quality rebuild quote should include a replacement parts strategy based on measuring wear, rather than assuming “we’ll replace what looks worn.” Tradeoff: partial repairs can sometimes work if the damage is very localized and measurements show acceptable limits, but without measurement you risk reinstalling worn mating surfaces and shortening rebuild life.
Edge case: some “ticking” can be valve train noise or belt/drive train noise that’s external to the engine. The wrong move is attributing every sound to the engine without verification. That’s why recording rpm correlation and using a disciplined symptom checklist before disassembly is essential, especially when drivetrain slip is also possible. The result: you avoid paying rebuild labor for a non-engine fault.
Most guides get this wrong by advising “keep riding to see,” which is risky because metal-to-metal contact can destroy mating surfaces quickly. If you’re preparing for a shop call, a quick checklist before booking can prevent vague symptom descriptions and help the technician plan the right teardown steps: https://nrtoffroadperformance.com/atv-engine-repair/ .
9) How to decide and get a quote for an ATV Engine Rebuild (a process buyers can follow)
Deciding on an ATV Engine Rebuild should follow a structured process: identify the 7 signs that fit your symptoms, verify the most likely mechanical causes, then request a scope-specific quote tied to evidence. The goal is to ensure the recommended work matches the root problem instead of turning your repair into an open-ended “package rebuild” guess.
Start with what to gather before contacting shops: model/year, whether it’s EFI or carbureted, coolant type if liquid-cooled, oil change history (including interval adherence), and a symptom timeline with conditions (idle vs load, cold vs warm). Also note what repairs have already been attempted and what changed afterward. This matters because shops use that history to estimate likelihood of top-end vs full internal work, and because repeated repair attempts can influence how much wear has progressed.
A commercial-grade quote should include scope clarity: what they intend to measure, what parts they expect to replace, whether machining/clearance restoration is planned, and what they consider “confirmation points” during teardown. It should address parts strategy (OEM vs quality aftermarket categories) and specify what happens if measurements reveal additional damage. You want contingencies explained in advance because rebuilds can expand once the engine is opened—without good communication, expansion becomes surprise spending.
Go/no-go criteria: rebuild tends to be most cost-effective when internal verification aligns with your symptoms (for example, low compression consistent with sealing wear, metal debris consistent with bearing scoring, or overheating persistent after cooling service). Replacement can be more economical if parts/machining are scarce, if the engine has severe bottom-end damage, or if turnaround constraints make downtime too expensive. Tradeoffs include diagnostic uncertainty, shipping cores, and warranty coverage tied to what was measured and replaced.
Negotiation guidance: ask for measurement-based justification, not symptom-based sales pitches. For example, request discussion of compression/leak test results (if performed), inspection photos of wear surfaces, and clearance measurement documentation. If you’re comparing service scheduling options and trying to reduce downtime, a shop that prioritizes diagnosis early can align with faster fixes less downtime: https://nrtoffroadperformance.com/atv-repair/ .
10) Common mistakes and misconceptions that waste money on an ATV rebuild decision
The most common money-wasters in an ATV Engine Rebuild decision are mistakes that replace root-cause confirmation with repeated symptom guessing. When you misclassify internal wear as maintenance, or skip verification and measurements, you can spend on parts that don’t address the real failure mode and still end up doing the rebuild later.
One frequent mistake is confusing maintenance issues with mechanical wear. For example, a clogged jet or a weak coil can mimic stalling and poor acceleration, but internal ring or valve sealing problems can also present as “tune-like” behavior. Without compression trend checks or inspection-based evidence, you may keep cycling through fuel/ignition replacements. Another mistake is rebuilding without confirming the root cause—skipping compression/leak assessment when symptoms point there, or ignoring oil metal evidence that strongly indicates internal scoring.
A third misconception is choosing rebuild “packages” without understanding scope. Some shops offer top-end-only vs full internal rebuild options, but buyers often agree to a single option before learning what measurements show. A package might be “perfect” for one wear pattern and wasteful for another. You also need to consider usage history: hours, heat cycles, load habits, and whether the ATV was ridden after warning signs appeared. Wear progression changes rebuild scope, and without that context, quotes can be inaccurate.
Deeper insight: the silent killer scenario is delaying after early signs because each additional ride adds thermal stress and can spread localized damage. A mid-level issue (like minor sealing loss) can become bottom-end scoring once oiling performance drops or compression failure accelerates combustion heat. If you’re planning future service decisions, prevent costly breakdowns maintenance by improving how you respond to early warning evidence rather than waiting until the ATV is fully down.
Finally, avoid assuming “the shop will diagnose correctly.” The best protection is asking what tests they will do before teardown, what evidence will confirm the rebuild scope, and how they will handle contingencies if measurements show additional damage. If you want to standardize your pre-visit info, five quick checks first can help keep the first call productive and reduce the chance of symptom-only decisions: https://nrtoffroadperformance.com/atv-service/ .
11) Rebuild options and alternatives: what to compare before you commit (2–4 realistic categories)
Before you commit to an ATV Engine Rebuild, compare realistic alternatives that address the same root cause with different cost, downtime, and risk profiles. In many cases, the “best” choice depends on what measurements reveal (top-end wear vs bottom-end scoring) and whether used parts or complete engine units are available for your exact configuration.
Category one is a top-end rebuild vs a full engine rebuild. Top-end work typically targets valves, piston/rings, cylinder sealing surfaces, and related components, which aligns well with compression loss and valve sealing indications when the bottom end is healthy. Full internal rebuilds become more likely when metal debris, knock/grind, or persistent overheating points to crankshaft/bearing wear. The tradeoff is cost and downtime: full builds generally require more machining, more replacement parts, and a longer schedule.
Category two is engine replacement (a complete unit) compared with rebuild. Replacement can reduce downtime if a compatible unit is in stock, and it can simplify warranty expectations depending on the supplier. However, replacement cost may be higher, shipping and fitting can delay delivery, and you still need to ensure the cause of failure (like overheating/insufficient oil or fuel issues) isn’t present in the replaced engine environment. A rebuild’s advantage is that it can restore your original engine once the failure mode is known—but only if the shop measures correctly.
Category three is “measuring + machining” approaches such as short-block/long-block rebuild logic. What this implies commercially is durability: measured clearances reduce rework risk, but parts availability and machining feasibility can affect pricing. Category four is continued troubleshooting without rebuild. This can be rational when the evidence still leans toward fuel, ignition, or external cooling faults, but you should set end conditions: what specific test results would prove the engine is not mechanically worn?
To compare options without overthinking, use a decision-matrix concept: weight likelihood of success (based on signs and verification) against total cost of ownership (parts, labor, downtime, and chance of rework). This is where the internal mapping from the first sections pays off: the clearer the mechanical evidence, the less value continued troubleshooting offers.
12) Advanced considerations: wear patterns, compatibility, and edge cases most guides ignore
Advanced ATV Engine Rebuild decisions hinge on wear patterns and compatibility details that general guides often ignore. Two engines with the same “symptoms” can have different failure modes depending on lubrication quality, heat cycle severity, and how the engine was built and serviced previously.
Wear patterns matter because the location and type of damage predict whether machining and which parts matter most. For example, localized scoring might point toward oil contamination or a bearing lubrication issue, while uniform valve sealing degradation might point toward heat damage or repeated detonation. This matters commercially because it affects whether you should budget for just a top-end rebuild or plan for more extensive bottom-end work. If a rebuild is offered without discussion of wear patterns, ask how they will measure and document clearances and mating surface condition during teardown.
Edge case: repeated rebuilds that “don’t stick.” If the ATV has been rebuilt before and symptoms returned quickly, the likely causes include insufficient measurement, incorrect parts selection (mismatch in quality or fitment), or the original root cause not being addressed (like recurring overheating due to restricted airflow, inadequate coolant maintenance, or persistent oiling restriction). In that scenario, you’re not just repairing an engine; you’re correcting a process failure. Ask the shop what they will do differently in the diagnosis plan—how will they confirm clearances and sealing rather than relying on appearance?
Another edge case is bent valves or heat-damaged components. Overheating can lead to valve issues that mimic other internal problems and can shift rebuild scope (and parts list) significantly. Compatibility also matters: your engine’s configuration (cylinder size, head casting, EFI vs carb components, and specific piston/valve geometry) must match what the shop plans to install. If the shop doesn’t confirm fitment and configuration details, you risk rework and warranty disputes.
Warranty risk is a buyer consideration that many overlook. Request documentation: photos of wear surfaces, results of compression/leak checks (if performed), and any clearance measurement records. This protects you if a second issue arises and helps demonstrate that the rebuild was performed based on evidence. For buyers who want to reduce downstream surprises, the commercial value of better documentation aligns with the “decision lens” used earlier—signs plus measurable verification.
13) US buyer guide: choosing a shop and vetting an ATV engine rebuild in your area
Choosing a shop for an ATV Engine Rebuild in the US should start with vetting how they diagnose before teardown, how they define scope, and what warranty they offer on rebuilt work. Because rebuilds can expand once the engine is opened, you want a shop that communicates contingencies clearly and ties recommendations to measurements, not guesswork.
What to ask on the phone: request the symptom timeline, confirm whether they perform verification tests (like compression/leak testing where appropriate and internal inspection planning) before agreeing to a rebuild scope, and ask how they handle uncertainty. A strong shop won’t just say “we’ll rebuild it”; they’ll describe what evidence would make a top-end rebuild likely versus a full internal rebuild. If you’re dealing with logistics, ask about parts availability, core return processes if applicable, and how shipping time affects your total turnaround.
Here’s the how to compare quotes checklist readers can use immediately before committing to a rebuild—this is the most practical single list-style item in the guide. Use it on every quote you receive and insist the shop answer each point directly.
- Ask what tests they run before teardown (and what decision those tests support).
- Confirm scope: top-end only vs full internal rebuild, and why.
- Request a parts strategy explanation (OEM vs aftermarket quality categories).
- Ask what measurements they will document (clearances/wear limits) and whether they share results.
- Clarify machining plan (when boring/honing is required and who approves expansion).
- Define contingencies: what happens if they find additional damage after teardown.
- Verify warranty terms: duration, what it covers, and exclusions tied to diagnosis quality.
- Confirm turnaround timeline drivers (parts lead time, machining queue, diagnostics time).
- Ask about core handling and return policies if you’re using exchange parts.
Tradeoffs and risk reduction: shop selection affects both accuracy and timeline. A shop that focuses on “faster fixes less downtime” by diagnosing first and scoping precisely can save money by reducing rework and preventing avoidable teardown expansions: https://nrtoffroadperformance.com/atv-repair/ . Also, consider that usage restrictions, parts availability, and emissions-related constraints can indirectly affect what replacement components are easy to source, which changes cost and timing. Even when regulations don’t directly dictate internal engine work, they can affect which components are available and how quickly you can restore operation.
If you want to streamline your shop comparison and ensure you present consistent symptom evidence, start with a quick checklist before booking so the first visit aligns with the 7-sign framework above: https://nrtoffroadperformance.com/atv-engine-repair/ .
Frequently Asked Questions About ATV Engine Rebuild
What does an ATV engine rebuild typically include?
An ATV engine rebuild can range from top-end service (cylindrical sealing surfaces, piston/rings, valves/valve seats) to a full internal rebuild that also addresses bearings and crankshaft components. In most evidence-based rebuilds, the shop measures wear and restores correct clearances through machining/fitment as required. Exactly what gets replaced depends on diagnostic findings, because the goal is to correct sealing and clearance problems that tests or inspections confirm.
How long does an ATV engine rebuild take in 2026?
Typical rebuild turnaround can range from several days to a few weeks, depending on diagnostics time, parts lead times, and machine work scheduling. Timelines extend when shops wait for OEM or specialty parts, when they need additional inspection after teardown, or when machining shops have queue delays. To manage downtime, ask the shop to provide an estimated “minimum date” for teardown and a second date once parts and measurements are confirmed.
Can I ride my ATV if it has low compression?
Low compression often indicates internal sealing wear, and riding can accelerate heat and scoring—especially under load. If the ATV has repeated stalling under acceleration or metal debris in the oil, treat it as a “do not ride” scenario until inspection confirms the risk level. If you’re unsure, monitor only after an immediate safety assessment; use the compression evidence to guide whether you should stop riding or continue very limited testing.
Should I rebuild or replace the engine if the ATV is older?
Rebuild vs replace depends on parts availability, machining feasibility, and what measurements reveal about wear. For older models, replacement can be attractive if a compatible engine unit is available quickly, but rebuild can be more economical when the scope is limited and the shop can source parts. Warranty coverage and labor risk also matter: replacement may be simpler to warranty, while rebuild reliability depends heavily on measurement-based work quality.
What are the signs of internal engine damage vs fuel or ignition problems?
Internal damage signs often include compression loss trends under load, metal debris in oil, overheating that returns after cooling service, and knock/grind that correlates with rpm. Fuel or ignition problems more often present as misfire-like behavior that improves with electrical/spark or known fuel delivery changes. Buyers should avoid assumptions and instead request verification like compression/leak testing and inspection that can distinguish mechanical wear from external faults.
How do I tell if overheating means the engine needs a rebuild?
Overheating alone doesn’t automatically mean rebuild, but reproducible overheating that returns after cooling-system checks is more concerning. The more the symptoms correlate with oil quality changes, compression/sealing problems, or internal friction evidence, the more likely the driver is internal wear. Verification should include ruling out cooling-system causes first, then evaluating internal indicators—especially oiling and combustion behavior.
Is a top-end rebuild enough, or do I need a full rebuild?
Top-end rebuilds can be enough when wear is primarily in the cylinder sealing surfaces and valve train, and measurements show the bottom-end clearances are acceptable. Full rebuild is more likely with metal debris indicating bearing damage, knock/grind noises tied to rotating assembly wear, or persistent overheating that suggests oiling and internal friction problems. The key decision input is measurement during inspection rather than symptoms alone.
Ask what diagnostics they run before teardown, what evidence supports the rebuild scope, and which measurements they will document (clearances, wear, sealing condition). Request an explanation of parts strategy (OEM vs quality aftermarket), machining approach, and what contingencies apply if they find additional damage. Also ask about warranty terms and how they handle timeline changes due to parts and machine shop scheduling.
Why does my ATV keep stalling after repairs even though it runs?
Stalling after repairs can happen when internal wear affects compression buildup, valve sealing, or combustion stability under load. Repeated “no-fix” repair cycles that don’t eliminate the stalling pattern—especially if compression tests are inconsistent—should lead you to request deeper internal inspection rather than more tune parts. Document when it stalls (warm/cold, idle/load, acceleration) so the shop can map it to mechanical causes.
ATV engine rebuild vs rebuild kit: what’s the real difference?
A rebuild kit usually provides standardized parts (like rings, gaskets, and sometimes bearings), but it may not include the measurement and machining steps needed for long-term durability. An evidence-based rebuild focuses on inspecting and measuring wear, then restoring correct clearances and sealing surfaces based on what’s actually found. In practice, the “real difference” is whether the shop builds around verified clearances versus simply swapping parts.
Conclusion (planning notes for the writer — not a vague H2 unless you want one)
Use the 7 signs to target when internal wear is the likely root cause, not just when a temporary repair might mask symptoms. Each sign in this guide points you toward a verification step—compression trends, oil metal evidence, reproducible overheating behavior, leak/consumption patterns, mechanical running instability, power loss that returns after servicing, or rotating assembly noise.
Then act commercially: document the symptom conditions, request measurement-based justification, and insist on scope clarity before paying for parts and labor. Comparing rebuild vs alternatives should be based on likelihood of success (aligned to your signs and tests) and total cost of ownership, including downtime and the chance of rework.
Your next step should be to prepare a symptom checklist and request at least one shop inspection/diagnostic plan aligned to the sign categories above. If you want a starting framework, use a quick checklist before booking so your first appointment is evidence-first rather than symptom-guess-first: https://nrtoffroadperformance.com/atv-engine-repair/ .
Updated May 2026