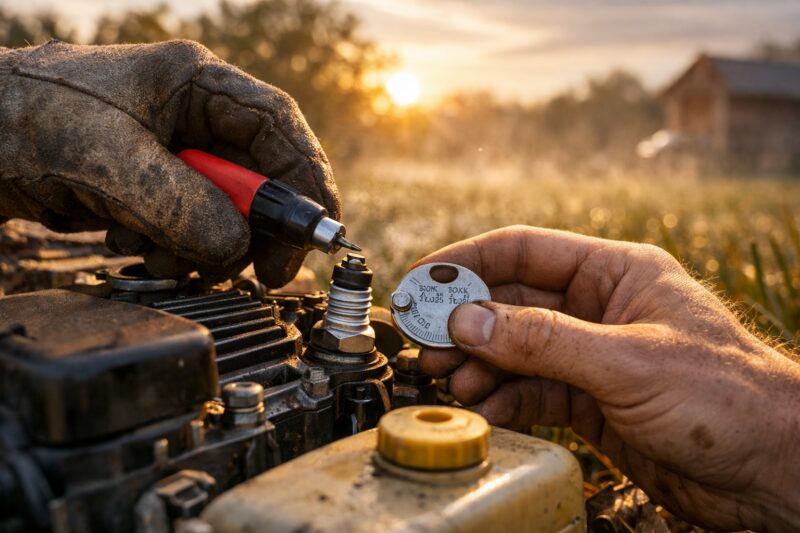
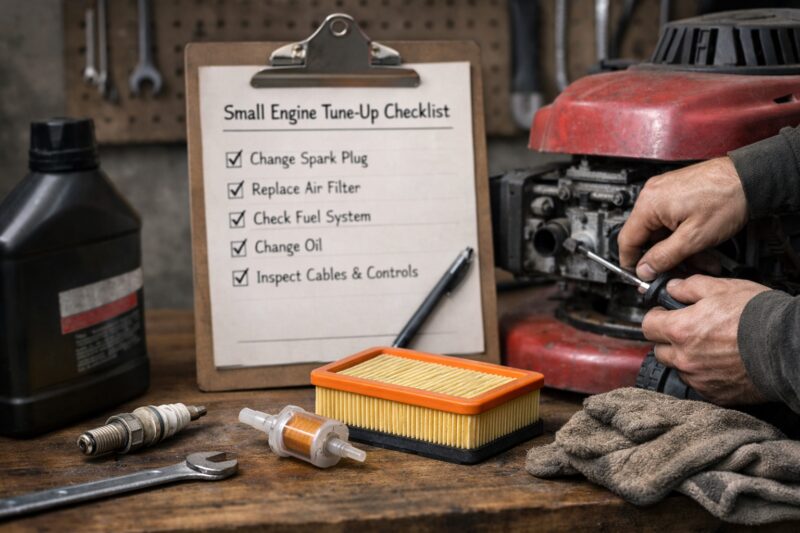
A small engine tune up checklist helps you diagnose the start problem systematically, then restore the start-critical systems (fuel, spark, and air) for faster, smoother starts—especially after sitting. This Small Engine Tune Up approach is designed for both DIY owners who want a repeatable workflow and customers shopping for service who need to verify the work matches the symptoms.
After reading, you’ll be able to follow a decision path that prevents wasted parts, recognize when the issue likely lives in fuel vs. spark vs. air vs. mechanical health, and use verification checkpoints like hot restart and idle stability. You’ll also know “stop rules” for when it’s smarter to escalate to professional diagnostics. Because settings and compatible parts vary by model, always align the checklist with your manufacturer manual before changing mixture, idle speed, plug type, or governor-related components.
In 2026, customers increasingly expect documented troubleshooting, not guesswork. If you’re considering service, this checklist helps you ask for specific tests (cold start, hot start, idle stability, and throttle response) so results are measurable rather than “we cleaned the carb.”
Build a Start-Focused Small Engine Tune Up Workflow (the decision path)
If you want a faster, smoother start, you need a workflow that diagnoses first and tunes second. a start-focused Small Engine Tune Up sequence keeps you from swapping random parts while the real cause is still present.
Start problems can look similar—hard cranking, no-fire-at-all, surging, or a run-then-die condition—but the underlying system failures differ. That’s why the order matters: fuel issues can be “hidden” during spark tests, and spark issues can be masked by stale fuel or clogged airflow. A disciplined “start diagnosis → tune steps → verify” path prevents wasting time and parts, because each stage has its own checkpoints and pass/fail criteria.
How it works in practice is simple. You first identify symptom patterns (cold start vs. hot restart, flooding vs. dry-no-start, stable idle vs. unstable idle, and whether throttle response improves or worsens). Then you perform targeted checks in fuel, spark, and air—only moving deeper when the previous category passes your verification checkpoint. After each stage, you test the outcome under the same conditions the symptom happened (for example, a hot restart attempt after a 15–30 minute soak).
There are clear limits to DIY. Stop DIY and escalate to service if you see fuel system leaks that smell strongly near the carb base or tank outlet, repeated flooding that persists after float/choke/function checks, damaged wiring/boots you cannot safely repair, or signs of low compression (for example, repeated pull-start resistance drop-off, or persistent no-start that does not improve after verified fuel, spark, and air conditions). Compression and internal mechanical health require specialized testing, and guessing there can increase the chance of further damage.
Common “deeper than obvious” mistakes include cleaning carb flow while ignoring an ignition component that only fails under heat. For example, a cracked coil boot may spark cold but go intermittent once heat-soaked. Your verification plan should include a hot restart test and an idle stability check before you conclude that “fuel is fixed.” This is also where “reliable starts less wear” becomes a practical goal: fewer repeated start attempts reduces stress on components like the starter system, battery (if equipped), and carb circuits that can accumulate varnish when flooded repeatedly.
If you’re also managing other upkeep, it helps to coordinate this process with a broader maintenance routine such as the guidance in Small engine maintenance planning and checklists. If your issue is urgent, consider whether a <a href="https://nrtoffroadperformance.com/local-small-engine-repair/">same-day tune-up checklist</a> and service request fits your situation, but only after you’ve identified the likely category so you can discuss the correct tests with less back-and-forth.
Fuel System Checklist (clean, correct, and stable fuel delivery)
Most small engine hard-start and flooding complaints ultimately trace back to unstable fuel delivery—too much fuel, too little fuel, or fuel that can’t vaporize/flow consistently. A fuel-focused Small Engine Tune Up checklist verifies flow control, contamination, and carb bowl behavior so your engine gets the right mixture at the moment it matters most.
Fuel system problems matter because the start sequence is time-sensitive. On a typical carbureted engine, the carb bowl and idle/main circuits must deliver fuel cleanly through passages that are extremely sensitive to debris and varnish. Even if the engine “runs” once started, a marginal fuel delivery system can produce surging, rough idle, or restart failure after sitting—because the condition changes as fuel settles or heats up.
Start with pre-checks before disassembly. Inspect fuel age and storage practices: if the engine sat for months with untreated fuel, the most common failure pattern is varnish that restricts jets/passages. Confirm the correct fuel type and ethanol tolerance per the manual; ethanol-blended fuel stored too long can cause phase changes and residues that mimic “clogged carb” symptoms. Practical owners often start by draining old fuel, but a deeper insight is that new fuel alone may not fix residual varnish in narrow passages, or a sticky float needle that keeps the bowl too full.
Your checklist steps should include inspection of the fuel line condition (cracks, soft spots), verifying the shutoff valve operation (if equipped), and checking filter state (and whether it’s installed in the correct direction). For engines with a carburetor, inspect bowl cleanliness if accessible and verify that the carb outlet is not blocked by residue. For carbureted models, include float height/needle behavior and choke function verification, because a weak choke circuit can produce a lean start, while a failing float needle can produce repeated flooding.
“Different fuel delivery types” deserve careful scope control. For small engines that use different fuel delivery systems than a typical carb bowl (for example, systems with specific pressure/flow requirements), don’t turn your tune up into a generic engine repair project. Stay model-appropriate: verify what the manual allows you to check safely, confirm correct fuel lines and seals, and evaluate symptoms against fuel delivery behavior (like whether the engine stalls during acceleration or only fails after heat-soak).
Edge-case failure modes include varnish vs. water contamination vs. stuck float needle. Varnish can cause intermittent passage restriction that shows up as hard starts after sitting but not necessarily during immediate runs; water contamination can affect vaporization and create inconsistent starting behavior during specific humidity/temperature conditions. A common misconception is “the carb kit will fix it,” when the real issue is ignition heat-soak or an air leak that changes mixture—so always verify spark and air after you make fuel changes.
If you’re thinking about DIY troubleshooting and want a symptom-based approach before you pull parts, these DIY troubleshooting tips can help you avoid unnecessary disassembly. If you’re evaluating service or comparing what work should be included, use a “quick checklist before calling” mindset like the guidance at quick checklist for repair conversations so you can align the diagnostics with the symptom pattern.
Spark & Ignition Tune Steps (hot, consistent ignition for smoother starts)
If fuel seems fine but your engine still starts rough, surges, or fails on hot restart, ignition is the next category to verify. A spark and ignition Small Engine Tune Up checklist improves starting consistency by ensuring the plug, boot, wiring, and grounding are producing reliable spark under real conditions.
Spark issues matter because “one good spark” is not the same as consistent spark across temperature swings and crank cycles. A common scenario is a mower, trimmer, or generator that starts cold, then fails to restart after heat-soak. That pattern often points to ignition insulation breakdown, a boot that leaks voltage, a weak coil connection, or grounding that changes with vibration and heat.
Your practical checklist begins with spark plug inspection and correct installation. Check plug condition: wet and fouled plugs suggest flooding or mixture problems, while dry soot can indicate ignition not firing long enough or insufficient mixture; overly sooty plugs can also reflect mixture/air issues. Confirm the plug type and gap using manufacturer specifications. You should also inspect the spark plug boot integrity and look for cracks, looseness, or corrosion at connections.
Next, inspect ignition components you can access safely: coil/wire condition, any protective covers, and grounding points. Evaluate whether the plug color and behavior match what you’ve observed during fuel checks. For testing, a spark tester can be useful when you need a clear “spark/no spark” result, but you should avoid unsafe testing methods or anything that could expose you to ignition energy beyond what your tools and manual specify. Use testing to confirm behavior rather than to chase a “perfect looking” plug if symptoms don’t align.
Timing and governor interactions can also affect start quality without requiring deep theory. For instance, some small engines change airflow/control behavior as the governor and choke/idle circuits interact during start and warm-up. If you adjust idle speed too high before verifying air/fuel baseline, you can end up with an engine that starts but won’t idle normally, or conversely a rough-start condition that looks like a fuel issue.
Deeper insight: a common mismatch problem is installing the wrong plug heat range or an incorrect gap. On certain engines, a plug that’s too cold or too hot relative to the design can cause intermittent or inconsistent ignition, especially at specific temperatures. This is also why “manufacturer manual compatibility” matters: correct parts are not only about fit; they’re about the thermal characteristics that affect ignition under heat-load.
When ignition issues persist after you’ve confirmed plug, boot, and grounding, that’s a good stop rule for DIY—especially if you suspect coil failure or intermittent wiring faults. From a service standpoint, it’s reasonable to request “cold start and hot restart behavior verification” after any ignition-related work, so you know the fix matches the symptom window.
Air & Compression Checks (prevent lean starts and ensure the engine can breathe and spin)
A small engine needs clean airflow and adequate mechanical health to start smoothly; if it cannot breathe or cannot spin with sufficient compression, fuel and spark won’t work as intended. Use an air and compression Small Engine Tune Up checklist to prevent lean-start conditions and identify when escalation is necessary.
Air system problems matter because the start mixture is highly sensitive to intake restriction and leaks. A restricted air filter or blocked intake screen can create mixture behavior that makes starting harder, causes surging at idle, or makes the choke feel “inaccurate.” Conversely, a vacuum leak or intake seal failure (where applicable) can mimic fuel problems by pulling extra air, leading to lean operation and unstable idle or hot restart failure.
On the air side, inspect intake cleanliness, air filter condition, and any intake boot/line sealing. Look for torn filter elements, missing gaskets, loose clamps, or cracks around intake connections. If the engine uses an intake screen or mesh pre-filter, ensure it is not clogged. This is also where verification order matters: changing the air filter after you’ve “tuned” carb behavior can change the mixture enough to mislead your diagnosis. The practical approach is to set air baseline first, then verify fuel and ignition behavior.
Compression checks should be conservative for DIY. Without specialized tools, you can assess what you feel and observe: whether the pull-start or crank feels consistently strong, whether prior maintenance indicators suggest internal wear, and whether the engine’s behavior changes dramatically after repeated attempts. However, if you suspect low compression, do not keep adjusting carb or chasing plug gaps as a substitute for proper measurement—low compression is a stop rule, because it can’t be fixed with a tune up.
Deeper insight and edge case: an engine that starts when cold but fails hot can be affected by air leaks that open under heat, fuel boiling behavior near intake interfaces, or mixture changes due to heat-soak. For example, an intake seal that seals better when cool may leak when warm, producing a lean or unstable hot restart. Your checklist verification plan should include both cold start and hot restart tests after you address air sealing and filtration.
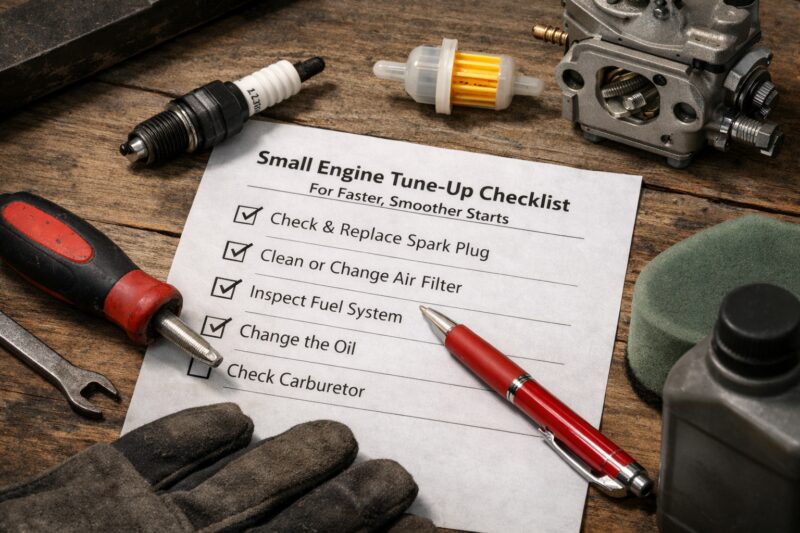
Tradeoffs and limitations: you can reduce uncertainty by confirming air filter health and intake seal integrity, but you still may need service for compression testing. If you complete reasonable tune-up steps and the engine repeatedly fails to fire or maintain stable idle while fuel and spark checks pass, escalate for compression evaluation rather than continuing to iterate.
Fast-Start Maintenance Practices (filters, lubrication, cooling, and seasonal readiness)
Even a correct tune up won’t deliver reliable starts if basic maintenance and readiness steps are neglected. A fast-start Small Engine Tune Up checklist includes oil level/condition, airflow cooling checks, starter/battery health (if applicable), and seasonal planning so your engine starts smoother when you need it.
Maintenance matters because it affects starting speed, friction, ignition quality, and heat management. Oil level that’s too low can increase internal friction and reduce cranking effectiveness; oil that’s too old or degraded can contribute to poor performance and deposits. Cooling and airflow matter because overheating can worsen starting behavior by changing tolerances and affecting vaporization/mixture stability.
Start with oil level and condition per the manual. Check for correct viscosity and whether the oil should be changed based on hour/season usage. Then confirm lubrication points—again, per the manufacturer’s guidance—rather than improvising with generic greasing assumptions. Many owners accidentally over-lubricate or lubricate the wrong area, which can attract debris and worsen airflow or introduce contaminants.
Cooling/airflow checklist items include inspecting fins and surrounding vents for debris, ensuring the engine area is clear, and checking for airflow obstructions under normal operating conditions. If the engine is overheating, it can create a feedback loop: heat-soaked ignition components perform worse, fuel can vaporize in unwanted places, and hot restart becomes unreliable. That’s why cooling checks are part of a start-focused tune up, not an afterthought.
Starting system checks vary by engine type. For recoil systems, inspect cord condition and mechanism wear. For battery-equipped engines, check battery health, cable tightness, and corrosion prevention on terminals. Loose or corroded connections can cause symptoms that look like fuel or ignition problems, especially at marginal battery voltage during hot conditions.
Seasonal readiness should be planned. Before storage, address fuel stabilization conceptually and ensure you follow the manual on whether to store with treated fuel or drain the system. If your engine uses priming mechanisms (common on some designs), verify correct priming technique before each seasonal start. Deeper insight: changing the air filter or performing oil changes at the wrong time can alter how the engine behaves and cause you to misinterpret carb symptoms. Sequence your maintenance actions so you can still attribute symptom changes to the correct system.
If you also want a practical maintenance rhythm, the broader workflow described in small engine maintenance planning and checklists is a natural companion to this start-focused tune up approach.
Common Mistakes & Misconceptions in a Small Engine Tune Up
The most common reason tune ups fail is not that the checklist was wrong—it’s that the diagnosis and assumptions were. Many DIY and even some service workflows make mistakes that inflate cost without improving faster, smoother starts.
Mistake one is replacing parts instead of diagnosing symptom patterns. If you throw a new carb kit at a hot-restart problem without verifying ignition under heat, you may spend money while leaving the true cause intact. Mistake two is using one-size-fits-all settings for idle speed or mixture. Manufacturer baselines exist because carb designs, governor behavior, and air restriction characteristics vary between models. If you skip the manual, your adjustments can create new problems, like unstable idle or difficult restarts.
Mistake three is cleaning carburetors incorrectly or over-disassembling without tracking components and diaphragms. That can lead to misassembly, altered diaphragm orientation, incorrect seating of parts, and missing small jets or passages that are required for proper starting. Even if you reassemble correctly, you can miss an ignition component that is the real failure point. This is exactly why verification checkpoints after each stage are mandatory for a real Small Engine Tune Up.
Mistake four is ignoring maintenance basics and then concluding “the carb is bad.” If fuel is stale, air filter is restricted, or the spark plug is wrong for the model, the carb may only be the messenger of a larger issue. If you must clean or adjust, confirm air and ignition fundamentals first, because the carb’s behavior depends on them.
Deeper misconception: operator technique can make a tune up look like it failed. Choke usage timing, priming technique, and throttle position during start attempts can change mixture delivery. A practical way to verify technique during troubleshooting is to standardize your start procedure while you test changes. If you improve after adjusting fuel or spark, confirm the improvement holds using the same technique before you declare victory.
From a buyer or service shopper perspective, using a “quick checklist before calling” can help you avoid misunderstandings where you authorize work that doesn’t match the symptom category. Helpful starting points for those conversations are covered at quick checklist for repair conversations, and DIY approach notes can be found in DIY troubleshooting tips.
Options & Alternatives to a DIY Tune Up (what to choose and what to expect)
You can get a faster, smoother start in several ways: follow the DIY checklist, request a parts-specific service, or choose full diagnostics from a reputable shop. The best option depends on complexity, your risk tolerance, and whether you need documented verification.
Option one is DIY follow-through using the start-focused decision path. This works best when you can access components safely, follow the manual, and verify results with hot restart and idle stability checks. If you’re organized and can stop when your “pass/fail” criteria are met, DIY can be efficient and cost-effective.
Option two is part replacement/service-only tune. Some owners choose to replace known wear items like the spark plug, air filter, and fuel filter first, then reassess symptoms. This can be reasonable when the engine has straightforward maintenance history, but it becomes less reliable when the symptoms point to intermittent ignition under heat, low compression, or air leaks that require inspection.
Option three is full diagnostics by a small engine shop, which may be the best choice if you suspect compression issues, repeated flooding after verified fuel checks, or damaged wiring you cannot safely repair. When hiring service, ask for documented checks and what was tested. A strong shop outcome includes confirmation tests such as cold start behavior, hot restart behavior, idle stability under load-free conditions, and throttle response consistency.
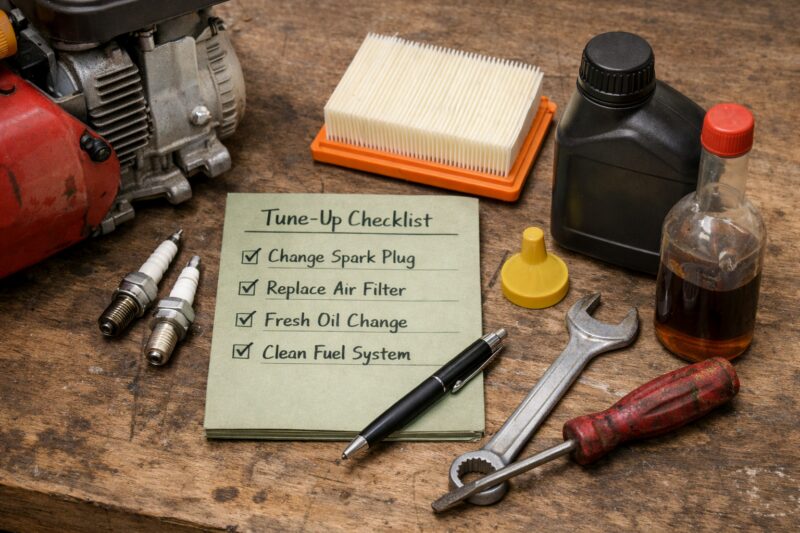
Deeper tradeoffs: a “clean carb kit” approach can be insufficient if the core issue is ignition intermittency or air leakage. Conversely, a shop that only tests spark without confirming fuel stability may miss varnish or float needle sticking. You’re looking for a workflow that matches the symptom pattern—fuel → spark → air → verify, or an equivalent diagnostic order that leads to measurable results.
If you want a way to decide what to ask for, a same-day tune-up checklist and service request workflow can help structure the conversation. For owners who prefer to learn before authorizing work, DIY troubleshooting tips can also support better scoping of the problem.
External references that support safe maintenance and model-specific procedures include: the EPA small engines and emissions guidance for understanding why proper maintenance matters, the Consumer Product Safety Commission guidance on safe tool and engine use for safety principles, and the Outdoor Power Equipment Institute (OPEI) resources for industry-aligned maintenance awareness.
Advanced Considerations & Edge Cases (what most guides miss)
Many guides stop at “clean carb and replace plug,” but advanced edge cases require a more careful interpretation of conflicting evidence. In a real Small Engine Tune Up, the fastest path to a reliable start is using verification checkpoints to separate fuel, ignition, air leaks, and mechanical limitations.
Hard-start edge cases include hot restart failures, intermittent no-start after movement, and starting that improves briefly then regresses. For example, if an engine starts after you prime twice but fails after it warms, that points to heat-soak effects: fuel boiling or vapor lock behavior, ignition insulation breakdown, or air leaks that only appear at operating temperature. Your checklist differentiates these with tests tied to conditions—like trying a restart after a heat soak rather than restarting immediately after adjustments.
Fuel system nuance matters when deciding whether the cause is varnish vs. water contamination vs. a stuck float needle. Residual varnish can partially block jets, causing inconsistent fuel delivery that changes with time and temperature. Water contamination often produces symptoms that correlate with humidity and can improve after fresh fuel and time, but it may still require cleaning. A stuck float needle may present as flooding and wet plugs, but you should confirm float/choke behavior rather than assuming any wet plug means “fuel too rich.”
Ignition edge cases often involve intermittent spark due to heat-soaked cracks, poor grounding that changes under vibration, or cracked insulation in wiring. The mistake most guides make is relying on a spark test once at room temperature. A more reliable approach is to re-test under the same “failed state” conditions and verify the plug sign and fuel behavior together. If your plug is repeatedly wet after verified fuel delivery and choke/float function checks, ignition intermittency becomes more likely.
Carb/mixture adjustment concerns: avoid adjusting until air baseline is verified. If the air filter is restricted or an intake seal leaks, mixture adjustments can “chase” symptoms that are not actually mixture-related. If you must adjust, make small changes and re-verify idle stability and hot restart behavior, not only immediate start success.
What most guides get wrong is interpreting conflicting evidence without a decision framework. For instance, a plug that looks lean may still coincide with a fuel line that is clear, but an air leak can pull the mixture lean. Instead of one-off readings, rely on the checklist verification checkpoints: hot restart test, idle stability, and throttle response under load-free conditions. If those pass and symptoms persist, it may shift toward mechanical issues and compression suspicion.
Frequently Asked Questions About Small Engine Tune Up
What should be included in a Small Engine Tune Up checklist?
A solid Small Engine Tune Up checklist includes fuel system checks (line/filter/shutoff and carb bowl behavior where applicable), spark/ignition checks (plug condition, correct gap, boot integrity, and grounding), and air checks (filter and intake sealing). It should also include basic maintenance items like oil level/condition and cooling airflow, plus safety and verification tests such as cold start and hot restart confirmation.
How often should I do a Small Engine Tune Up for better starting?
For many owners, a scheduled check is practical at least once per season, but symptom-triggered tune ups are often more efficient. If the engine sits unused, has difficult hot restarts, or begins surging/rough idling, you should perform the start-focused workflow rather than waiting for the next seasonal interval.
Why does my small engine start faster when cold but not when hot?
Cold-first starting often points to heat-soak behavior such as fuel boiling/vaporization changes, an air leak that opens with temperature, or ignition intermittency that only appears once components warm up. A start-focused tune up confirms this with a hot restart test after the engine has been sitting at operating temperature and then compared against cold start behavior.
Can a dirty carburetor cause hard starts even with new fuel?
Yes. Even with fresh fuel, residual varnish or deposits can remain in narrow passages, and a sticky float needle can cause flooding or inconsistent bowl levels. That’s why the fuel checklist verifies more than “fuel freshness,” including float/choke function and carb bowl passage cleanliness where accessible.
What spark plug gap is correct after a Small Engine Tune Up?
Use the manufacturer’s specified gap for your specific model and plug part number, not a generic number. Installing the wrong gap (or the wrong heat range) can cause intermittent or hard starting, particularly under certain temperatures, so confirm the model number and follow the manual’s guidance.
Should I replace the air filter before I tune the carb?
In most start-focused workflows, yes—because air restriction changes the mixture baseline and can make carb behavior look like a fuel problem. Replacing or verifying the air filter and checking intake sealing first helps you tune with meaningful baseline conditions instead of chasing symptoms.
How do I know whether I need a tune up or full engine repair?
If you complete fuel, spark, and air checks with verification (cold start, hot restart, idle stability), and the engine still fails to start reliably, escalation is appropriate. Stop rules include signs of low compression, repeated flooding that persists after float/choke checks, or damaged wiring/fuel leaks that create safety risk or cannot be resolved with safe tune-up actions.
What are the most common mistakes during a Small Engine Tune Up?
Common mistakes include replacing parts without diagnosing symptom patterns, using generic mixture or idle settings, and over-disassembling carbs without tracking diaphragms and small components. Another frequent error is changing maintenance items in the wrong sequence and then misreading how symptoms changed, which defeats the verification checkpoints.
Where can I find the right parts and settings for my specific model?
Use your engine or equipment’s manual and model number to confirm the correct plug type/heat range, air filter specification, and any carb settings baseline. Matching parts matters for compatibility and thermal behavior, so confirm the part number and not just the plug appearance.
Long-tail: What should I check if my mower starts then dies right away?
Check whether fuel delivery is consistent (fuel line/filter/shutoff), verify choke and idle circuit behavior (including float function where applicable), and inspect for intake air leaks or a restricted air filter. Also re-check spark plug condition and whether the plug is getting fouled quickly, then verify the restart procedure matches the manufacturer’s guidance.
Long-tail: How do I troubleshoot a small engine that cranks but won’t fire?
Use a systematic fuel → spark → air → mechanical approach. If fuel is present, verify spark plug condition and boot integrity, confirm intake airflow is not restricted and there are no obvious vacuum/intake leaks, and if all those pass while symptoms persist, escalate for compression testing or professional diagnostics.
Conclusion (planning notes — no H2)
A Small Engine Tune Up for faster, smoother starts works best when it follows a start-focused workflow: diagnose first, then execute fuel, spark, air, and maintenance checks in a deliberate sequence with verification checkpoints. This approach reduces wasted parts and turns troubleshooting into measurable outcomes you can confirm with cold start and hot restart behavior.
Commercial value in 2026 comes from fewer “guess-and-replace” loops. If you use the checklist and stop rules, you’ll know when to escalate—such as suspected low compression, repeated flooding after confirmed fuel control checks, or ignition problems that appear only under heat. For your best results, always validate settings and parts against the manufacturer manual before changing gaps, mixture, or idle targets.
If you’re hiring service, request documented verification: cold start + hot restart behavior, replaced components list, and what systems were tested. And for ongoing ownership, pair this start system workflow with a broader maintenance rhythm like small engine maintenance planning and checklists so reliable starts remain consistent rather than occasional.
Updated May 2026