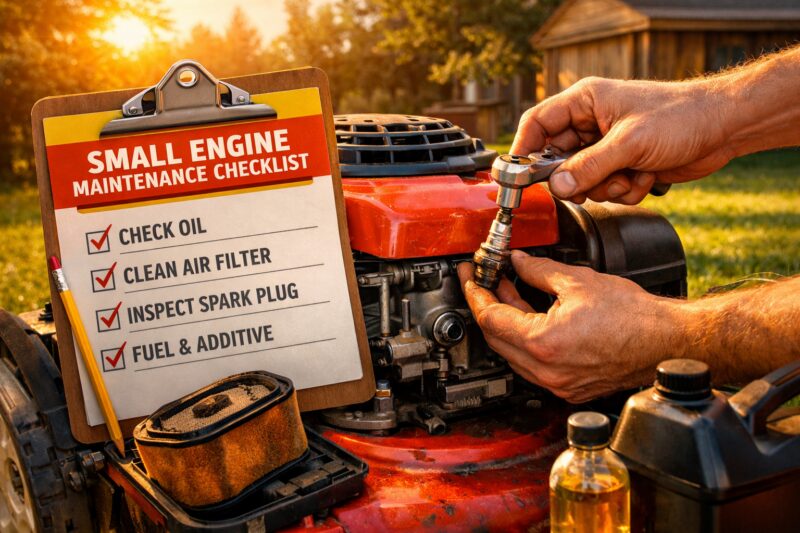
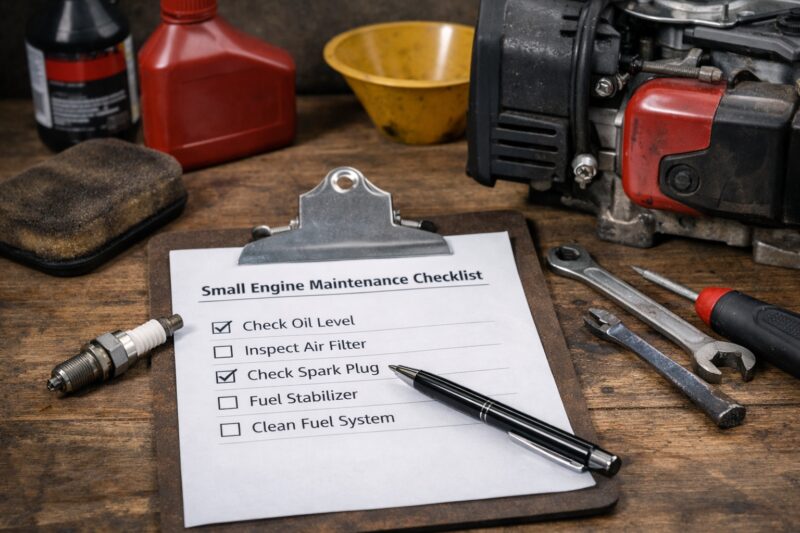
Small Engine Maintenance checklist helps you get reliable starts and reduce wear by systematically checking the basics that most hard-start problems come from: fuel, air, spark, oil, and cooling. In practice, consistent Small Engine Maintenance means fewer no-starts, smoother running, and longer service intervals because small neglected issues don’t compound into expensive repairs.
Wear is often caused by “neglected basics,” such as old or contaminated fuel, restricted airflow, weak or inconsistent spark, incorrect lubrication, or cooling airflow blocked by debris. The checklist below is repeatable for common small engines—lawn equipment, trimmers, blowers, and small generators—and it’s written to be safe and practical with minimal tools and without unnecessary disassembly. If you’re working on equipment, confirm the exact procedures, torque specs, and fuel/oil requirements in your owner’s manual.
This guide uses a systems approach so you can stop guessing: fuel system health, air filtration, ignition readiness, lubrication, and cooling. You’ll also learn how to avoid common “parts swapping loops,” where symptoms that look like carburetor problems are actually caused by stale fuel interacting with a clogged filter or a failing primer bulb.
Top 10 Questions About Small Engine Maintenance Checklist for Reliable Starts and Less Wear: What It Does, What to Expect, and How to Use It
A Small Engine Maintenance checklist does two things at once: it lowers the chance of hard starting and reduces internal wear by keeping fuel delivery, air intake, spark delivery, lubrication, and cooling within the conditions the engine was designed to run. When you follow it consistently, you prevent the common scenario where a minor neglect turns into repeated crank attempts, flooding, carbon buildup, or overheating.
The reason it matters right away is simple: small engines do not forgive “almost right” inputs for long. If fuel is stale or the tank vent isn’t flowing, the engine can run poorly or fail to start. If airflow is restricted by an incorrectly seated filter or wrong orientation, the mixture shifts and can cause flooding or rough idle. If cooling airflow is blocked, you may see a pattern of starting cold and failing hot, which accelerates wear and can damage components even though the engine seems “fine” for the first few minutes.
This checklist is intended to be repeatable across common equipment: push mowers (typically 4-stroke), string trimmers and blowers (commonly 2-stroke), and small generators (often 4-stroke). It emphasizes safety and tool discipline: you should inspect what you can reach safely, use basic checks before opening housings, and stop when the manual or your experience level indicates the risk is too high. For deeper maintenance (carburetor service, compression tests, or electrical diagnostics beyond simple checks), you’ll get more consistent outcomes by using a professional workflow.
To keep the process efficient, you can think of your routine as a “DIY troubleshooting checklist” you execute before escalating. That means you start with the checks that prevent wasted effort: fresh fuel discipline, air path verification, spark readiness, and correct lubrication and cooling airflow. If you’re tempted to jump straight to carb adjustments, pause and use the ordered diagnostic path in this article so you don’t replace parts repeatedly without confirming the root cause.
Sources that support these system-based principles include U.S. EPA guidance on small engines and emissions-related maintenance practices and Briggs & Stratton’s owner resources and maintenance guidance. For carburation and small-engine operating concepts, Honda’s small engine maintenance resources are also useful references when your equipment model is brand-matched.
Small Engine Maintenance: What to Inspect Before You Start (Checklist Overview and Before-First-Start Sequence)
Before you even pull the starter cord, inspect the basics that control starting: fuel availability, air restriction, ignition readiness, correct controls setting, lubrication level, and cooling airflow. Doing this in a fixed sequence reduces the number of variables you’re fighting, which is the fastest route to reliable starts and less wear.
The purpose of the checklist is to reduce system interactions that create hard starts and premature wear. Small engines can be sensitive to fuel quality, tank venting, filter restriction, spark plug condition, and oil or fuel-oil ratio accuracy. When you maintain each system and keep them consistent, you reduce the “compounding errors” that happen when multiple small issues stack up at once—like stale fuel plus a partially clogged air filter producing symptoms that look like a carburetor failure.
Use a before-first-start sequence every time: first do a visual inspection, then confirm controls and choke/primer positions, then check filters and air intake seating, then verify fuel line routing and primer bulb integrity (if equipped), and finally verify spark plug wire boot connection and basic fuel delivery behavior. This doesn’t require disassembling the engine. In most cases, “inspect” means looking for cracks, loose hoses, clogged intake openings, missing gaskets or spacers, and incorrect filter orientation—things you can identify without opening the carburetor or removing the flywheel.
A helpful nuance: inspecting doesn’t always mean disassembling. Many no-start problems can be identified by safe checks such as confirming the primer bulb returns properly, tank cap vents are unobstructed, fuel filters aren’t cracked or blocked, and the spark plug boot is firmly attached. Also, some faults are system interactions: a restricted air path can make a fuel problem look worse, and a weak spark can cause fuel-wet plugs that mimic flooding.
Set pass/fail criteria so you know when to stop. For example, if you see fuel actively leaking from a hose or fitting, stop and correct that before attempting starts. If the filter is damaged, missing, or incorrectly seated, correct it rather than continuing to crank. If you’re unsure where the problem lives after basic checks, consider using a “before you call repair” approach so you document observations and avoid unnecessary service charges caused by incomplete diagnostics.
Fuel System Maintenance for Easier Starting and Less Internal Wear (Freshness, Ethanol, Storage, and Delivery Checks)
Fuel system maintenance improves starting by ensuring the engine receives the right fuel in the right condition, at the right time. When fuel is fresh and delivery is consistent, you reduce flooding, lean hesitation, varnish buildup, and the internal wear associated with repeated no-start attempts.
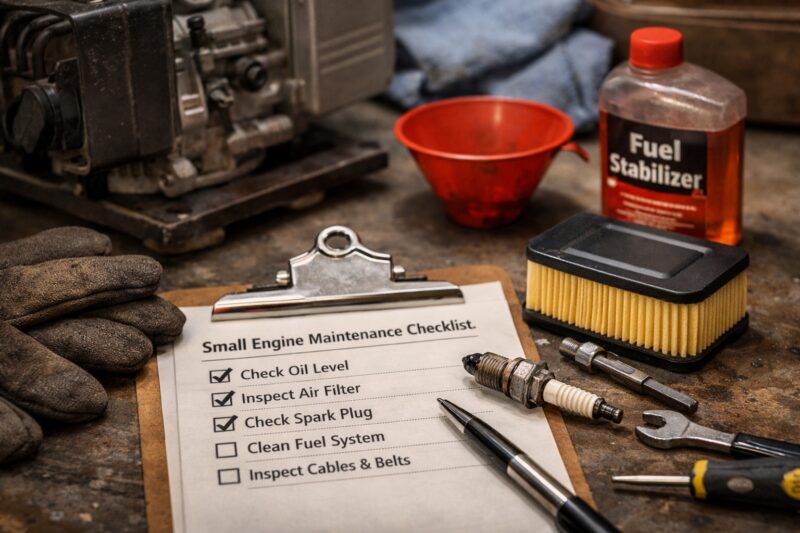
Fuel matters because gasoline quality changes with time and temperature, and ethanol blends can accelerate phase separation under certain storage conditions. Old fuel can cause hard starts, surging, stalling, and “starts then dies” patterns as the engine briefly runs on fuel that degrades during the startup process. Ethanol also increases sensitivity to storage: residue and deposits can form that restrict jets or foul small passages, leading to recurring symptoms that seem carburetor-specific even when the root cause is the fuel.
Practical checks include inspecting tank cap venting (a blocked vent can prevent fuel flow), checking for fuel filter condition and any visible line cracks, verifying primer bulb behavior on models that use priming, and observing carburetor bowl drainage behavior where applicable. If your equipment has a fuel shutoff valve, confirm it returns fully to the run position. Where you can access safely, ensure hoses are routed correctly and not kinked or rubbing on covers.
Use a decision framework for fuel treatment versus replacement. Fuel stabilizer is appropriate when the fuel is still serviceable and you’re storing within reasonable limits for the season and climate. However, stabilizer is not a cure-all for severely degraded fuel—if the fuel smells sour, appears contaminated, or has sat long beyond what the manual recommends, replacement is often the better choice. A useful real-world scenario: if an engine starts briefly after priming but dies after you open the throttle, stale fuel combined with an airflow restriction can be the culprit; in that case, replacing fuel and addressing the intake path first is usually more effective than immediately cleaning jets.
Seasonal strategy in 2026 is moving toward “planned storage,” not set-and-forget. That means you reduce varnish/gum risk by managing fuel freshness, keeping vents functioning, and preventing long stagnant periods with fuel that has already begun to degrade. If you store equipment for months, follow the manufacturer’s storage guidance for draining or stabilizing. If you want to align your workflow with dependable repairs and parts compatibility, “choose right repair service” by bringing a short fuel history (type of fuel used, approximate storage duration, stabilizer use, and symptoms) so technicians can diagnose faster.
Air, Filtration, and Intake Checks That Prevent Rough Starts (Restriction, Seating, and Correct Cleaning Limits)
Air and filtration maintenance prevents rough starts by ensuring the engine can draw the correct air amount for proper fuel-air mixture. When the intake is restricted or the filter is mis-seated, the engine may flood, hesitate, or surge because the mixture becomes inconsistent.
How it works is straightforward: small engines meter fuel based on air intake and internal airflow paths. If the air filter is clogged or installed incorrectly, the engine receives too little air relative to fuel delivery, which can cause rich running (fuel-wet spark plug condition, difficult starting, and uneven idle). Conversely, an air leak at the intake manifold or incorrect reassembly after filter cleaning can introduce unmetered air, leading to lean hesitation and unstable idle.
In practical terms, inspect intake openings for debris, verify filter seating, and decide between cleaning and replacement based on condition. Look for missing gaskets, spacers, or seals. Confirm the filter orientation matches the design (some foam elements must face a particular direction, and paper elements must seal fully). If you’ve cleaned a filter recently, ensure you reinstalled it correctly—one small misfit can create chronic hard-start behavior or surging.
A deeper insight many guides miss is that “cleaning” can damage filtration effectiveness. For foam filters, aggressive solvent soaking, damaging heat exposure, or over-oiling can reduce filtration quality and alter flow. If the filter media looks degraded, has tears, has hardened, or no longer seals, replacement is safer than repeated “revive and reinstall” attempts. Also remember that blower and trimmer intakes can collect grass dust and fine debris quickly; if you maintain less frequently in dusty conditions, starting issues will appear sooner.
When you’re building your workflow, include air checks early in your diagnosis because air restrictions are a frequent contributor to hard starts that get misdiagnosed as carb failure. If you’re also dealing with service options, a “same-day tune-up checklist” can help you structure what a tech checks first (filters, air leaks, spark, and fuel delivery behavior) so you don’t spend time on deep carb work unnecessarily.
Spark, Ignition, and Compression Considerations for Reliable Starts (No Spark vs Spark but No Firing)
Spark and ignition readiness are critical for reliable starts because without proper spark at the correct time, fuel cannot ignite consistently. Even with good fuel and airflow, a worn plug, faulty switch, or failing ignition component can produce no-start symptoms that mimic carburetor problems.
Spark plug condition is your fastest ignition clue. Inspect for correct gap, intact insulation, and signs of fouling. Fuel-wet plugs suggest rich flooding or poor combustion, oil-fouled plugs often point to lubrication ratio issues (especially 2-stroke), and heavy carbon deposits may indicate mixture problems or incomplete combustion. The kill switch and wiring/boot integrity matter too: a loose spark plug boot or damaged wire can reduce or interrupt spark under vibration or load.
Decision criteria for cleaning vs replacing: if the electrode is badly worn, the insulator is cracked, or the plug has repeated fouling, replacement is typically the better investment than repeated cleaning. For models that have access to coil/ignition components only with partial disassembly, limit yourself to safe inspections (wiring, connectors, visible damage) unless the manual authorizes further work. Also check that the safety interlock is behaving correctly; recoil systems and operator controls can prevent starting when bound or misaligned.
Add compression awareness without going too deep. If an engine has consistent difficult starts plus performance drop, it could indicate intake leaks or mechanical wear. However, if you cannot confidently confirm intake leak sources safely, stop and consult the manual or a technician. A common misdiagnosis is assuming “carb” when the root cause is “spark but not firing” due to weak ignition energy or timing constraints. Distinguish symptoms: no spark often produces consistent failure regardless of fuel condition, while spark present with wet plugs often suggests fuel-air imbalance or flooding.
To keep troubleshooting efficient and avoid parts-swapping loops, use symptom-based sequencing. If the spark plug is wet but ignition components appear intact, prioritize air and fuel system checks before deeper ignition changes. If the spark plug is dry and you still get no fire, you may need to address ignition readiness and fuel delivery behavior together. If you’re aiming for predictable outcomes, documenting your observations aligns with the way pros approach diagnostics when you “before you call repair.”
Oil, Lubrication, and Cooling Maintenance to Reduce Wear Over Time (4-Stroke Oil Level, 2-Stroke Ratio, Heat Management)
Oil, correct lubrication, and cooling maintenance reduce wear by ensuring internal components run with proper film strength and temperature control. Reliable starting is also affected because incorrect oil levels or incorrect 2-stroke ratios can change combustion behavior, contribute to fouling, and lead to hard starting patterns.
For 4-stroke engines, check correct oil level and the correct viscosity selection for the operating season. Overfilling can cause oil foaming and can affect starting and lubrication performance. Underfilling reduces protection, increasing wear risk. For 2-stroke engines, maintain the exact oil-to-fuel ratio specified by the manufacturer; wrong ratios change deposit formation and can foul spark plugs or cause inconsistent combustion. A common real-world scenario is seasonal confusion: using an inappropriate mixture or a different brand oil than specified can lead to repeated “starts cold, runs rough” behavior that improves only after the mixture is corrected.
Cooling maintenance is often overlooked until problems appear. Clean fins and clear debris around shrouds, confirm fan/vent paths aren’t blocked, and verify airflow during operation. If cooling is obstructed, you can see a pattern where the engine starts fine when cold but fails hot. That “it works until it warms up” behavior may also overlap with fuel delivery issues (vapor formation, venting problems), but you can differentiate by checking airflow pathways and debris buildup before chasing carb adjustments.
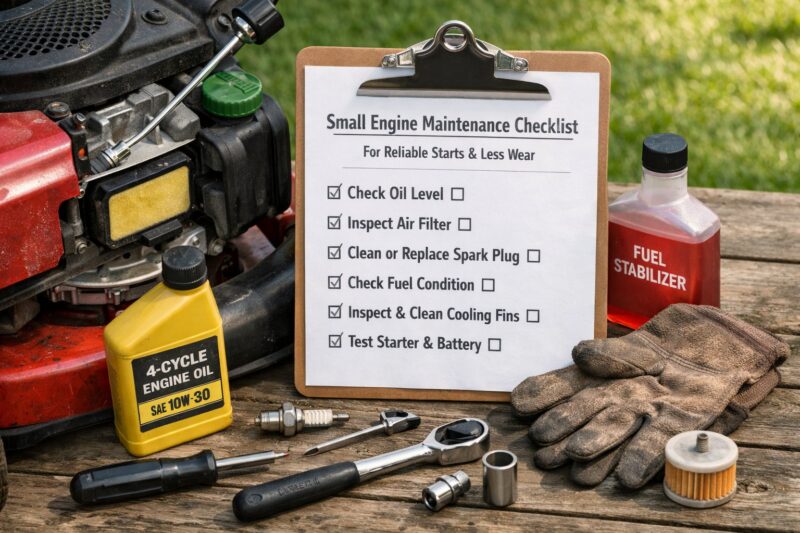
Use service interval guidance tied to hours and use conditions rather than calendar date alone. Dusty environments, heavy load, and extended runtime demand more frequent inspection of air and cooling paths. Also, verify that the engine is operating with its shroud and cover correctly installed; missing or misaligned components can disrupt cooling airflow even if the engine otherwise looks fine.
A deeper insight: clogged cooling can mimic fuel problems because overheating affects combustion consistency, which can foul plugs and worsen starting. So cooling is not just long-term protection—it’s also a near-term reliability multiplier. If you prefer to compare approaches, the maintenance options section later in the article explains when DIY checks are enough and when a professional diagnostic prevents repeated downtime.
A Systematic Start-and-Run Diagnostic Path (Process, Not Guesswork)
A systematic start-and-run diagnostic path prevents guesswork by mapping symptoms to the most likely maintenance checks first, then moving to targeted tests only when the evidence supports it. This saves time, avoids repeated parts replacement, and reduces wear from repeated cranking on the wrong assumptions.
Start by identifying the symptom pattern: won’t start cold, won’t start hot, stalls under load, surges at idle, bogs on throttle, or dies after priming. Then follow an ordered checklist: fuel freshness and delivery behavior, air path and filter seating, spark plug condition and boot integrity, then lubrication and cooling airflow checks. The ordering logic matters because it minimizes wasted effort. For example, if a clogged filter and stale fuel both contribute, addressing only one can still leave the engine struggling and you may incorrectly conclude a carburetor overhaul is required.
Use pass/fail observations to decide what to do next. “Pass” examples include: the filter seals correctly with no air leak signs; the tank vent isn’t blocked; the spark plug shows a consistent pattern after a controlled start attempt; and fuel is present at the expected delivery stage. “Fail” examples include visible fuel leaks, damaged hoses, missing gaskets, repeated flooding despite correct controls, or signs that safety interlocks are preventing starting. If any fail condition indicates a safety risk, stop and correct before continuing.
A common mistake is the parts swapping loop: replacing carb components repeatedly without confirming fuel delivery, air sealing, and ignition readiness. When you change multiple components, you lose your diagnostic signal. Instead, treat each checklist category as a gate: address what’s most likely and most observable first, then proceed. This method is also useful when coordinating service; technicians respond well when your notes include the exact observations from each category, which supports a “choose right repair service” conversation based on evidence rather than guesswork.
If you want a structured routine you can reuse, think of this as your personal “DIY troubleshooting checklist” that you run in the same order for every symptom. That consistency helps you notice patterns over time—like the same hot-start failure after dusty season, which often points to cooling airflow blockage or fuel vapor issues rather than a random carb problem.
Common Mistakes and Misconceptions in Small Engine Maintenance (Carb Myth, Fuel Errors, and DIY Damage)
Most hard-start problems are not solely a carburetor issue, and misunderstanding that leads to avoidable mistakes and additional wear. A strong Small Engine Maintenance routine starts with the premise that fuel, air, spark, oil, and cooling all interact—so you must check them in a logical order.
One misconception is: “If it won’t start, the carburetor is always the problem.” Evidence-based troubleshooting often shows alternative causes first. For example, stale fuel can cause short-lived running, and a restricted filter can create rich symptoms that look like jet blockage. A weak spark can produce fuel-wet plugs too, confusing the diagnosis. Another misconception is that “adding a stabilizer” fixes severely degraded fuel; it may help if the fuel is still in good condition, but it doesn’t reverse varnish formation once deposits have already started.
Common DIY pitfalls include using wrong fuel types, improper storage, over-oiling air filters, damaging seals during cleaning, and mis-torquing fasteners. Over-tightening can warp covers or distort mating surfaces, creating chronic air leaks that cause unstable idle or persistent hard starts. Another frequent error is ignoring wiring/control issues like kill switch behavior, primer bulb line routing, or loose spark plug boots—these can prevent starting entirely even if the carb is clean and fuel is fresh.
What most guides get wrong is the implied sequence. Many instructions jump into carb cleaning without first confirming fuel delivery behavior, airflow restrictions, and spark plug condition. That can waste time and increase risk. If you find yourself tempted to repeatedly clean or adjust without stable diagnostic results, pause and use a structured “before you call repair” approach: confirm which maintenance category is actually failing, then escalate only when the evidence points there.
When you’re choosing a maintenance approach in 2026, the goal is fewer interventions, not more. Small corrections done consistently—proper fuel discipline, correct filter fit, correct oil or mixture ratio, and cooling airflow management—prevent the need for deeper repairs. If you want help deciding what’s appropriate to DIY versus leaving to service, the upcoming alternatives section covers risk, time, and warranty considerations.
Maintenance Options and Alternatives: Tune-Up Approaches That Fit Your Equipment
You have three practical routes for Small Engine Maintenance: a DIY checklist-based routine, periodic professional tune-ups, or a hybrid approach where you do the routine checks and let a pro handle calibration, deeper diagnostics, or carb service when needed. The “best” choice depends on your time, your equipment type, and how often you use it.
DIY checklist-based servicing is strongest for repeatable, evidence-driven tasks: fuel freshness discipline, air filter inspection and correct seating, spark plug inspection, basic oil/mixture verification, and clearing cooling airflow paths. This route improves reliability because you reduce variables early, before problems compound. It also helps you learn patterns: if you always see trouble after dusty work, your intake cleaning cadence likely needs adjusting more than any carb adjustment.
A professional tune-up is most valuable when symptoms persist after basic checks or when the job requires tools or adjustment authority you don’t have. Pros can verify fuel delivery behavior under conditions, check for air leaks that are hard to spot visually, and diagnose ignition output beyond plug appearance. If you run equipment commercially, or you simply want to minimize downtime, professional service can be the most predictable option.
A hybrid approach is often the most efficient: do the routine “systems” checks yourself, then bring the equipment to a shop when diagnostics indicate deeper work. In that situation, having your observations ready supports faster service and reduces misdiagnosis—especially if you can share what you inspected first and what “passed” versus “failed.” If you want to compare shop versus DIY decisions, reference your notes with guidance like “same-day tune-up checklist” style expectations (filters, spark, fuel delivery behavior) so you can choose what you’re asking for.
Tradeoffs: DIY can increase downtime if you need parts, wait for shipping, or risk misassembly that creates new problems. Professional service costs more but can reduce trial-and-error. Also consider warranty and design constraints: some modern engines have emission or design features that limit what you can safely adjust or disassemble.
When your situation is high-stakes—like repeated failures close to a seasonal deadline—use the “choose right repair service” mindset. Look for a shop that focuses on diagnosing the system interaction rather than charging for default parts replacement.
Advanced Edge Cases: When the Checklist Isn’t Enough (Storage Flooding, Persistent Hot Starts, and Safety Stop Points)
Some small-engine failures go beyond a basic checklist—especially after prolonged storage, persistent flooding, repeated pull-start failures, fuel leaks, or unusual exhaust/odor patterns. In these cases, you need stricter boundaries for what you can safely adjust and when to stop and seek service.
Edge cases often involve compounding effects. After prolonged storage, fuel varnish can block small passages, primer systems may not function as expected, and air leaks may develop where seals have aged. Persistent flooding despite correct controls can indicate a fuel delivery problem or a primer/check valve behavior issue. Unusual exhaust or strong fuel odor can suggest severe mixture imbalance or a safety-relevant fuel leak.
Calibration/adjustment boundaries matter. You can usually verify controls movement and confirm basic idle where the manual allows, but you should not “chase symptoms” by randomly changing settings. If the equipment has manufacturer-specific emissions calibration limits, leaving adjustments out of spec can worsen running and create repeat failure. Use your owner’s manual for allowable adjustments, and if you don’t have the correct procedure, don’t improvise.
When symptoms point to multiple systems, troubleshooting must be more disciplined. For example, “lean air leaks + spark plug changes” can confuse diagnosis because a modified plug can temporarily improve starting while a leak still causes unstable idle. Stop points should include tasks that add significant risk: compressed-air testing beyond basic leak checks, fuel system hose replacement without correct parts compatibility, and any electrical insulation work that could create shock or fire hazards.
In 2026, more equipment includes emissions-related design constraints and system integration that changes what “safe DIY” looks like. If your checklist steps don’t resolve the issue and the engine repeatedly fails hot or floods, switching to a professional diagnostic path is often the quickest way to prevent further wear and avoid additional damage from extended cranking.
If you’re deciding whether to escalate, ask yourself whether you can confidently demonstrate evidence of the system that fails. If you cannot, use “before you call repair” to summarize the symptoms, your maintenance timeline, and which checklist categories you tested so the technician can focus on root cause rather than redoing basics.
Frequently Asked Questions About Small Engine Maintenance for Reliable Starts
How often should I do Small Engine Maintenance to prevent hard starting?
Do routine Small Engine Maintenance checks before each season and after heavy dusty use, then verify key basics like filters, spark plugs, and fuel quality on a regular cadence based on hours. If your equipment sees frequent starts and short runtime, inspect more often because fuel and air paths change quickly under real-world conditions.
What are the first things to check when a small engine won’t start cold?
Start with the easiest, safest checks: correct choke/primer/control positions, fuel freshness and delivery behavior, and air filter seating and condition. Then inspect spark plug condition and confirm the spark plug boot and kill switch wiring are secure.
Can stale fuel cause a small engine to start then die?
Yes. Stale fuel can allow brief ignition during startup, but the engine may die as fuel degrades further or as varnish restricts consistent delivery. If you see recurring “starts then dies” behavior, replacing fuel is often more effective than immediately cleaning carb parts.
Do I need to replace the air filter or just clean it for reliable starts?
Replace the filter if it’s damaged, has hardened media, or can’t seal correctly, because leaks and restriction are common causes of rough starts. Clean foam filters only within the manufacturer’s limits; aggressive cleaning can reduce filtration effectiveness even if the filter looks “clean.”
How do I tell if the spark plug is fouled from fuel or oil?
Fuel-wet fouling often looks soaked and indicates rich conditions or flooding, while oil-fouled plugs often suggest incorrect lubrication or mixture ratio (especially on 2-stroke engines). Carbon-heavy plugs can indicate incomplete combustion from mixture problems, so pair the visual reading with fuel, air, and oil checks.
What’s the difference between 2-stroke and 4-stroke Small Engine Maintenance?
2-stroke engines require correct oil-to-fuel ratio, and wrong ratio can cause deposit buildup and difficult starting. 4-stroke engines require correct oil level and appropriate viscosity; overfilling or underfilling can harm lubrication and starting behavior.
What should I do if my engine starts, but the idle surges or hunts?
Idle surging often points to air leaks, incorrect filter seating, or mixture imbalance. Inspect the air intake seals and ensure the filter and gaskets/spacers are installed exactly as designed before you adjust anything.
Is it safe to use fuel stabilizer when storing a small engine for winter?
Fuel stabilizer is usually appropriate when used with fuel that is still within its serviceable condition and when the manufacturer allows stabilization for your engine. If fuel is already degraded or contaminated, stabilization may not be sufficient and replacement may be necessary.
Why does my small engine fail only when hot, even after maintenance?
Hot-start failures often relate to cooling airflow blockage, fuel vapor formation, or a system that behaves differently as temperature rises (such as venting or delivery path issues). Check cooling fins and shrouds first, then revisit fuel delivery and venting behavior before making repeated carb changes.
Small engine maintenance for dusty conditions—what should I inspect more?
Inspect intake openings, air filters, and cooling fins more frequently because dust clogs airflow paths and increases restriction. Also check for debris around shrouds and fan vents, and ensure the filter is seated properly to prevent unmetered air leaks.
Conclusion: Build a Repeatable Small Engine Maintenance Routine for 2026 Reliability
Reliable starts and less wear come from treating Small Engine Maintenance as a systems routine: fuel + air + spark + lubrication + cooling, checked in a consistent order. When you do the basics well and early, you prevent the interactions that cause hard starts, flooding, surging idle, and overheating patterns.
The key discipline is diagnostic sequencing. Use the symptom-to-check decision path so you don’t fall into parts swapping loops, and use pass/fail observations to decide whether to continue with checklist steps or escalate. Over time, your own maintenance evidence becomes your best guide for what’s failing first on your specific equipment.
For 2026, storage habits and seasonal readiness are especially important. Fuel freshness discipline, correct oil or mixture ratios, heat/debris management, and careful air filter seating often determine whether equipment remains dependable after months of downtime.
Next steps: confirm the exact specs in your owner’s manual, then set a personal checklist cadence based on your usage hours and symptoms. If you want to compare your current routine against a structured service expectation, review your approach by category (fuel, air, spark, lubrication, cooling) and schedule your next service window accordingly.
Optional Comparison Table: DIY vs Professional Maintenance vs Hybrid Approach
If you want a quick way to match your approach to your equipment and time budget, use this decision snapshot.
| Approach | Best For | What You Typically Cover | Main Tradeoff |
|---|---|---|---|
| DIY checklist-based | Homeowners, light seasonal use | Fuel freshness, air intake inspection, spark plug checks, oil/mixture verification, cooling airflow cleaning | Slower resolution if symptoms require deeper diagnostics |
| Professional tune-ups | Commercial use, persistent faults | Thorough system diagnostics, calibration where allowed, carb and fuel system service as needed | Higher cost per service |
| Hybrid (DIY basics + pro diagnostics) | Busy schedules, predictable downtime control | Routine pre-start inspections plus evidence capture for the shop | Requires planning and communication |
If you’re evaluating local service, focus on whether the shop’s process supports evidence-based diagnosis rather than default parts replacement. That’s where “choose right repair service” matters most, especially when symptoms show system interactions like fuel-air imbalance or hot-start cooling issues.
Updated May 2026