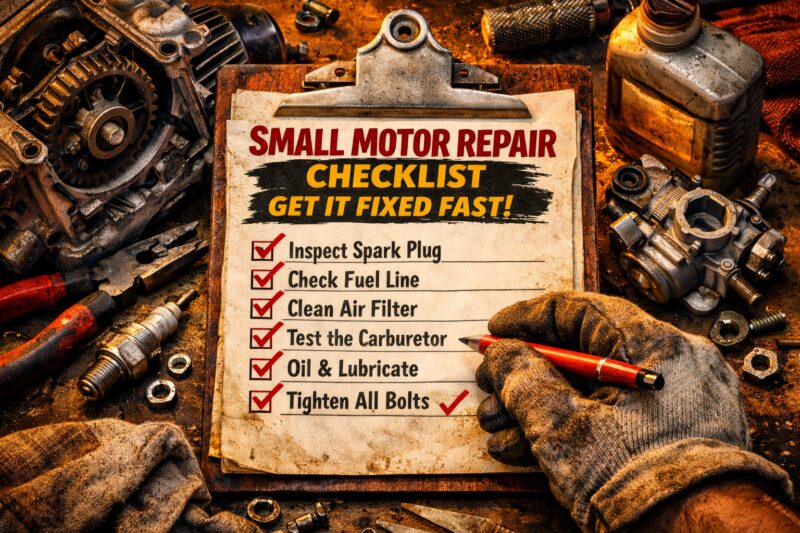
A well-run Small Motor Repair checklist speeds diagnosis, shortens the time to restore service, and reduces repeat breakdowns by forcing technicians to “measure before you replace.” Commercial teams care because downtime costs money, reliability affects production schedules, and documented test results make it easier to justify repairs, approvals, and warranty work.
This checklist is designed for small motors used in common shop and commercial equipment—power tools, pumps, compressors, HVAC accessories, and shop equipment—where the goal is fast, evidence-based triage, not guesswork. It focuses on decision-and-verify workflow: symptom → likely cause → targeted quick checks → repair plan (repair vs replace vs professional service call). It also emphasizes safety gating so the motor isn’t energized when there are signs of electrical arcing, heat damage, or structural failure.
To keep the scope tight, it avoids unrelated DIY electronics and does not rely on full rewind theory. Instead, it gives a practical system for narrowing fault categories (supply/protection, starting components, mechanical binding, and load/system interaction) and turning your observations into documented “go/no-go” actions. If you apply it consistently in 2026, you’ll get faster turnaround today and better repeat-failure prevention tomorrow.
What is a Small Motor Repair checklist, and how does it get jobs fixed faster?
A Small Motor Repair checklist is a structured intake-and-diagnosis workflow that helps you identify the fault category quickly, confirm it with targeted checks, and choose the lowest-risk next action—so repairs finish faster and come back less often. For commercial buyers, it matters because every failed “second attempt” increases downtime, labor hours, and scheduling uncertainty.
At its core, the checklist works like a decision tree. You capture what changed, verify safety conditions, run quick functional tests, then measure key electrical and mechanical indicators that support (or rule out) specific hypotheses. Instead of swapping parts based on guesses, technicians use evidence to confirm whether the issue is primarily electrical (supply/protection or starting components), mechanical (bearing drag, misalignment, rub), or system interaction (blocked airflow, pump head increases, coupling problems).
In practice, this checklist reduces time-to-repair in two ways: it prevents “time-wasting reroutes” (for example, checking supply after replacing a capacitor) and it creates a consistent record for repeat work. The intake log—symptom, timeline, operating conditions, and any prior repairs—lets the second technician (or the same technician days later) reproduce the reasoning quickly. That documentation also supports warranty claims because you can show what was tested and what was measured after repair.
A common limitation is that not every failure can be safely narrowed with quick checks. If you have clear heat discoloration, burning odors, cracked housings, or evidence of arcing, the checklist’s safety gates will push you toward escalation and professional service—because “faster” is not worth the risk of energizing a damaged motor.
Edge case: intermittent failures that only happen after a warm-up period can fool basic “cold checks.” The checklist addresses this by capturing duty cycle, load sensitivity, and start-vs-run behavior so you can plan the right verification window rather than repeatedly pulling parts.
If you maintain other engine-like equipment, you can parallel this approach with a Small engine repair checklist to standardize intake and evidence capture across multiple service categories—helpful when teams manage mixed fleets of shop equipment and outdoor machinery.
Rapid triage checklist before you touch parts: symptom to likely cause
The fastest way to get a small motor repaired is to triage from symptom to likely cause before touching components. A rapid triage checklist helps you stop guessing, narrow the fault category early, and avoid unsafe tests when electrical or mechanical damage is suspected.
Start with the “what changed?” log: capture the exact symptom (won’t start, starts then trips, noisy but runs, weak output, overheat), when it started, any maintenance performed, prior repairs, and the operating conditions (load, duty cycle, environment, ventilation). For commercial equipment, this information is often the difference between a quick fix and a week of re-diagnosis. For example, a pump motor that began failing after a line restriction change may be “electrically normal” but mechanically overloaded by increased resistance.
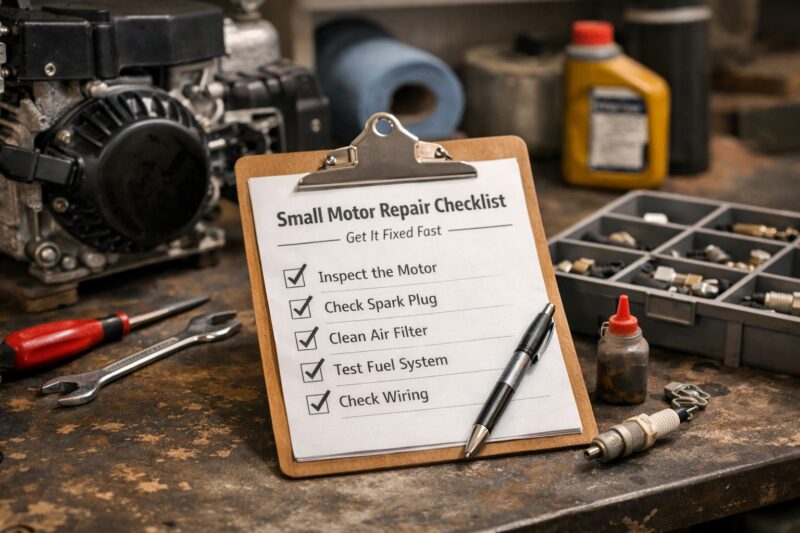
Next, do visual + safety pre-checks. Verify power source status and breaker condition, look for loose or damaged wiring insulation, confirm grounding integrity where applicable, and inspect for moisture ingress, corrosion at terminals, or signs of overheating (heat discoloration, melted insulation, abnormal odors, smoke). The goal is to identify whether the motor can be safely tested, not to complete a full repair at this stage.
Then run quick functional tests that narrow the fault. Use a “spin/drag check” if appropriate and safe, listen for abnormal mechanical binding or grinding, and note start vs run behavior: does it hum only, does it trip immediately, does it start cold but fail when warm, or does it run but with reduced speed/torque? Pay attention to intermittent patterns and load sensitivity. “Starts under no-load then fails under load” suggests supply/control issues may be less likely than overload and mechanical resistance.
Decision gating is essential. Stop early and escalate if you see heat damage, structural cracks, burning smell, melted components, or evidence of electrical arcing. Also stop if tests require unsafe energization or if protective devices suggest ongoing electrical stress. This is not only safety—it’s time protection. Testing a damaged motor can create further failures that complicate diagnosis and increase replacement likelihood.
Deeper-than-obvious routing: “It hums but won’t start” often points toward starting component failure (common in capacitor-based systems) or a supply/protection interruption that prevents the start circuit from energizing. “It starts then trips” often points toward overload, failing bearings increasing drag, weak capacitors that can’t sustain run/start transition, or intermittent supply/control issues. A good checklist routes these categories so you don’t spend time measuring the wrong variables.
To help technicians follow consistent procedures in the field, you can borrow structure from a documented DIY troubleshooting checklist steps workflow that emphasizes safety gating, observation logs, and stepwise verification before parts replacement—then adapt it to commercial standards and test equipment.
Measurements that speed up Small Motor Repair: what to verify, not guess
Measurements speed up Small Motor Repair because they convert uncertainty into evidence. A practical measurement set verifies electrical baseline conditions, starting component health, and mechanical drag so you confirm the root cause before you replace parts.
First, verify electrical baseline checks. Confirm correct voltage at the motor terminals (and not just at the breaker), compare the nameplate rating to the actual supply, and perform continuity/insulation checks where applicable and safe for the equipment type. Incorrect voltage or poor connections can cause symptoms that look like internal motor failure—especially intermittent start problems in commercial environments with long runs or frequent load cycling.
Second, verify starting components and capacitor-related behavior based on symptoms and confirmatory checks. Instead of replacing capacitors immediately, look for patterns: slow starting, hum with no rotation, or start failure that improves intermittently. Use your measurements to identify whether the start component is likely weak or failed, and whether any run capacitors or protective devices are in play. Tradeoff: sometimes tests require equipment or access you don’t have on-site; in that case, the checklist should trigger escalation to a bench test rather than forcing unsupported “part swaps.”
Third, reduce misdiagnosis with mechanical checks. Shaft/bearing drag checks and coupling alignment verification help prevent “electrical-only” assumptions. If the rotor rubs or the coupling is misaligned, current draw and heat rise can mimic electrical faults. For belt-driven configurations, confirm belt tension and general condition only where relevant, because a mis-tensioned belt can increase load and trigger protection trips.
Fourth, use temperature and current verification. With clamp meters/ammeters (and appropriate safety practices), capture current draw during start and during steady run. This helps distinguish overload conditions from internal electrical failure patterns. Real-world scenario: a pump motor drawing higher-than-normal current under load but drawing closer to normal current briefly at start often points to mechanical resistance (impeller drag, clogged inlet, bearing issues) rather than a purely electrical failure.
Deeper-than-obvious: measuring only at rest is a common mistake. Many issues reveal themselves under controlled start/load conditions—like a weak start capacitor that only fails during the start transient. Your checklist should specify when to capture readings safely during start and under known load conditions. When load testing is unsafe or not permitted, the checklist should document why and propose the next safest alternative (like verifying system restrictions upstream or using non-invasive checks).
If you frequently service motors attached to pumps, fans, or compressors, consider documenting how ATV repair reduces downtime logic applies to your workflow: stage parts, confirm with tests, and minimize return visits by “evidence-first” triage that matches the equipment’s operating profile.
Correct diagnosis workflow: from tests to a repair plan (decision path)
A correct diagnosis workflow turns test results into a repair plan by matching symptom categories to a hypothesis shortlist, then confirming with targeted tests and choosing the appropriate action branch. This decision path is how Small Motor Repair avoids repeat trips and reduces labor waste.
Use a structured flow: symptom category → hypothesis shortlist → confirmatory test(s) → repair action category → post-repair verification. The hypothesis shortlist should be evidence-based. For example, if your intake log shows failure after a load change and your current measurement under load indicates overload, prioritize mechanical system interaction checks (coupling alignment, blocked airflow/inlet restriction, pump/fan resistance). If your measurements show supply instability at the motor terminals, shift attention to wiring connections, contactor issues, timers, or control sensors.
Prioritize lowest-risk, highest-information steps first. The checklist should guide technicians to verify supply and controls early because miswired protection circuits and bad connections can masquerade as internal motor defects. Practical application: confirm correct voltage at the motor and inspect terminal integrity before opening the motor housing. This saves time because many “motor problems” are actually upstream.
Define repair-action branches. Typical categories include service/adjust (cleaning, wiring corrections, alignment, restoring airflow paths), replace a specific component (starting component, protective device) when evidence supports it, clean/restore (terminal cleanup, moisture mitigation where appropriate), or escalate to professional overhaul when internal damage is indicated. Each branch should have a “go/no-go” checklist: what must be true after the repair for the job to count as complete—starting behavior restored, current draw within expected range, noise profile acceptable, and no new fault symptoms.
Deeper-than-obvious: the “can’t afford downtime” objection. A checklist helps you stage repairs rather than rush them. For instance, stock common start/protection items for predictable categories, pre-approve replacement thresholds based on evidence strength, and batch similar checks when multiple motors are waiting. Tradeoff: staging may require space and inventory controls, but it usually reduces total downtime because it prevents failed rework cycles.
Edge case: “repair succeeded” but fails quickly after restart. That can indicate you fixed a symptom, not the cause—such as restoring temporary operation without correcting recurring overload from bearing drag or inlet restriction. Your workflow must include post-repair verification thresholds and a final system interaction check.
For technicians who benefit from field-ready procedures, you can also adapt the documentation style from Reliable dirt bike quick checks—the same philosophy of consistent, repeatable verification points can improve outcomes when teams rotate across different shop equipment types.
Common mistakes and misconceptions that delay small motor fixes
Most delays in Small Motor Repair come from misdiagnosis, skipped verification, and documentation gaps. Recognizing common mistakes early prevents replacing the wrong components and reduces repeat breakdowns.
One major misdiagnosis trap is replacing parts without confirming the underlying cause—especially capacitors, bearings, or thermal protectors. If the motor’s symptoms are driven by mechanical drag or airflow restriction, a replaced capacitor won’t stop the overload condition, and the motor may fail again. Practical correction: use your measurement set to confirm whether the root cause category is electrical, mechanical, or system interaction, then replace only what the evidence supports.
Another common delay is overlooking supply and controls. Breaker status is not enough; check voltage at the motor terminals, inspect contactor/timer behavior when relevant, and verify sensors or protection circuits that govern starting sequences. In commercial setups, a timer misconfiguration or intermittent contactor can produce “motor failure” symptoms that disappear when the load changes or when the control cabinet is reseated.
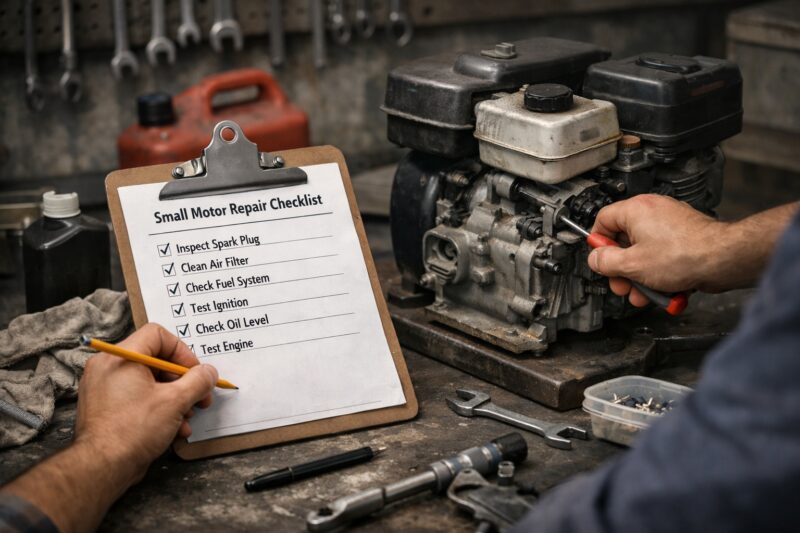
Mechanical causes are also frequently underestimated. Teams sometimes assume electrical failure because the motor is the visible component. But misalignment, blocked airflow, clogged pump inlets, or a changed load can create overload current draw patterns and heat rise that look like internal failure. Tradeoff: deep mechanical troubleshooting can take time; however, the checklist helps decide when mechanical evidence is strong enough to prioritize those checks over opening the motor.
Skipping documentation is a repeat-failure accelerant. Without a symptom timeline, measurement notes, and repair rationale, the second attempt loses the reasoning path. Commercial customers often need that record for internal approvals and vendor warranty discussions. The checklist’s intake log and post-repair verification requirements address this directly.
Deeper-than-obvious nuance: “new part installed” does not mean “root cause corrected.” A repeat failure can indicate the new part is being stressed by the original issue (recurring overload from bearing drag, miswired protection circuits, or airflow restrictions not restored). The checklist should include a verification threshold beyond “it started”—for example, confirming current draw range and noise profile during steady run, and ensuring upstream system conditions are back to normal.
Common mistake in the field: technicians rush to energization tests after a suspected internal failure without safety gating, which can worsen damage and extend repair time. The checklist prevents this by using visual and odor/heat evidence to decide when to stop and escalate.
Repair options and alternatives: fix vs replace vs outsource
Choosing the right Repair option—repair, component replacement, bench service, replace, or outsource—depends on evidence strength, damage severity, downtime cost, and parts availability. This decision framework helps Small Motor Repair jobs finish faster by avoiding unnecessary internal disassembly or last-minute sourcing.
Category 1 is on-site or component-level repair. This typically includes cleaning, restoring wiring correctness, replacing starting/protective components when evidence supports them, and adjusting alignment or airflow paths when those are the root cause. This category is best when symptoms indicate an external or accessible fault and when post-repair verification can be performed immediately.
Category 2 is shop bench repair. Complex faults may require internal inspection, controlled testing, bearing service, or component-level replacement that cannot be safely or reliably done in-place. The checklist should trigger bench escalation when you see internal evidence (significant heat damage, repeated protection trips with confirmed supply health, or suspected component breakdown that can only be validated on test equipment).
Category 3 is replace with an equivalent unit. Replacement is appropriate when the motor is damaged beyond economical repair, when lead times are shorter than shop turnaround, or when safety risks exist (cracked housings, extensive burn marks, or evidence of internal arcing). Compatibility checks matter: match voltage, duty type, mounting/shaft compatibility, and protective ratings. Practical application: document the motor nameplate and verify the system requirements before ordering to avoid downtime caused by mismatched specs.
Category 4 is outsource specialty service such as overhaul or rebuild—used selectively when it’s cost-effective and when the provider can meet turnaround expectations. Evaluate credibility using clear evidence-based diagnosis, documented measurements, and explicit turnaround commitments. Tradeoff: outsourcing may be slower, but it can be the best choice for motors where replacement lead times are unpredictable.
Deeper-than-obvious decision criteria the checklist should capture include total downtime cost, warranty requirements, evidence strength (what you measured and why), parts lead time, and whether the repair addresses the root cause or only restores temporary operation. Real-world scenario: a pump motor that repeatedly trips after a “capacitor-only” fix is a sign the repair likely addressed a symptom. The checklist helps you decide whether the next step is bearing service, system restriction correction, or replacement.
To help internal stakeholders approve faster, ensure your repair plan includes a go/no-go summary: what must be true after the repair for it to be considered complete and what happens if those criteria aren’t met within a defined verification window.
Advanced considerations for reliable Small Motor Repair in real world conditions
Reliable Small Motor Repair in 2026 depends on accounting for duty cycle, environment, and load/system interactions—not just the motor itself. Advanced checklist steps prevent “it worked in the shop” failures that show up after hours or days of real operation.
Duty cycle and environment change how faults present. Intermittent duty can mask problems that only occur during extended run time; dust and moisture can contaminate terminals and degrade insulation; temperature extremes can affect starting component performance. A strong intake log should record environment conditions (humidity, wash-down exposure, airborne dust), operating intervals, and whether the motor is frequently started under load.
Load and system interaction is another advanced factor. Motors attached to pumps and fans can fail “electrically” because the system has shifted: a blocked inlet increases load, a coupling is misaligned, the pump may be cavitating, or airflow restrictions can raise operating temperature. The checklist should include a system verification step: confirm that inlet/outlet paths are clear, that valves are set correctly, and that the connected equipment’s resistance hasn’t changed since the last maintenance cycle.
Warranty and repeat-failure prevention require documentation that goes beyond a part invoice. Record test measurements before and after repair, note the symptom timeline, and include post-repair verification thresholds—such as current draw range at start and run, noise profile acceptance, and evidence that protective trips no longer occur. This also helps if the motor is returned under warranty; you can demonstrate whether the same operating conditions caused repeat failure.
Safety and compliance considerations must remain central. Grounding integrity, insulation condition handling, and lockout/tagout logic should be respected so technicians do not energize suspect motors in unsafe states. The checklist’s safety gating should be treated as a compliance requirement, not a suggestion.
Edge case: motors that appear repaired but fail quickly can indicate latent issues such as miswired protection circuits or airflow restrictions that were not corrected. What most guides get wrong is stopping once the motor starts; for commercial reliability, you must confirm steady operation under expected load conditions and ensure the upstream system is back to baseline.
Practical application: if you repair a motor connected to HVAC accessories, include airflow and filter status checks in the same job scope or capture evidence that the airflow path is within spec. This aligns Small Motor Repair outcomes with the system that actually determines thermal and electrical stress.
Where appropriate, standardize your technician handoff notes so that every job’s evidence is recorded the same way. Checklist drift—different measurement points between technicians—creates inconsistent decision-making and can trigger repeat visits.
Small Motor Repair for commercial operations: run it as a workflow
To get small motors fixed fast in commercial settings, treat the Small Motor Repair checklist as a repeatable workflow from intake to outcome tracking. This reduces decision latency, prevents checklist drift, and enables continuous improvement based on verified root causes.
Start with a standardized intake form. Capture motor type/ID, symptom description, when it started, observed faults, operating context (load, duty cycle, environment), prior repairs, and urgency rating. If multiple motors run the same process line, include which process they serve; that helps you prioritize based on downtime cost rather than “arrival order.” This is where commercial buyers benefit most: fast triage aligns repairs to business impact.
Adopt a triage SLA mindset. Define what happens immediately (safety checks, supply verification) and what happens next (measurements that narrow the fault). Then define escalation triggers: heat damage evidence, repeated protection trips with confirmed supply, suspected internal mechanical damage, or inability to safely verify symptoms. The checklist should clarify “stop points” so technicians don’t keep testing in unsafe or low-information conditions.
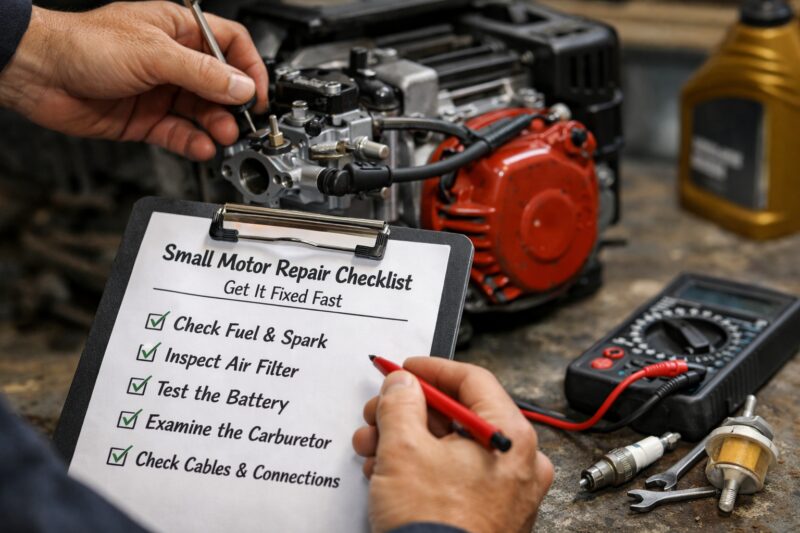
Build a parts readiness plan. Stock common starting components and protective items based on the equipment types you see most, and label compatibility constraints clearly. Practical application: if your compressors use similar capacitor/protection parts, stage spares for batch jobs; if your pumps vary, stage by motor ID and nameplate ratings. The key is to reduce time-to-replace without encouraging random swapping.
Track outcomes for continuous improvement: time-to-diagnosis, time-to-repair, repeat-failure rate, and top root-cause categories. Deeper-than-obvious: checklist drift often happens when technicians use different measurement points or interpret current readings inconsistently. Prevent it by defining exact measurement locations (for example, terminals vs supply bus), recording formats, and post-repair verification thresholds. This allows every job to add value to the next job’s diagnosis speed.
Real-world scenario: A facility notices repeat “start then trip” failures. With workflow tracking, you may find the root cause is recurring load increase from a process change, not the motors. That insight prevents repeated capacitor replacement and shifts maintenance toward system correction.
If you want additional evidence-based operational discipline, you can align your workflow style with the repeatable field mindset found in Reliable dirt bike quick checks: consistent steps, consistent documentation, and decision gates that prevent unnecessary disassembly.
Location and availability reality check: choose a service approach that fits your market
The best Small Motor Repair approach depends on your local lead times, technician availability, and shipping constraints. A realistic plan reduces downtime by matching the repair option to what your region can deliver reliably.
For many buyers, “local fast” sounds ideal, but it can create rework if diagnostic evidence is weak or if the repair plan does not address the root cause. A careful checklist helps you verify that any provider uses safety gating, measurement-based diagnosis, and post-repair verification—not just “replace and hope.” Mentioning your service constraints early (urgency, acceptable downtime window, on-site access) helps align the provider’s strategy with your operational needs.
Regardless of location, ask any service provider for turnaround estimates broken into diagnostic time and repair/parts time. Request what test equipment is used and what evidence you will receive: voltage checks, current measurements, starting component verification approach, and mechanical verification steps where relevant. Also ask about return/recheck policies and warranty terms tied to documented verification rather than vague “works when tested” claims.
Deeper-than-obvious edge case: a fast local fix that restores short-term operation can fail later if the system interaction wasn’t corrected—such as a blocked airflow path, load increase, or alignment issue. Your checklist should include the evidence you need to ensure the repair addresses the cause. Practically, require confirmation that current draw and noise profile are within expected ranges during steady operation, not just “the motor started once.”
If you’re comparing service options, consider building a simple decision matrix in your internal process documentation. A provider that communicates quickly, documents measurements clearly, and provides a reasoned repair plan typically reduces total downtime—even if the initial scheduling is not the earliest.
For teams who standardize procurement and operations, this kind of evidence-first comparison complements broader maintenance planning practices, such as on-page workflows in software contexts or equipment triage programs in facility operations. The key is consistency in what “done” means across every service vendor.
| Service option | Typical turnaround factors | Evidence you should receive | Warranty expectations |
|---|---|---|---|
| On-site component-level repair | Part availability, access to motor/control wiring | Baseline supply verification + post-repair starting/current checks | Cover replaced components and verified post-repair behavior |
| Bench bench repair | Shop scheduling, test equipment time | Controlled measurements, part replacement rationale, verification thresholds | Often stronger if evidence-based test results are documented |
| Replace like-for-like | Lead time and spec matching | Nameplate compatibility verification + system interaction checks | Warranty on the new unit; ensure root cause is corrected |
| Outsource overhaul/rebuild | Shipping + shop queue + test completion | Overhaul scope documentation + post-service test results | Confirm turnaround and warranty terms in writing |
Frequently asked questions about Small Motor Repair
What should a small motor repair checklist include for fast diagnostics?
It should include an intake form capturing the exact symptom, when it started, maintenance history, operating conditions, and any prior repairs. It must also include safety gating (when to stop testing), a symptom-to-hypothesis decision path, and specific electrical/mechanical measurement steps. Finally, it should define post-repair verification targets such as acceptable start behavior and current draw range.
How do I tell if my small motor needs a capacitor replacement?
Look for symptom patterns that align with start-component failure, such as “hums but won’t start” or intermittent start that worsens when the motor is cool-warmed cycle affected. Confirm with targeted checks rather than installing capacitors blindly—verify supply correctness first, then evaluate starting behavior and measurements that indicate a weak start component. If the motor starts but trips during transition, capacitor weakness can be one category to test, but overload and mechanical drag must still be ruled out.
Why does my motor hum but not start after maintenance?
After maintenance, hum-with-no-start often points to wiring, control timing, or starting circuit issues—such as incorrect connections, poor terminal integrity, or a supply interruption in the start path. Mechanical binding from misalignment or coupling issues can also cause a hum without rotation. A reliable checklist routes you to confirm supply/control first, then check mechanical drag, and only then evaluate starting components.
What tests help distinguish electrical failure from mechanical problems?
Start with electrical baseline checks: verify correct voltage at the motor terminals and inspect wiring/grounding integrity. Then measure current draw during start and steady run to spot overload signatures, and use temperature/odor/heat evidence to support electrical vs mechanical suspicion. For mechanical confirmation, include shaft/bearing drag checks and alignment/coupling verification, and validate that airflow or inlet restrictions are not driving increased load.
When should we repair a small motor vs replace it?
Repair when evidence indicates a specific fixable component or condition (wiring correction, starting/protection component, cleaning, alignment) and post-repair verification targets can be met quickly. Replace when damage severity indicates internal failure beyond economical repair, when safety gating prevents safe testing/operation, or when lead times and reliability requirements favor a like-for-like unit. Your checklist should include a decision summary based on downtime cost, evidence strength, warranty needs, and parts availability.
How can commercial shops reduce repeat failures after small motor repair?
Require documented intake timelines, pre- and post-repair measurements, and go/no-go verification criteria rather than stopping once the motor starts. Ensure the repair addresses root cause categories, not only symptoms—for example, correcting load interaction like airflow restriction, pump inlet changes, or bearing drag that drives overload. Track repeat-failure rate and top root causes so you can improve your triage thresholds and parts staging strategy.
What are the safest steps before energizing a suspect small motor?
Follow lockout/tagout logic and perform visual inspections first for heat damage, melted insulation, arcing evidence, cracked housing, or signs of moisture ingress. Verify grounding integrity and inspect wiring condition before applying power, and stop testing if burning odors or smoke indicators are present. Then verify supply conditions and only perform energization tests within the safety gating defined by your checklist.
Can a small motor repair be done without removing the motor?
In many cases, yes—if you can safely access terminals, measure supply at the motor, check controls, and correct wiring or start-protection components without energizing in unsafe conditions. You may also be able to verify mechanical binding through accessible coupling/shaft checks. However, internal electrical faults or bearing service often require removal or bench testing to produce reliable evidence-based verification.
How long should small motor repair take for common faults in 2026?
Typical timelines depend on whether parts are immediately available, whether the diagnosis is straightforward, and whether bench service is required. On-site component-level fixes can be quick when symptoms clearly align to starting/protection issues and supply/control is verified within the same visit. More complex faults—repeated protection trips with confirmed supply, suspected mechanical overload under load, or internal damage evidence—can add time due to shop scheduling, controlled testing, or replacement lead times.
What information should we request from a service provider before approving the repair?
Request the symptom category, the diagnosis steps performed, and the specific test results (voltage/current measurements, starting behavior observations, and any mechanical checks). Ask for the rationale for each proposed action—service/adjust vs component replacement vs replace—and confirm post-repair verification thresholds. Also get warranty terms tied to the documented evidence and the provider’s recheck/return policy if the motor fails again under the same operating conditions.
How do load issues cause “motor failure” symptoms during start-up?
Load issues can increase resistance at start, causing higher current draw, voltage sag effects, and premature tripping of protection devices. Examples include blocked airflow, clogged pump inlets, misalignment that increases drag, or valves/flow restrictions that raise system head. A solid checklist validates supply and then checks load/system interaction so the repair stops addressing the symptom only.
Conclusion: implement the Small Motor Repair checklist as a standardized workflow
The fastest Small Motor Repair outcomes come from evidence-first triage: capture what changed, measure to confirm, follow a decision path, and verify the fix with clear post-repair criteria. When commercial teams document symptoms and measurements, they reduce downtime, lower repeat-failure rates, and speed approvals because the repair plan is grounded in test evidence.
Across every H2 above, the consistent theme is the same: move from symptom to likely cause using quick checks, then use targeted electrical and mechanical measurements to confirm what category is driving the failure. That’s what prevents common mistakes like replacing capacitors without addressing overload, ignoring supply/control factors, or stopping after the motor starts once.
Your next step is operational: implement the checklist as a standardized intake + verification workflow for Small Motor Repair jobs. If safety thresholds trigger escalation or if evidence suggests internal damage beyond economical repair, route the job accordingly and document it clearly so approvals and future troubleshooting are faster.
When you need to act quickly in 2026, don’t just “fix the motor”—fix the decision process that finds the root cause. And if you encounter clear arcing, severe heat damage, or unsafe test conditions, consult a qualified service provider rather than forcing energization.
Updated May 2026