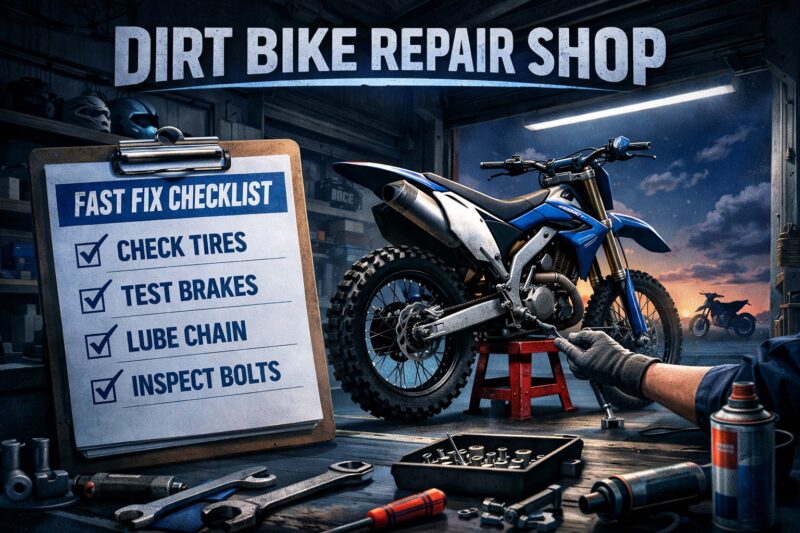
If your dirt bike needs help before the next ride, the fastest path is a structured triage at home plus a “verification-first” checklist for any Dirt Bike Repair Shop. This guide gives you a fast fix checklist and a decision path so you can prevent preventable breakdowns, reduce repeat visits, and communicate clearly with the shop in 10–15 minutes.
Why this matters: commercial riders and weekend racers typically want reliability, predictable turnaround, and fewer “comeback repairs.” A good Dirt Bike Repair Shop doesn’t just fix symptoms—it verifies the work with practical checks so the bike is test-ride ready the right way.
In 2026, shops increasingly handle complex wiring maps, modern torque-spec workflows, and parts lead times in a standardized way, but the customer still has to bring clear symptom details. Use this article to plan your service level (quick diagnostic vs deeper inspection), prepare your bike correctly before drop-off, and judge whether a shop’s “fast” promise is grounded in real verification.
Scope note: This article focuses on checklist-driven repair readiness and shop evaluation—not on unrelated riding technique or general riding gear topics. You’ll get a practical screen-to-service path, measurable verification criteria the shop should follow, and how to interpret red flags before you pay.
What to Check First at Home Before You Call a Dirt Bike Repair Shop
Do a 10–15 minute symptom triage at home so the shop can diagnose faster and avoid trial-and-error. This screen helps you decide whether it’s a “repair now” safety fix or a “needs inspection” schedule repair.
Why it matters: the time between drop-off and the first useful diagnosis depends on what’s observable. If you call with vague complaints like “it runs bad,” many shops must spend extra hours confirming the problem type, which can delay your turnaround. When you provide structured symptom evidence—what happens, when it happens, and what improves or worsens it—an off-road technician can target the right system first, whether that’s fuel delivery, air leaks, ignition, clutch/drivetrain drag, or brake-related drag.
How it works: start with symptoms, map them to the likely system, then decide the appropriate urgency. For example, repeated stalling at throttle opening points toward lean conditions, air leaks, or fuel delivery issues, while grinding or popping during engagement often suggests clutch or drivetrain mechanical problems. Then apply safety guardrails: if brakes are compromised, you should not “test it again” on the next ride.
Practical application: use this quick screen flow before you call. Symptoms → likely system → repair-now vs inspection-needed. A “repair now” category includes obvious hazards (overheating, fuel smell, structural cracks, brakes that do not stop consistently). “Needs inspection” often includes intermittent issues that depend on temperature, vibration, or altitude, where the shop benefits from controlled inspection rather than repeated riding attempts.
Tradeoffs and limitations: home triage cannot confirm internal engine damage or pressure integrity, and it may not reveal hidden wiring faults. But it prevents two common commercial slowdowns: (1) the shop discovering the same issue later that you could have flagged, and (2) you paying for parts swaps without providing the evidence needed for root-cause verification.
Real-world scenario: imagine your bike starts normally in the driveway but fails under load. If you note that it only happens when accelerating through mid-range and disappears if you baby the throttle, you’ve already narrowed the cause. That information often moves the shop from broad diagnosis to targeted checks—like fuel delivery under load, air leaks, ignition under vibration, or carb slide/jetting behavior—faster than a “runs rough” description.
Deeper insight (what most guides get wrong): Many guides only list “symptoms.” For fast results, you must also note conditions (engine hot vs cold, straight-line vs cornering, bumps vs smooth ground, idle vs throttle). Intermittent failures frequently track with harness movement, heat soak, or airflow changes, so condition details are the difference between a same-day diagnosis and a multi-day chase.
Minimum data to bring to the Dirt Bike Repair Shop: photos of the bike and problem area, your model/year, exact symptoms (starting behavior, stalling pattern, noise type), time-to-failure, what you were doing immediately before it occurred, any recent work performed (including parts replaced), any parts or fluids recently changed, and the last time it behaved normally.

Repair-Readiness Checklist Before You Ride (What a Good Dirt Bike Repair Shop Should Verify)
A good shop should verify more than “it starts”—it should confirm safe function across the systems most likely to cause comeback failures. Use this checklist to evaluate what the shop should check before any test ride.
Why it matters: most repeat breakdowns after service aren’t random; they come from incomplete work verification. The shop might have corrected the immediate fault but left a secondary risk: an air or vacuum leak not found, a brake bleed not confirmed, a cable routed to bind under motion, or fasteners not re-torqued after installation. A verification-driven approach reduces repeat visits and makes turnaround more predictable for commercial riders.
How it works: shops can follow category checks that connect “what they did” to “how they confirmed it’s right.” That means measurable checks: brake lever feel and travel, clutch engagement behavior, chain slack and alignment, absence of fluid leaks, correct routing of hoses/wiring, and fastener torque verification where applicable. When a shop documents what it verified, you can trust the test-ride outcome.
Practical application: ask the shop what they will verify in each category and whether they’ll confirm after the fix with a test procedure (static checks plus a short controlled ride). In many cases, you can request “before/after” evidence like photos of hose routing, a fastener check note, and confirmation that brake bleeding and lever travel were verified after installation.
Tradeoffs and limitations: a quick diagnostic shop may not do full-depth checks unless you authorize a pre-ride inspection scope. Also, some “deep” checks require time (cooldown heat-cycle considerations, component removal, or measurement equipment). Still, a quality shop can do at least a baseline set of safety and work-quality confirmations quickly.
Real-world scenario: you had a chain/sprocket replacement. A poor completion often looks fine in the shop, but later you notice poor engagement or chain binding. A good shop will verify chain slack range, axle alignment, and that the chain does not bind through suspension travel. Then it should confirm that brake dragging or drivetrain drag was not introduced by installation.
Deeper insight (comebacks prevention): Verification must include “work-quality beyond surface symptoms.” Ask the shop to confirm correct routing of hoses and wiring, confirm bleeding/lever travel after any brake service, and confirm that changes do not create new failure modes (for example, cable routing that changes under handlebar movement). This is especially important after “fast fix” work where time pressure can lead to shortcuts.
Edge cases that trigger expanded verification: bikes stored wet or dusty (greater chance of corrosion-related electrical or seal issues), recently rebuilt engines (break-in sensitivities and torque recheck needs), or bikes with aftermarket electrics (mapping, wiring harness changes, and non-standard connectors). In these scenarios, the shop should verify not only the repaired part but also surrounding interfaces.
If you want a structure for the shop to follow, refer to the checklist-driven workflow in this related resource: the fast reliable mechanic checklist approach can help you align expectations before work begins: https://nrtoffroadperformance.com/dirt-bike-mechanic/.
How to Choose a Dirt Bike Repair Shop That Delivers Fast Fixes
“Fast” should mean organized: clear diagnosis time, written estimate, a parts availability plan, and documented test procedure. Use this decision process to choose a shop that can deliver reliable turnaround instead of guess-and-repair.
Why it matters: commercial intent means you likely need a bike back for an event, a work schedule, or a planned trip. If the shop’s process is unclear, you can end up paying twice—once for labor and again for redo work when the root cause wasn’t confirmed.
How it works: set urgency level first, then define scope (quick targeted repair vs deeper inspection). Ask for estimate confidence: “What are you confident about today, and what remains uncertain until you measure X?” Good shops distinguish between “we can fix this quickly” and “we can’t confirm the true cause without inspection.”
Practical application: define what “fast fix” looks like for your use case. Look for diagnosis time expectations (for example, “we’ll identify the fault within the same day if we can replicate symptoms”), a written estimate with labor and parts breakdown, and a plan for parts lead times. Also ask how they handle uncertain faults: do they call you before ordering additional parts, and do they document measurements?
Tradeoffs and limitations: sometimes the shop can’t be fast because your symptoms are intermittent or because parts are on backorder. The quality difference is transparency. A shop that communicates constraints early and offers a safe workaround plan (like borrowing time with a controlled inspection schedule) is usually better than a shop that makes unrealistic promises.
Real-world scenario: a shop claims same-day repair for a starting issue but refuses to collect photos or asks you to “just drop it off with no notes.” That’s a risk signal because starting failures often have multiple branches: battery/charging, ignition timing behavior, fuel delivery, air leaks, or starter/relays. Fast without evidence typically leads to repeat repairs.
Deeper insight (how to interpret “too fast” quotes): Red flags include no inspection plan, no confirmation of prior work, no photos requested, and vague parts assumptions like “we’ll replace a bunch of stuff.” Also watch for the absence of work verification: if they cannot explain how they’ll confirm the fix after installation, your bike may “appear fine” until trail conditions stress the system.
To streamline your evaluation questions, practice the mindset behind choose the right shop quickly and use it as a call script checklist for intake: https://nrtoffroadperformance.com/offroad-repair-shop/.
Communication script (what to ask): Ask what safety checks they’ll perform before any test ride, what evidence they will provide (photos, torque verification notes, brake lever travel confirmation), what test procedure they’ll run (static verification plus short ride), and whether they will replicate the symptoms you observed rather than “hope it clears.” Ask if they offer a redo policy or warranty coverage that specifically addresses incomplete root-cause work.
Common Mistakes & Misconceptions When Using a Dirt Bike Repair Shop
The most common mistakes are trusting symptom-based fixes without verification and letting “it starts” become the only success criterion. Avoid these misconceptions to reduce repeat breakdowns and hidden safety risk.
Why it matters: dirt bikes operate in harsh vibration, dust, and temperature cycles. A fix that works briefly in the shop may fail under throttle load, repeated impacts, or heat soak. When customers assume that “running equals solved,” technicians can end up focusing narrowly on the symptom rather than the root cause and its side effects.
How it works: many repeat failures come from masking symptoms. Examples include replacing a part without checking the underlying system (like replacing a sensor while ignoring a wiring chafe), or reassembling without confirming correct routing and lever travel. Another common failure mode is fastener torque not being verified after installation or heat cycles, especially on components that see repeated thermal changes.
Practical application: use a “verification expectation” mindset. For instance, if you reported spongy braking, a shop should not stop at pad replacement; it should confirm bleed quality and consistent lever feel. If you reported stalling under load, a shop should confirm the actual operating condition causing failure—through measurement and controlled replication—rather than swapping parts that only address idle behavior.
Tradeoffs and limitations: shops may need to use a staged approach for intermittent faults, which can look like part swapping. The quality differentiator is evidence and documentation: what measurement they took, what symptom they replicated, and why the part replacement was justified.

Real-world scenario: “It starts, so it’s fine.” You pick it up and it idles smoothly, but it stalls when you roll on throttle after 10 minutes. This often indicates fuel delivery behavior under load, an air leak that worsens with heat, or electrical faults influenced by vibration. If you don’t communicate the exact timing pattern and conditions, the shop may miss the branch of diagnosis that matters.
Deeper insight (intermittent problems are the trap): Intermittent faults are frequently caused by harness movement, connector resistance changes with heat, or vacuum/air leaks that open only at certain throttle angles. A common misconception is that intermittent means “random,” leading to repeated “tests” that only reproduce the problem intermittently. Instead, request a diagnosis plan that targets the failure conditions you observed.
Repeat repair prevention: If a prior repair didn’t hold, request a root-cause investigation rather than simply replacing the same component again. Ask what was checked the first time, what changed in the system after service, and whether they will verify torque/bleed/routing and measure the system behavior that triggered the original fault.
For a structured approach to “what to request next” before calling a shop back, use the quick checklist for fast fixes resource as a baseline for your repeat-repair conversation: https://nrtoffroadperformance.com/dirt-bike-repair/.
Maintenance Scope Planning: Quick Fix vs Deeper Service (What’s Worth Paying For)
Pick your service tier based on symptom certainty and safety risk: quick diagnostic for targeted, known issues; deeper service for uncertainty, multiple symptoms, or recurring faults. Planning scope upfront is one of the best ways to keep a “fast fix” promise realistic.
Why it matters: commercial reliability depends on aligning cost with uncertainty. A “cheap quick fix” for a multi-symptom root cause can become expensive if it triggers downstream failures—especially in braking, drivetrain alignment, fuel/air sealing, and electrical systems. Conversely, paying for a full pre-ride inspection when you only need one verified safety correction may cost more than necessary.
How it works: use decision triggers. Time sensitivity (event weekend), symptom severity (safety-critical vs rideable-but-unsafe-feeling), and uncertainty level (one-off fault vs trend over days) determine whether deeper inspection is economically smarter. If multiple symptoms suggest a shared root cause—for example, “air leak signs plus lean running” or “misalignment symptoms plus chain wear”—a deeper service tier often prevents repeated visits.
Practical application: ask the shop to propose scope options with tradeoffs. For example: “quick diagnostic + targeted repair” if the issue is clearly isolated, or “full pre-ride inspection + verification test” if the issue might involve related systems. You can also request an outcome-based scope: “I want brake confidence confirmed, not just pad replacement,” or “I want to know whether the stalling is fuel/air or ignition under load.”
Tradeoffs and limitations: OEM vs aftermarket parts can affect fitment and how verification should be performed. Aftermarket components may require more attention to compatibility and correct installation behavior. Also, some deeper checks require time that cannot be compressed without increasing diagnostic risk.
Real-world scenario: you complain that the lever feels off after service and you notice uneven pad wear. Paying for deeper service is worth it because it can reveal a shared root cause such as caliper alignment issues, a bleed incomplete process, or a hose routing problem that changes with handlebar movement.
Deeper insight (what to request without drifting into irrelevant topics): Focus on checks that confirm installation quality and system health after your specific complaint. Examples include true wheel alignment checks if you reported handling vibration, brake system health checks if lever feel is inconsistent, and drivetrain checks if you reported chain noise, skipping engagement, or binding.
If you want a decision framework you can use when choosing service tiers, lean on the off-road mechanic checklist choose workflow to match your symptom pattern to the right depth: https://nrtoffroadperformance.com/offroad-mechanic/.
Advanced Edge Cases: When the Checklist Isn’t Enough
Some faults require expanded diagnostics beyond a basic pre-ride checklist, even when you followed home triage. If the problem involves electrical behavior under vibration, recurring stalling under load, or vacuum/fuel contamination, ask for an expanded inspection scope.
Why it matters: dirt bike systems interact. A small air leak can cause lean running; a fuel contamination issue can mimic ignition problems; an electrical connector can create intermittent failure only when the harness moves. If you treat these edge cases as routine fixes, you increase the risk of repeat repairs and trail failures.
How it works: expanded inspection focuses on measurements and replication under conditions that match your symptoms. Electrical gremlins often require connector inspection, harness movement tests, charging/voltage checks, and sometimes oscilloscope-style verification depending on shop capability. Vacuum/air leak checks might require seal inspection, pressure testing where available, and careful review of hose routing and clamps.
Practical application: if you have recurring stalling under load after a repair, collect evidence before returning the bike. Note the time-to-failure, temperature, and operating conditions that replicate the issue. Then ask the shop what they will verify to prove the root cause: for stalling, confirm fuel delivery and air/vacuum integrity at the operating range that fails, not just idle behavior.
Tradeoffs and limitations: expanded diagnostics take time and may require parts availability. In 2026, many shops can streamline diagnostics with standardized workflows, but you still need to authorize measurement-based investigation rather than only “replace components.”
Real-world scenario: “New parts, same problem.” If you replaced a sensor or ignition component and the stalling pattern persists under acceleration, the evidence you captured—conditions and thresholds—becomes critical. The shop should test symptom replication and record measurements rather than continuing a parts-swapping loop.
Deeper insight (common mistake): Shops and customers sometimes treat aftermarket complexity as the explanation rather than the variable to manage. If you have aftermarket electrics, mapping changes, or non-standard wiring, the shop must verify compatibility, correct wiring routing, and safe behavior across operating modes. Otherwise, the bike can run fine in the driveway but fail under trail vibration.
Finally, tie it back to the title promise: these expanded considerations aren’t to slow you down—they’re to prevent repeated trips and ensure the verification process matches your bike’s real failure conditions.
Local Service Considerations: Finding a Reliable Dirt Bike Repair Shop Near You
To find a reliable shop locally, vet them on evidence of diagnosis quality, realistic turnaround, and rework/warranty handling—not just on speed claims. Even if you search broadly, using a consistent “local evidence” criteria set helps you choose the right place.
Why it matters: local parts sourcing and turnaround depend on how quickly a shop can obtain components and how they communicate constraints. For commercial riders, an unstructured shop experience leads to surprises—late parts, unclear scope, or rework that pushes your ride schedule. Vetting locally with a process reduces those risks.
How it works: look for online reviews that mention turnaround time and specifically describe rework outcomes. The most useful review language includes diagnostic competence and verification behaviors, such as “they rechecked torque,” “they re-bled,” “they found the real cause,” or “they documented the fix.” This is an indirect but valuable signal of whether the shop uses verification steps you’ll rely on.

Practical application: run a quick call script before dropping off. Ask about response time, parts sourcing plan, and whether they request photos and symptom details at intake. Then ask how they handle the scenario where the first diagnostic doesn’t fully resolve the issue: do they call you before ordering extra parts, and do they provide a written estimate update?
Tradeoffs and limitations: reviews can be biased, and some excellent shops may have fewer reviews. That’s why you should prioritize evidence-based language rather than star ratings alone. Also, the “nearest shop” may not be best if it can’t source parts quickly or doesn’t handle your bike type reliably.
Real-world scenario: you search for a nearby shop and find one with fast quotes but no mention of recheck/warranty. If their reviews are mostly “fixed it quickly” without detail, you may be buying speed with less verification. In contrast, reviews mentioning “they verified after service” suggest a process that aligns with your “safe test-ready” expectation.
Deeper insight (how to read review language): Pay attention to whether reviews credit the shop for identifying root causes or for preventing comeback repairs. Phrases like “they rechecked,” “they verified,” “they documented,” and “they stood behind it after rework” are stronger indicators than generic satisfaction.
Next steps: photograph problem areas before dropping off, write a short symptom timeline, and confirm turnaround realistically based on parts availability and diagnostic needs. If you need help selecting a local shop based on evidence quality, use the earlier decision framework from choose the right shop quickly: https://nrtoffroadperformance.com/offroad-repair-shop/.
Comparisons & Options: Alternatives to Hiring a Dirt Bike Repair Shop for a Fast Fix
You have alternatives to hiring a traditional shop, but “fast fix” outcomes depend on evidence, tooling, and verification. The best option matches your risk tolerance and how complex the failure is.
Why it matters: commercial riders often want speed, and sometimes DIY triage or mobile service can accelerate the process. But if you skip verification or lack the tooling to confirm torque, bleeding, alignment, or air/fuel integrity, you may trade time savings for repeat repairs and unsafe rides.
How it works: evaluate four realistic approaches. First, DIY using the checklist for triage and targeted repair if the fault is clearly isolated and non-critical to safety. Second, mobile mechanic or field service that can diagnose quickly on-site when access is difficult and symptoms are easy to replicate. Third, specialty service days or structured clinics where experienced technicians verify common systems. Fourth, community “yard” assistance for non-critical tasks if you can still verify safety outcomes.
Practical application: a hybrid workflow is often the most commercial-efficient. Do DIY triage at home, then bring your findings to a shop for diagnosis or verification you cannot do safely. After the shop confirms the root cause, you can do simple reassembly tasks yourself if the shop provides clear documentation.
Tradeoffs and limitations: alternatives may provide less warranty clarity or different redo policies. Mobile service might be less equipped for measurement-heavy diagnostics. Community assistance may not include the same torque verification process or safe test-ride procedure. For these reasons, the “fast fix” promise must still end with a safe, test-ready outcome.
Deeper insight (how to prevent miscommunication): When you split work across DIY and shop, document everything: what symptoms you saw, what you changed, and what improved (or did not). Miscommunication between parties is a hidden cause of repeat repairs. If you do DIY modifications before a shop visit, note them clearly so the technician doesn’t assume the original baseline.
Frequently Asked Questions About Dirt Bike Repair Shop
What should I ask a Dirt Bike Repair Shop before dropping off my bike?
Ask what scope they will diagnose first and what safety checks they’ll confirm before any test ride. Request an estimate method (measurement-based vs assumption-based), turnaround expectations, and whether they document torque/bleed/routing verification.
How long should a Dirt Bike Repair Shop take to diagnose starting problems?
Starting diagnostics can range from a same-day triage to a longer investigation if the fault is intermittent. Speed depends on how clearly the failure condition matches your symptoms (cold vs hot start, repeated clicks vs no spark feel) and whether parts are needed for measurement or replacement.
Can a Dirt Bike Repair Shop do a same-day repair?
Same-day repairs are realistic for clear faults with readily available parts and symptoms that can be replicated quickly. If the issue is intermittent, depends on load, or requires ordering parts, many shops need more time to diagnose correctly.
What does a pre-ride inspection include after service?
A solid pre-ride inspection includes controls and safety checks like brake lever travel/feel, drivetrain drag checks, fluid leak inspection points, and verification that hoses and wiring are routed correctly. It should also include a controlled test procedure so the shop can confirm the fix under relevant conditions.
How do I know if my mechanic re-tightened and verified torque properly?
Ask for a work-order note showing what was torqued and how it was verified (tool-based torque confirmation rather than “tightened by feel”). If the work involved components that benefit from heat-cycle rechecks, ask whether they recommend or perform a recheck interval.
What are common causes of chain or sprocket wear the shop should check first?
Before replacing parts again, the shop should check alignment, chain slack range, and whether the chain has been maintained and lubricated appropriately. Root-cause investigation matters because incorrect alignment or driveline issues can rapidly accelerate wear.
Why does my dirt bike run at idle but fail under load after repairs?
This pattern often points to fuel delivery behavior, air/vacuum integrity, or ignition/electrical behavior under vibration and throttle/load conditions. If the shop only confirms idle behavior, the true fault branch can remain unresolved.
What’s the difference between a quick fix and a full diagnostic?
A quick fix targets a specific suspected fault and may be fast if the symptom clearly maps to one system. A full diagnostic uses verification and measurement to confirm the root cause across related systems, which costs more but reduces comeback repairs when the issue is complex.
When should I stop riding and take it to a Dirt Bike Repair Shop immediately?
Stop riding and seek immediate service if brakes feel inconsistent, there are fuel or oil leaks, the bike overheats, you see structural cracks, or there is severe vibration or new grinding/noise that increases quickly. Safety-critical symptoms should not be treated as “ride it and see.”
Are aftermarket parts always safe after a Dirt Bike Repair Shop installs them?
Aftermarket parts can be safe, but fitment and compatibility checks are essential. Ask the shop to verify correct installation, compatibility with your bike’s specs, and the test procedure used to confirm safe behavior after installation.
Conclusion: Use a Fast Checklist to Get Verified Results From a Dirt Bike Repair Shop
The fastest reliable outcome is not just speed—it is speed with verification. A triage screen at home plus a structured “what should be checked before a test ride” framework helps you prevent preventable breakdowns after maintenance and reduces repeat visits.
By planning your scope (quick targeted repair vs deeper inspection) based on symptom certainty and safety risk, you make the shop’s job easier and protect your budget. You also gain leverage when comparing estimates: “fast fix” should include clear diagnosis time, written expectations, and evidence that the work was confirmed—not merely that the bike starts in the driveway.
In 2026, parts availability and modern electrical complexity can change timelines, but the process should still be transparent and verification-driven. Use the checklist in this article, prepare the minimum data for intake, and ask for evidence of work quality—torque verification where relevant, brake bleed/lever travel confirmation, correct routing, and a controlled test procedure.
Next, run the checklist before calling, ask the same core questions across options, and request “what was checked + how the bike was tested” before you assume the job is complete. If you do that, your Dirt Bike Repair Shop experience is far more likely to end with a safe, test-ready ride.
Updated May 2026