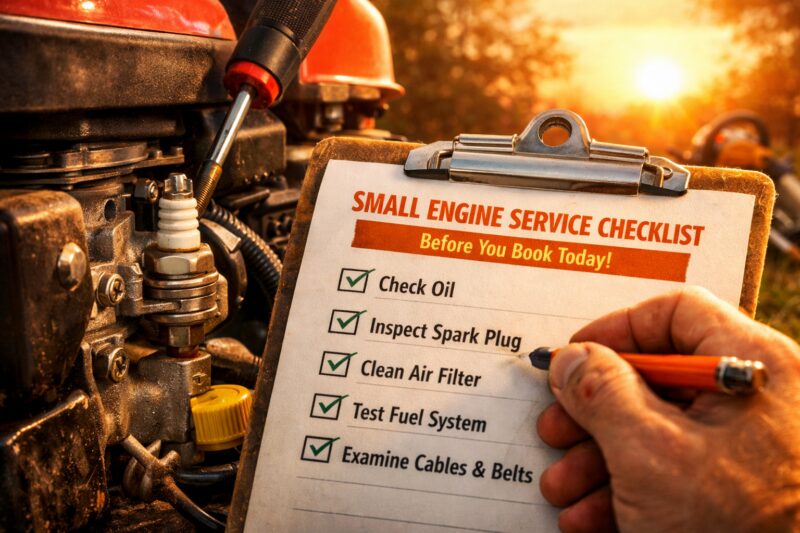
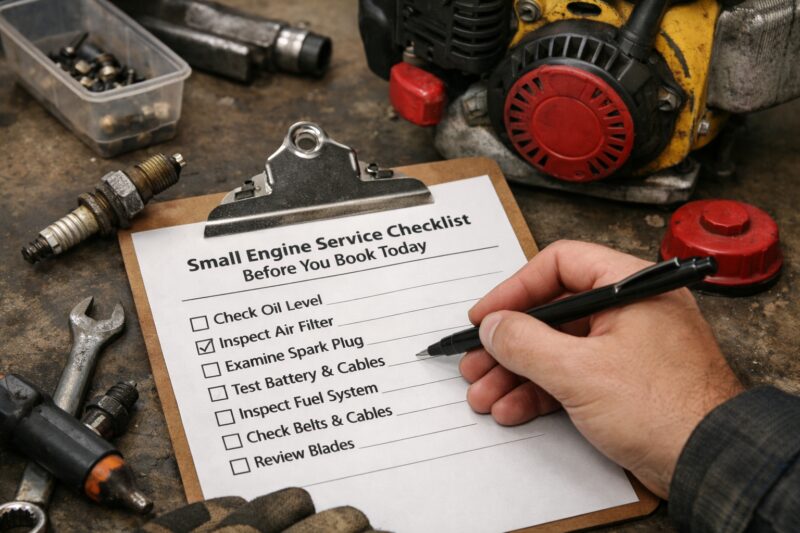
A Small Engine Service checklist is a pre-appointment “bring-to-the-shop” packet that captures the exact model, the symptom timeline, and what you already tried—so your technician can diagnose faster and quote more accurately. Before you book, you should gather identification details, document starting/running behavior with photos or short video, and note fuel/storage history so the shop does not have to start from guessing. This saves time and cost by preventing repeat trips, reducing unnecessary parts swaps, and helping the service team choose the right diagnostic path the first visit. In 2026, modern shops may also request digital intake forms, photos/video of warning lights or starting behavior, and emissions/regulatory information depending on the equipment type.
This article focuses on what to do before you book—it’s not a DIY repair guide. Your goal is to arrive with a clear “service info packet” that improves diagnostic efficiency, shortens approval cycles, and limits “while we’re in there” surprises.
Top 10 questions about Small Engine Service Checklist Before You Book Today
If you’re trying to decide what to prepare before scheduling, the core answer is simple: bring the machine’s identity, a precise symptom timeline, and evidence of what it does when you try to start or run it. For commercial-intent buyers, the checklist is about reducing diagnostic time, aligning expectations, and making it easier for the shop to give an estimate before major teardown. Done right, a Small Engine Service appointment becomes a structured process rather than a trial-and-error guessing game.
A strong pre-booking checklist also helps the shop separate the most likely categories of failure. Small engines typically fail by ignition issues, fuel delivery issues, air intake restrictions, compression/mechanical drag, cooling/overheating effects, or storage-related contamination. When you provide the “why/when/how it changed” details, the technician can prioritize tests in a logical order and avoid replacing parts that are unlikely to be the cause.
Practically, you should think of the checklist as an intake assistant. Instead of relying on a vague description like “it won’t start,” you provide the conditions: when it started failing, whether it’s intermittent, what fuel was used, whether it sat in humid or cold storage, and what happened after you changed anything. That is also why the modern intake experience in 2026 may include photo/video upload, model/serial verification, and additional documentation. The result is less downtime, fewer repeat visits, and higher quote accuracy.
What a Small Engine Service checklist is (and why you should use one)
A Small Engine Service checklist is a structured set of details and media you collect before the appointment—so the shop can diagnose quickly and quote accurately. The checklist saves you from repeat trips and reduces “guess-and-replace” behavior that can inflate labor and parts costs.
Why it matters: small-engine problems are often a symptom masquerade. For example, a no-start issue could be fuel starvation, a weak ignition component, an air restriction, a safety switch, or even stale fuel residue after storage. Without evidence and timeline context, a technician may perform tests in a slower sequence or end up re-checking assumptions because the initial intake did not capture relevant variables (like temperature, choke use, or whether fuel was stored with stabilizer).
How it works: you collect the machine’s identification, symptom behavior, fuel/storage history, and “what you already tried,” then you share that packet during intake. Shops use that information to decide whether they should start with ignition checks, fuel system inspection, air-flow restrictions, compression checks, or cooling-related inspection. In 2026, many providers also rely on digital intake forms, and some will ask for specific images (air filter area, fuel lines, spark plug condition) or short starting videos to reduce in-shop time.
Tradeoffs and limitations: a checklist cannot guarantee the diagnosis, and it is not a DIY repair guide. Some problems are genuinely intermittent, require load or temperature conditions to reproduce, or depend on internal wear that only inspection can reveal. Still, a strong checklist narrows the diagnostic lane quickly, which is why it is one of the highest-leverage steps you can take before you call.
Real-world scenario: imagine a chainsaw that starts for two pulls, then dies. If you only say “it won’t stay running,” a shop may try multiple components. If you document that it starts after choke for a moment, then dies after choke release, and you note it sat for months with untreated fuel, the technician can shift toward fuel delivery/venting/stale fuel pathways sooner. This is what you want from a pre-booking tool—more accurate diagnostics on the first visit.
Related supporting work you may want to read after service planning: if your goal is to reduce repeat issues, review guidance on keeping engines healthy over time, including reliable maintenance habits that support consistent starts—see reliable starts less wear.
When deciding on a service provider, it's helpful to follow a straightforward selection method that emphasizes clarity and procedure—begin by assessing how to select the best repair service for your needs that aligns with both your urgency and budget. This approach will ensure that you make an informed choice, reducing potential delays and enhancing the repair experience.
Quick actions for today: before you call, run a quick checklist before you call so you can answer intake questions without missing critical details.
What to collect before your technician arrives (model, fuel, timeline, and proof)
Before you book Small Engine Service, collect the exact identification and the most useful symptom evidence: model/serial, engine type, fuel history, usage pattern, symptom timeline, and what you already tried. This combination gives the technician context and proof so they can diagnose faster and quote more accurately.
Why it matters: small engines use model-specific parts, and many failures trace to fuel and storage conditions. A “wrong” model number in intake can delay parts ordering or lead to unnecessary cross-compatibility checks. Likewise, fuel history is not trivia—ethanol sensitivity, storage duration, and correct 2-stroke mixture ratios can dramatically change what is inside the carburetor jets, fuel passages, and crankcase.
How it works: create a service info packet. Include the purchase year if available, the engine type (2-stroke/4-stroke), fuel type (including whether fuel had ethanol), approximate run hours, and how the equipment is used (light duty, heavy cutting, intermittent start/stop). Then document the symptom timeline with “first symptom,” “what changed,” and “frequency.” Was the failure sudden or gradual? Does it happen only when hot? Is it worse after long storage? Those answers help map to ignition, fuel, or mechanical drag categories.
Practical application: you should gather proof before you go. Use photos or a short video of starting behavior, including whether it cranks normally, how many pulls it takes before firing (if it fires), and whether it smokes unusually. If the unit has warning lights or an electronic module display, capture the moment the light appears. Also capture access points: air filter assembly, spark plug area, and visible fuel lines. When you remove the air filter for evidence, photograph it before reinstallation if that is appropriate for your equipment.
Deeper insight: most DIY guides fail to emphasize “what you already tried” with dates and results. If you used carb cleaner incorrectly, sprayed the wrong component, attempted a spark test without confirming grounding, or changed the air filter after the fact, disclose that. It prevents misdiagnosis loops and helps the technician interpret residue or altered behavior accurately. Tradeoff: do not over-disassemble sealed or emissions-critical components without a clear reason; the technician may need those parts intact for certain checks or to preserve warranty conditions.
Real-world scenario: a pressure washer may sputter and die under trigger load. If you document that the problem appears only when spraying and you capture what happens to the exhaust sound, you help separate fuel delivery restrictions from load-related stalling or overheating.
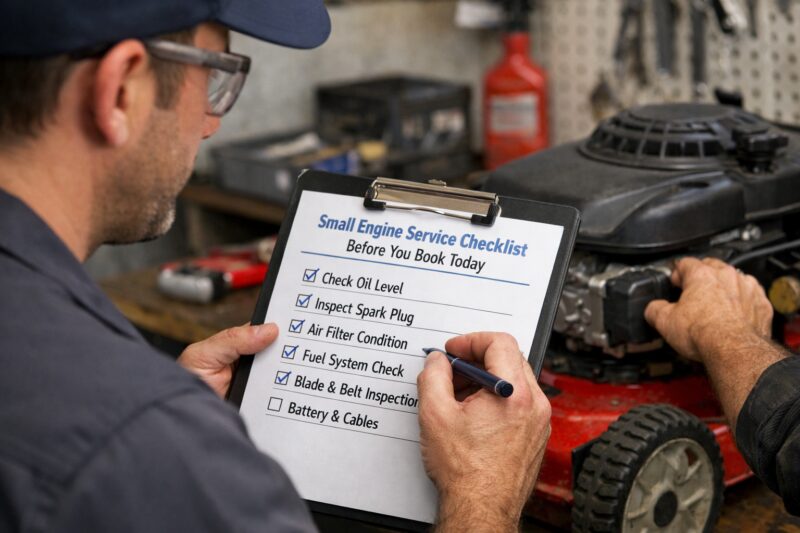
For additional readiness planning related to preventing repeat problems over time, you may also review reliable starts less wear.
How to document symptom behavior so the shop can diagnose faster
To get faster Small Engine Service, document symptom behavior with repeatable details: cold vs warm start results, choke effect, throttle response, noise characteristics, and exactly when the failure occurs during starting or running. The more consistent your observations, the easier it is for the technician to pattern-match.
Why it matters: many small-engine failures look similar from the outside. A no-start can be ignition-related, fuel delivery-related, or air restriction-related. Intermittent faults add another layer: the machine might run briefly, then die due to venting, fuel supply, overheating, or even a safety interlock that only trips after a temperature rise. Without documented conditions, the shop must guess which scenario to reproduce first.
How it works: your documentation becomes a compressed “diagnostic script.” When you report that “at approximately 55°F it starts with choke after 3 pulls, then dies after choke removal,” the technician can prioritize tests that correspond to choke function, mixture behavior, and fuel flow stability. If you report the same symptoms at a different temperature, they can isolate temperature-sensitive causes like fuel volatility issues, float behavior, or compression variation.
Practical application: use a simple reporting format. Include “at X temperature” and “at Y RPM” where possible. If the equipment is electric-start, note whether the starter spins quickly or sounds sluggish. If it’s pull-start, note pull resistance consistency—does it feel normal, unusually easy, or abnormally heavy? Also record whether the failure repeats after rest, after adding choke, or after adjusting throttle.
Tradeoffs and limitations: tests can mislead if the fuel is stale or if air passages are blocked. For example, a spark test performed with a wet spark plug may appear like an ignition issue, but it could actually be a fuel flooding condition. That’s why your documentation should include the surrounding context (fuel age, choke use, whether the plug looked wet or dry). This is also why you should avoid the common mistake of cleaning or spraying multiple components right before the appointment without telling the shop what you did.
Real-world scenario: Suppose a generator cranks but will not sustain output. If you note that it starts briefly and then drops RPM, and you capture what the exhaust tone sounds like at the moment it fails, the technician can more quickly decide whether to examine fuel delivery under load, governed throttle behavior, or overheating protection paths.
To ensure your future maintenance planning supports consistent starts, compare your habits against reliable starts less wear.
Pre-booking external checks you can do safely (fuel, air, leaks, and storage clues)
Before Small Engine Service, you can do a few safe external checks—fuel condition, visible leaks, air filter state, clogged intake areas, and obvious loose lines—then document what you find. These checks help the technician avoid wasting time on basics and focus on the right diagnostic direction.
Why it matters: many diagnoses start with whether the engine can receive clean fuel and sufficient air, and whether the system is free of major obstructions. Even a small amount of debris in an intake screen, a severely clogged air filter, or a loose vacuum line can change the entire failure pattern. External inspection also reveals safety risks (fuel leaks, cracked fuel lines, frayed wiring) that a shop must treat before testing.
How it works: you perform lightweight observations without altering sealed or emissions-critical assemblies. Check the fuel level and whether the fuel looks fresh or contaminated (for example, varnish-like residue in transparent lines). Inspect for obvious leaks around the carburetor area, fuel tank outlet, hose connections, or crankcase gaskets. Look for signs of cracked or brittle fuel tubing, loose clamps, or disconnected air intake hoses. Examine the air filter—note whether it is clogged, water-soaked, torn, or excessively dirty.
Practical application: “good documentation” means each observation has a visual reference. Photograph the air filter before you clean or replace it if the shop wants to see its condition. If you notice a loose line or a wet spot, take a photo from multiple angles. Also note storage context: how long it sat, whether stabilizer was used, whether fuel was drained, and whether the storage environment was humid or cold. Those factors strongly influence whether you will see varnish, deposits, swollen seals, and sticky fuel valve behavior.
Tradeoffs and limitations: do not remove sealed components, break emissions seals, or disassemble components that may affect warranty or legal compliance. Also avoid cleaning with additives right before the appointment unless you disclose it, because it can obscure residue-based clues. Common guides get this wrong by suggesting “spray everything” behavior, which can create a longer diagnostic loop.
Real-world scenario: a mower that died after wet storage might show a water-contaminated fuel system pathway. If you report humid storage and show the air filter’s condition and fuel line appearance, the shop can decide whether to inspect for water/contamination effects before chasing ignition causes.
If you are planning your workflow to reduce future downtime, you can also align your readiness with faster smoother starts tune up scheduling practices.
Minimal-effort performance tests you can do before booking (and how to report results)
You can perform a small set of minimal-effort performance tests before Small Engine Service—then report the results with temperature, timing, and observable behavior. The goal is to gather decision-grade information without “playing mechanic” or damaging components.
Why it matters: a few simple observations can quickly separate ignition, fuel, and mechanical drag paths. For example, cold vs warm starting behavior is often a major clue. If it starts cold but fails when warm, the issue might relate to fuel vaporization, overheating effects, or ignition module behavior. If it cranks but never fires, the information points toward ignition, fuel delivery failure, air obstruction, or major compression issues.
How it works: you perform controlled attempts and record outcomes. Try cold start behavior if it’s genuinely cold, then warm start after it has been stopped for a short period. Observe choke use effect: does adding choke improve the start briefly? Watch throttle response: does it bog immediately, hang at RPM, or die when you apply throttle? Listen for unusual noises—knocking, squealing, grinding, or repeated clicking in electric-start units.
Practical application: for pull-start equipment, note pull resistance and whether resistance changes during repeated attempts. If it uses a battery, note whether the starter sounds weak, the battery indicator is low, or the unit clicks repeatedly. Report starting-circuit symptoms too: for example, whether the pull cord snaps back normally or feels abnormally heavy.
Deeper insight: common traps include misleading test results caused by stale fuel, weak batteries, or blocked air passages. A weak battery can create “false ignition failure” symptoms in electric-start systems. Similarly, fuel contamination can create symptoms that resemble ignition issues, such as a wet spark plug or repeated firing then immediate die-off.
Tradeoffs: these observations guide hypotheses but do not guarantee diagnosis. You should not assume certainty based on a single test. Instead, you discuss your best hypothesis with the technician—“it seems like choke helps at first” or “it only fails under throttle load”—so they can validate it with proper testing.
Real-world scenario: leaf blowers may stall after a brief run if air filtration is compromised or if fuel delivery is inconsistent. If you record that it starts with full choke and dies after several seconds, the shop can focus on fuel/air mixture behavior and potential intake obstruction.
For a broader context of reducing repeat no-start events, consider aligning your service schedule with faster smoother starts tune up planning.
How the checklist changes by equipment type (mowers, chainsaws, blowers, generators)
The checklist changes by small engine type and use case: a mower diagnosis benefits from usage and air/fuel restriction evidence, while a generator diagnosis depends heavily on start temperature, load behavior, and governed RPM stability. Tailor your pre-booking information so the shop can focus on the most likely failure pathways.
Why it matters: different small engines face different failure modes. Lawn mowers and garden equipment frequently accumulate dirt and debris, leading to air restrictions, clogged intakes, and cooling inefficiency. Chainsaws and trimmers involve 2-stroke fuel mixture sensitivity and rapid temperature/mixture changes. Pressure washers and generators often reveal issues under load conditions. If your checklist does not match the equipment’s typical operating conditions, the technician may waste time on the wrong test sequence.
How it works: you decide what the shop needs most based on how the equipment fails. For lawn mowers, capture air filter condition, fuel age, whether it starts with choke, and whether it stalls when you engage the blade or drive system. For chainsaws, document fuel mixture type (and whether it was premix or oil-mix), storage duration, and starting behavior under different choke positions. For leaf blowers, note whether it starts and dies quickly (possible fuel delivery or air restriction). For pressure washers, document whether failure happens only while spraying or also when idling. For generators, note start behavior at different temperatures and whether output drops under electrical load.
Practical application: include the equipment-specific details in your service info packet. For 2-stroke engines, be explicit about whether the fuel mixture was correct and whether ethanol was present. For 4-stroke engines, provide information about correct oil type and oil level history if you know it; many stores will ask this because oil starvation or wrong viscosity affects mechanical wear and valve train behavior. Also note emissions/regulatory constraints: some equipment uses emissions systems that require careful handling before parts replacement, particularly in modern configurations in 2026.
Deeper insight: intermittents deserve special documentation. If the engine runs briefly then dies, capture what happens right before death—does it happen after trigger release, after a temperature rise, or only when fuel is low? Many guides skip this nuance, but it often points toward fuel venting issues, float bowl behavior, overheating protection, or vacuum/air leak effects.
Real-world scenario: a pressure washer that starts but dies during spray likely has load-related fuel delivery or airflow problems. If you document the exact moment it dies (first trigger squeeze vs sustained spray), the technician can prioritize fuel supply and governor behavior more efficiently.
To reduce repeat issues across categories, also align your maintenance approach with reliable starts less wear.
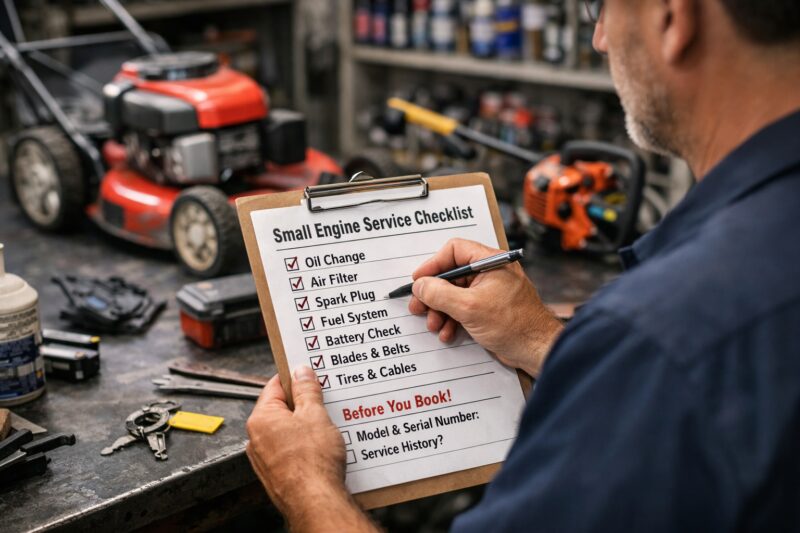
How to achieve faster quotes and fewer surprises from your Small Engine Service shop
To get faster quotes from a Small Engine Service shop, ask for a diagnostic-first workflow with clear authorization steps, transparent diagnostic fee structure, and a defined estimate before major parts replacement. You can also request an inspection scope (what they will check first) so you avoid delays.
Why it matters: delays and surprise costs often occur when shops move too quickly from “symptom” to “replacement.” A quote becomes accurate when the shop can match the symptom category to likely causes and then test the most probable components. Without a structured approach, repairs may drift into “while we’re in there” changes that you did not approve with full context.
How it works: a good intake-to-quote process follows: initial symptom assessment → basic inspection → targeted tests → estimate → approval → parts and repairs. Diagnostic-first shops typically apply a logical sequence: verify safety systems, confirm ignition/fuel/air supply categories, then only proceed to teardown when necessary. In 2026, some providers may also capture digital photos/video and attach findings to your work order, which helps both accuracy and communication.
Practical application: before work begins, request details on diagnostic fee structure and expected time window. Ask if teardown is included in the diagnostic fee or if teardown is a separate authorization. You should also ask what parts will be tested versus replaced by default. Many shops can test spark output and air restriction before ordering parts; you want the shop to explain how they decide replacement criteria.
Tradeoffs and limitations: diagnostic testing can take longer if the fault is intermittent or if parts availability constraints slow down confirmation. Also, if your documentation is incomplete, the shop may spend extra labor time repeating basic information. That is why your pre-booking packet matters.
Deeper insight: authorization boundaries are essential. Ask how the shop handles “while we’re in there” add-ons. For example, if they discover a worn seal during carburetor service, will they call you with options (repair vs replacement), provide a cost range, and obtain approval before proceeding? Most guides underemphasize this commercial decision layer, but it’s the difference between predictable budgets and avoidable surprises.
Real-world scenario: if a mower’s carburetor cleaning reveals damaged jets, the technician may suggest a replacement. If they only quote after teardown without explaining what tests they already performed, you can end up approving parts without understanding why. A structured estimate process solves that by tying quote decisions to documented test outcomes.
If you are comparing provider process, use choose the right repair service to align a shop’s workflow to your timeline and budget.
What to ask before you commit: diagnostics, paperwork, parts sourcing, and warranty
Before you commit to Small Engine Service, ask what diagnostics they will perform, what documents they provide, and how parts sourcing and warranty work. The goal is to ensure expectations are documented before labor begins.
Why it matters: repair shops differ in their test order, documentation standards, and parts sourcing policies. Some centers replace components based on common failures; others follow a test-first approach. For commercial-intent customers, you want repeatable reporting: what they found, what they tested, and why they recommend specific parts.
How it works: you request the shop’s diagnostic outputs and paperwork flow. Ask if they provide findings and test results in your work order, and whether they give you a written estimate with labor line items before major work begins. Also ask whether they include teardown in the diagnostic fee, and whether reassembly labor is included if you approve later-stage repairs.
Practical application: ask about parts sourcing and compatibility checks. Confirm whether they use OEM parts or approved equivalents, and ask about lead times if the part is backordered. The shop should verify compatibility using model/serial numbers; if you provided those up front, this verification is faster. Ask whether they check for related issues such as fuel line contamination or clogged passages that can cause repeat failures after a “single part fix.”
Deeper insight: if the issue could be storage damage or contamination (common in 2026 due to longer digital intake intake and faster scheduling), ask how they confirm it. For example, do they test for water presence in fuel, examine varnish residue, and inspect seals and float behavior? What most guides get wrong is telling readers to “just ask for a carb cleaning” without considering whether contamination affects more than the carburetor.
Tradeoffs: detailed diagnostics might cost more initially, but can reduce total repair cost by avoiding unnecessary parts. If your priority is urgency, ask for a staged approach: verify the top categories first, then proceed to parts only after the shop confirms the likely cause.
Real-world scenario: if a generator starts and runs briefly, the shop may suspect a fuel restriction, governor issue, or overheating protection. If you ask how they test fuel delivery and governed behavior and what the written estimate will cover, you reduce uncertainty and improve decision confidence.
To keep long-term downtime low, you may also align service outcomes with faster smoother starts tune up strategies.
Common mistakes before booking Small Engine Service (and how to avoid them)
The most expensive mistakes before booking Small Engine Service are incomplete intake information, undisclosed changes, and assuming the solution without evidence. Avoid those behaviors to reduce misdiagnosis, rework, and unnecessary parts purchases.
Why it matters: small-engine diagnostics are evidence-driven. If you bring the wrong model number, forget to note fuel type and storage duration, or do not document starting behavior, the technician may spend extra time recreating context. That increases labor and can delay your estimate. If you change multiple variables right before your appointment (like spraying unknown cleaners, swapping parts, or draining fuel without recording condition), you can destroy the very clues that help the shop pinpoint cause.
How it works: your intake should be consistent and honest. Disclose what you already tried with dates and what the outcome was. If you used carb cleaner or fuel additives, tell the technician what you used and how much, because residue can affect mixture behavior and test results. Also avoid “part swapping on spec” unless the shop directs it—otherwise you may mask the original failure pattern and create new failure risks.
Practical application: make sure your information is complete. Bring photos/video of starting behavior, model/serial, symptom timeline, fuel type, and any warnings (if applicable). Use the symptom timeline to explain whether failure is intermittent or consistent. And if you find visible wear, document it; for example, show air filter condition and any obvious fuel leakage.
Deeper insight: a common misconception is that “all no-starts are the same.” In reality, fuel venting, air leaks, ignition modules, and compression conditions each alter symptom patterns differently. Another common guide mistake is recommending aggressive cleaning without disclosing it, which can make diagnosis less reliable. A good shop can still solve problems, but the diagnostic path may become longer and more expensive.
Real-world scenario: a mower that “only won’t start after it rains” may suffer from air intake water intrusion or fuel pickup contamination. If you forget to mention wet conditions in the timeline, the shop may chase fuel freshness alone and miss the environmental trigger.
Before booking, use quick checklist before you call and keep your intake consistent so the shop can diagnose with confidence.
Repair vs tune-up vs replacement: how shops evaluate your options
When you compare repair, tune-up, rebuild, or replacement for Small Engine Service, shops evaluate options using a practical mix of parts cost, labor time, test results, reliability expectations, and the engine’s remaining life. Your job before booking is to ask which category fits based on evidence, not assumptions.
Why it matters: a “tune-up” is not a universal fix, and replacement is not always the default answer. The best outcome depends on what tests show. For example, if a tune-up addresses air/fuel/ignition baselines, the equipment may run reliably for a meaningful time. But if the diagnosis indicates major internal wear, repeated contamination damage, or compression loss, targeted repair or rebuild may be the more economical long-run option.
How it works: many shops follow a decision framework after initial inspection and testing. They estimate the cost to restore the engine to proper function, then compare it against the value and likely remaining lifespan. They may recommend parts replacement when a tested component fails within spec or shows physical damage. They may suggest a rebuild if multiple internal systems show wear patterns and replacement costs become comparable.
Practical application: ask what tests support the recommended category. A repair recommendation should align with findings (for example, clogged fuel passages, failed ignition module, compression out of range, or evidence of air leaks). If your equipment is repeatedly failing after minor fixes, ask whether underlying causes are being addressed or whether troubleshooting is becoming “repair optimism.”
Tradeoffs and limitations: repair optimism can cost more when continued troubleshooting drives labor past the point where a controlled rebuild plan would be more predictable. Conversely, replacement can be overpriced if the diagnostics show a simple repair fix. The best shops explain both: what they found, why it matters, and what choices you have.
Real-world scenario: a generator that repeatedly shuts down under load may require fuel delivery correction and governed RPM verification. If the shop shows load-related test results and quotes a repair plan, you can avoid replacing a still-viable unit.
If you want a maintenance route that reduces future failures, consider how a tune-up aligns with the idea behind faster smoother starts tune up.
| Option | Best When | Shop Evaluation Focus | What You Should Ask For |
|---|---|---|---|
| Tune-up / service | Baseline issues (air/fuel/ignition) with good compression and no major contamination | Filter condition, ignition checks, basic fuel delivery behavior | Which components were tested vs replaced; labor estimate before parts |
| Targeted repair | Evidence points to a specific failure (fuel restriction, bad ignition part, leak) | Test results tied to a component category | Test findings and replacement rationale; warranty/return details |
| Rebuild / overhaul | Multiple wear indicators or compression/mechanical issues | Internal condition evidence and cumulative repair cost | Scope of work, rebuild timeline, and expected remaining-life reliability |
| Replacement | Supply constraints, major internal damage, or cost beyond predicted remaining value | Parts availability, rebuild vs replacement cost, risk profile | Compatibility confirmation, lead times, and warranty comparison |
What to do for intermittent faults, warranty constraints, and edge cases
For intermittent Small Engine Service faults, prepare a log that captures conditions and timing—temperature, humidity, duration, load state, and how the equipment behaves before it fails. Also ask about warranty constraints and what actions could void coverage, especially if your equipment is newer or emissions-restricted.
Why it matters: intermittent issues are among the hardest to diagnose because they may not reproduce during a test window. If you cannot reproduce the symptom, the shop must rely on your documented conditions to attempt a safe reproduction method. Warranty and regulatory constraints can also change what the shop is allowed to adjust or replace without additional documentation.
How it works: you treat intermittent faults like a dataset. Record when it starts acting up, how long it runs before failure, and what changes right before it stops. Note whether it fails after sitting, after fuel reaches a certain level, or after prolonged idling. For electric-start equipment, record battery condition and whether cranking speed changes between attempts.
Practical application: create a brief timeline and include environmental details. If a problem appears when the equipment is cold, warm, rainy, or very hot, mention it. If it runs briefly then dies, specify whether it dies under load or even at idle. Also note hidden causes that become evident during inspection, such as air leaks, crankcase pressure issues, clogged cooling passages, or water ingress effects.
Deeper insight: a common mistake is “chasing the symptom” by repeatedly trying random fixes without capturing the failure conditions. Another is failing to disclose tampering—if you replaced parts, adjusted mixture screws, or cleaned components, tell the shop because those actions can alter the diagnostic results. Tradeoff: you want enough evidence for a test-first approach, but you must avoid unauthorized repairs that could complicate coverage.
Real-world scenario: a mower that intermittently dies after a few minutes might involve fuel venting, debris in the tank pickup, or overheating in a clogged cooling pathway. If you note that the fan shroud is packed with grass and the problem worsens in dry-hot conditions, the diagnostic route shifts toward cooling/airflow and fuel stability.
To reduce ongoing downtime and repeated diagnosis cycles, pair your documentation habits with long-term maintenance planning aligned with reliable starts less wear.
Small Engine Service in 2026: what to expect from national providers vs local shops
In 2026, you can expect more standardized intake and documentation across both national-level providers and local shops, but the quality of communication and parts workflow may vary. Your best move is to ask how each provider handles diagnostic-first steps, estimate approvals, and parts availability.
Why it matters: provider type influences the speed of parts acquisition, the willingness to test before replacing, and how quickly you receive updated findings. National-level providers might have broader parts access and standardized work orders, while local shops often offer more flexible diagnosis and faster scheduling. Neither is automatically better—what matters is how the workflow maps to your urgency and budget.
How it works: many providers follow either a diagnostic-first workflow or a replace-first workflow depending on store policy, the equipment brand, and the typical failure rate. Diagnostic-first shops can reduce unnecessary parts replacement and shorten the path to a precise quote. Replace-first workflows may be faster initially but can lead to rework if the failure cause differs from the assumed pattern.
Practical application: ask about scheduling and turnaround. Confirm whether they inspect and quote before ordering parts. If you have downtime constraints, request an estimate time window and ask whether they can reserve parts once they confirm compatibility. For digital intake forms in 2026, be prepared to upload photos/video of the starting behavior and external components like the air filter and fuel lines.
Deeper insight: communication standards are a differentiator. Ask how they contact you for approval and what the approval boundaries are for add-on work. In some workflows, they may proceed with “minor” parts replacement without re-approval; you should ask where that boundary lies. This is also where location coverage matters—service availability and parts delivery speed can vary by region, even when the provider is national.
Real-world scenario: if you need a generator fixed quickly for events, a local shop might offer shorter turnaround for diagnostics, while a national provider might deliver OEM parts faster but could require longer scheduling. The best decision comes from comparing the documented process, not just the quoted price.
To evaluate provider transparency against your needs, read choose the right repair service.
FAQ about Small Engine Service Checklist Before You Book Today
What should I do before my small engine service appointment?
Bring the model and serial number, your fuel type history, and a clear symptom timeline (when it started and whether it is intermittent). Include photos or a short video of starting behavior and note what you already tried, such as choke position or any cleaning steps. If you did any pre-checks (air filter condition, visible leaks), document them with photos so the technician can diagnose faster.
How do I prepare my lawn mower for Small Engine Service?
Collect the mower’s model/serial and document starting behavior with choke use (for example, whether it fires with choke then stalls). Photograph the air filter after removal (or show the housing condition if you cannot remove it) and note fuel age and storage duration. If it stalls under blade engagement, describe that load condition precisely for the shop.
Is it worth getting a diagnostic before repairs?
In most cases, yes—because Small Engine Service diagnostics identify the category of fault (ignition, fuel, air, compression, mechanical drag) before parts replacement. Ask what the diagnostic includes and whether teardown is included or separately authorized. A clear diagnostic fee structure often saves money by preventing unnecessary parts swaps.
What information do shops need for a no-start issue?
Shops typically need fuel freshness and storage history, starting behavior (cranks normally or struggles), and choke/throttle position during your attempts. Provide evidence like a photo of the spark plug condition if you have it, and disclose any additives or cleaners you used. Also note whether the failure is consistent or temperature-dependent.
How long does Small Engine Service typically take?
Turnaround depends on whether the problem is intermittent and whether teardown is needed for confirmation. Simple diagnostics and tune-up fixes can be faster, while fuel contamination or emissions-system-related repairs may take longer due to parts lead times and verification steps. When you call, ask for a realistic time window for diagnostics first, then for repairs after approval.
What does a “tune-up” usually include for small engines?
A tune-up commonly includes baseline inspections and checks across air, fuel, and ignition, such as air filter condition, fuel delivery behavior, and spark verification. Depending on the equipment, it may also include cleaning, inspection of wear items, and replacing items that are clearly out of spec. Ask the shop to specify what they test versus what they replace by default.
Will ethanol fuel cause my engine problems?
Ethanol can contribute to fuel degradation and deposit formation, especially when fuel sits in storage for long periods. To help the technician, report whether your fuel contained ethanol and how long it was stored (and whether stabilizer was used). Ask how they confirm contamination effects and what mitigation steps they’ll take before running further tests.
Do I need to bring the model and serial number?
Yes, it’s strongly recommended because model/serial numbers are used for parts compatibility and accurate quoting. Even small variations in components or emissions configurations can change the correct parts and diagnostic approach. If you can’t find it, provide a clear photo of the identification label so the shop can verify quickly.
How can I avoid paying for unnecessary parts?
Ask for test-first standards and request a written estimate with labor line items before parts are replaced. Clarify what parts are tested versus replaced by default, and ask for criteria for replacement based on findings. Also set authorization boundaries for “while we’re in there” add-ons so you approve changes with context.
My small engine runs briefly then dies—what should I tell the technician?
Tell the technician exactly how long it runs before dying, whether it happens at idle or under load, and whether it starts better with choke. Note fuel level behavior, storage history, and whether the equipment was in humid/cold conditions. Provide any video evidence of the moment it stops so the shop can focus on fuel delivery stability, venting, overheating, or air leaks.
For deeper context on small-engine health and consistent starting outcomes, you may also compare your maintenance plan with U.S. Department of Energy guidance on energy-related best practices and storage considerations, and review EPA Small Engine and Emissions Information for emissions compliance context where relevant. For diagnostic and safety standards, consult OSHA resources when you handle fuel and run equipment for testing—especially in enclosed or sensitive environments.
Conclusion: compile your service info packet and book with confidence
A Small Engine Service checklist helps you get faster diagnosis, more accurate quotes, and fewer surprise add-ons by turning your appointment intake into an evidence-based process. When you arrive with the machine’s identity, a precise symptom timeline, and photos/video of starting or running behavior, the shop can choose tests logically and validate the most likely causes sooner.
Your next step for 2026 is straightforward: compile the service info packet (model/serial, fuel/storage history, what you already tried, and symptom evidence) before you schedule. Then proactively ask about diagnostic fee structure, estimate timing, parts sourcing expectations, and warranty/approval boundaries. This turns uncertainty into documented decision-making and reduces repeat trips.
Finally, compare provider options based on transparency and workflow quality, not just price. If you want a simple method to evaluate and decide, use choose the right repair service and book only after the shop confirms how they will diagnose and quote. With your checklist ready, you can get the repair you need with less downtime.
Updated May 2026