
Yes, you can usually do some preventive maintenance yourself, but hiring a pro is safer and more consistent for higher-risk or harder-to-diagnose tasks. This is exactly where DIY vs professional maintenance tradeoffs show up in real homes and facilities. The best choice depends on cost predictability, skill and time, and how costly a mistake would be. In this guide, we compare DIY preventive maintenance and professional preventive maintenance across risk, documentation quality, and long-term value.
DIY vs professional maintenance also affects how quickly you catch early symptoms. That can matter for homeowners, small business owners, and facility managers who want fewer surprise failures. Preventive maintenance typically includes routine inspections, cleaning, filter changes, calibration, and replacing wear items before failure. By the end, you will have a decision path and example scenarios to decide what to do yourself and what to outsource.
What “preventive maintenance” should cover in practice
Preventive maintenance means doing planned work to stop failures before they start. It is not the same as responding after something breaks. Instead, you inspect, clean, adjust, test, and replace parts based on manufacturer guidance and observed wear patterns.
In real life, preventive maintenance often covers small tasks that are easy to do consistently. For example, it includes cleaning intake vents, changing filters, checking for leaks, and verifying basic system operation. It also includes calibration or functional checks where the device needs to stay within a target range. Finally, it includes replacing known wear items, like belts or other serviceable components, before they reach end of life.
How it works is simple in concept but detailed in execution. You follow a schedule, then you document what you found. If you see a trend, you adjust the plan. Therefore, preventive work builds a baseline for “normal” performance at your site.
This approach matters because early symptoms are often subtle. A small airflow reduction, a slightly off reading, or a minor vibration can signal an issue long before failure. However, the limitation is that “planned work” has different levels of risk. Some tasks are low-risk checks. Others require specialized tools, sealed-system handling, or safety procedures.
For practical application, think of a seasonal plan. You do low-risk cleaning and visual checks yourself. Then you schedule deeper inspections for components that need measurements or tests. A common mistake is treating preventive maintenance as “part swapping.” That can miss the root cause and create future downtime.
For readers who also manage vehicles and equipment, the same logic applies. A consistent inspection habit is the foundation. If you want a similar routine mindset for outdoor power tools, check out the Small Engine Maintenance Checklist for how step-by-step coverage reduces missed items.
DIY preventive maintenance: when it’s the right tool
DIY preventive maintenance is best when tasks are low-risk, clearly documented, and easy to verify. You can control frequency and often catch obvious problems earlier. However, DIY is not automatic quality. It depends on correct procedures, safe access, and good record-keeping.
In practical terms, “DIY” can be a tight scope. It often includes routine checks, cleaning, filter changes, visual inspections, and basic tightening. It can also include scheduled lubrication, but only where the manufacturer approves it. In addition, DIY can include replacing serviceable wear parts you can access safely, using the correct model-specific replacements.
DIY can win on cost predictability. You may avoid the full callout price for every minor issue. You also build learning value. Each completed task teaches you what normal looks like at your property. Therefore, you get faster at spotting change.
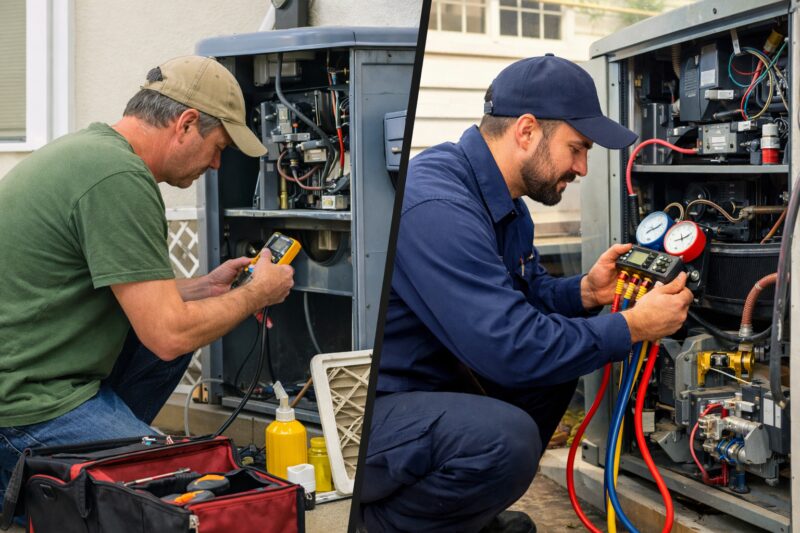
To be a good DIY candidate, you need more than willingness. You need low-risk access, like reachable panels and safe work conditions. You also need clear manufacturer instructions and standardized parts. Another key factor is minimizing invasive disassembly. If the job requires opening sealed housings, bypassing safety interlocks, or reaching hidden wiring, the risk rises quickly.
Hidden time costs are real. You may spend extra time on documentation, parts sourcing, and verification. You might also repeat a task if you discover you skipped a step. In addition, DIY can create false positives. For example, you might interpret normal aging as a fault and trigger unnecessary repairs.
Failure mode examples help clarify the edge cases. Missed early symptoms happen when someone only looks at one component. Over-tightening can damage housings or cause misalignment. Wrong replacement parts can fit but fail early. Skipping the step order can contaminate components or leave a system improperly configured.
To reduce these risks, use checklists and follow step-by-step procedures. Take photos before and after. Label parts as you remove them. Then verify the result using simple performance indicators. As you improve, you can expand scope, but only for tasks you can confirm were done correctly.
Professional preventive maintenance: what you gain and what it costs
Professional preventive maintenance is best when errors are expensive or when diagnosis needs tools and trained judgment. Pros typically deliver more consistent documentation and deeper inspection. The tradeoff is cost and scheduling, especially for bundled service visits.
In practice, professional service is often a repeatable workflow. Technicians perform scheduled inspections with the right instruments. They use experience to interpret patterns, not just single readings. They document findings and provide a corrective action plan. They also follow the manufacturer’s approved methods for service and testing.
The strongest benefit is risk reduction. A pro can detect issues that are hard to see during a quick visual check. For example, some faults show up as trends in sensor behavior, airflow balance, or control response. In addition, professionals can escalate faster when something does not match expected patterns. Therefore, you reduce the chance that a minor issue quietly turns into a failure.
Access to specialized equipment matters too. Some systems require test instruments, controlled checks, or safe procedures for components that DIY users should not open. This is especially important for safety-critical areas like controls and electrical interfaces, or for systems where improper handling can cause damage.
Pricing usually falls into service-plan models, hourly visits, or bundled inspection packages. That means cost varies with what is included. For the price to be worthwhile, the visit should include an agreed inspection scope, documented results, and clear recommendations. If a “preventive” visit only includes basic looks and no measurements, you are paying for uncertainty.
Deeper insight is about quality, not the word “professional.” A top technician with a good checklist will outperform a weaker one in any setting. So, you should compare how service providers document work, follow up, and handle repeat findings. Also look for a clear callback or re-check process if symptoms persist after service.
For cost of ownership, professionals can reduce downtime exposure. That is often the biggest lever for facilities. Fewer repeat callouts and better parts planning can extend system life. However, you still need boundaries. A contract that is too narrow can miss relevant components, while a too-broad scope may include unnecessary work.
How to choose between DIY and professional maintenance using a decision path
You should choose DIY for tasks that you can do safely and verify, and hire a pro for tasks with high consequence or high diagnostic complexity. A decision path turns “gut feel” into a repeatable method. It also helps you decide what to outsource first.
Start with risk level. Ask what happens if you do the job wrong. If the error could cause injury, damage, or safety issues, professional work is usually the right move. Next, assess required skill and tooling. Some tasks need calibrated instruments or controlled test steps, not just basic hand tools.
Then check access complexity. If you need to remove protective covers, work in tight spaces, or handle wiring, risk rises. Also consider manufacturer constraints. Many devices require approved procedures and correct parts to protect warranty conditions. Therefore, your choice should follow the scope in the manual, not a generic online tutorial.
Now sort tasks into three categories. First are DIY-safe tasks. These are routine checks and simple cleaning where you can verify results. Second are “DIY with guardrails” tasks, like work where you can follow step-by-step procedures and confirm using performance indicators. Third are professional-only tasks, like invasive diagnostics, calibration, or repairs that need specialized equipment.
Use a simple rubric approach. Score each task for safety impact, cost impact, diagnostic uncertainty, and verification difficulty. Then average your scores. If the risk score is high, outsource. If the verification difficulty is high, outsource or go hybrid.
Manufacturer guidance is part of how it works. Follow model-specific schedules, approved procedures, and do-not-open guidance for sealed components. In addition, keep documentation for what you did. That record supports comparisons later and helps future troubleshooting. If a control system throws an error, you will want Check Engine Light diagnosis help-style thinking even when the device is not an engine. Patterns matter, and records help.
An edge-case strategy is “start DIY, then outsource.” For example, you can do cleaning and visual checks yourself. Then you hand off calibration or diagnostics when symptoms deviate from baseline. This hybrid approach prevents you from paying pro rates for routine work while still protecting you from hard-to-diagnose faults.
Timing also matters. Plan seasonal pre-checks, after long downtime, and after any repairs. Also watch for performance changes. If the issue keeps returning, preventive work may need to shift into corrective maintenance. That is where professional diagnosis can save money.
Common mistakes and misconceptions that make DIY maintenance backfire
DIY maintenance backfires most often when people misunderstand scope, skip verification, or use the wrong parts. It can also fail when documentation is missing. These issues turn preventive maintenance into a repeat-calls cycle.
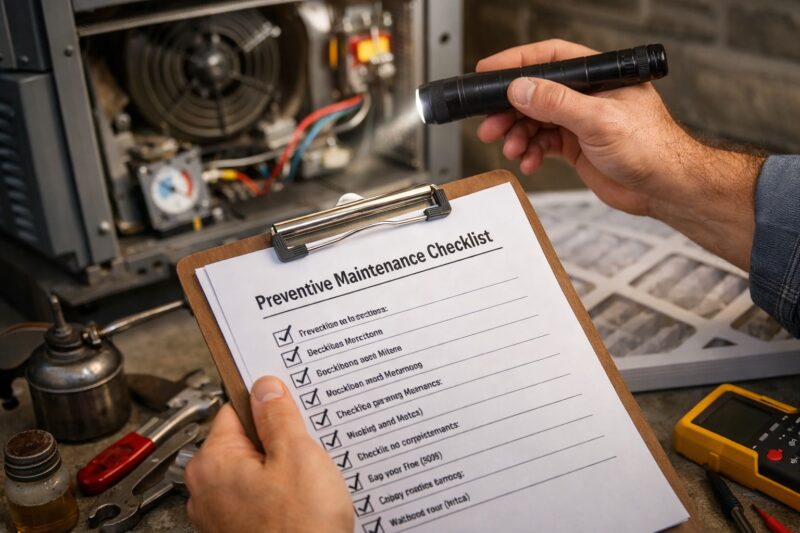
A common misconception is that preventive maintenance is just changing parts. In reality, the goal is to reduce failures by addressing wear and drift. Changing a part without measuring or inspecting surrounding components can hide the real cause. Therefore, you might replace something that was not the root issue.
Another mistake is thinking “if it looks fine, it is fine.” Many problems start as small changes. Airflow restrictions, sensor drift, and early contamination may look normal at first glance. A related misconception is that any similar part works. That can cause early failure, improper fit, or incorrect system behavior.
Practical DIY pitfalls include incorrect part selection, skipping spec steps, and skipping step order. For example, installing the wrong replacement filter can restrict airflow. Over-tightening can damage threads or misalign components. Neglecting airflow paths or drainage can also create conditions that worsen wear.
DIY can also create additional risk through misconfiguration. Improper lubrication can attract dust. Incorrect routing can block vents or interfere with controls. If you disturb wiring or seals without proper procedures, you can worsen reliability.
Deeper insight comes from documentation errors. Many warranties and service comparisons rely on records. If you cannot prove what you did, it becomes harder to confirm whether a issue is new or caused by your work. A subtle error is missing the “before” baseline, like measurements or photos of normal conditions.
Mitigations are straightforward. Use the manufacturer’s step-by-step procedure. Keep photos and receipts. Label what you touched. Then verify results with clear before-and-after performance indicators. Finally, set a stop rule. If you cannot verify, stop and call a professional.
If you own or maintain yard equipment alongside home systems, DIY missteps often show up as repeated faults. For reducing missed steps, the Lawn Mower Repair Checklist can be a helpful template for documenting what you changed and what symptom you verified.
Comparing options beyond the binary: hybrid, scheduled audits, and pay-as-you-go work
You do not have to choose “all DIY” or “all professional” to get preventive maintenance benefits. Hybrid models often reduce cost without losing diagnostic depth. The key is clear boundaries and a plan for measurements and follow-up.
Hybrid maintenance is common. You do DIY basics like cleaning, filter swaps, and visual inspections. Then you schedule a professional inspection at fixed intervals or when performance changes. This works well when you can verify outcomes and you know which tasks are truly DIY-safe. Therefore, you protect yourself from the hardest-to-diagnose failures.
Professional audits are another option. You pay for periodic deep inspections. Then you handle low-risk follow-ups yourself. This can work for facility managers who need consistent coverage across multiple systems. It also helps when you want a baseline trend without daily DIY involvement.
Some people use seasonal service bundles. They time targeted visits to the highest-risk periods for their equipment. For example, they schedule before high-use seasons and again after winter or summer strain. Tradeoffs exist. Bundles can reduce friction, but they can also include work you do not need if the scope is not tailored.
Pay-as-you-go preventive replacement is a hybrid idea too. You replace known wear items only when indicators support it. Indicators can include observed wear, performance drift, or documented conditions. This prevents overspending on parts that are still good. However, the limitation is that it still requires good observation and correct interpretation.
Deeper insight is the transition strategy between DIY and pro coverage. If you move from DIY to professional, start by capturing baseline data. Measurements, photos, and dates help technicians build a clear “normal.” If you move from pro to DIY, get an inspection report first. Then do only the tasks that the report confirms are low-risk.
How “DIY vs professional maintenance” differs in outcomes is simple. DIY often improves responsiveness to obvious issues. Professional work improves consistency for less obvious degradation. Therefore, many owners choose hybrid because it uses each strength where it fits.
For a structured approach to service decisions on off-road equipment, you may also find value in the Off-Road service booking checklist mindset. It helps separate routine follow-ups from higher-risk maintenance that needs a skilled shop.
Maintenance decisions for common home and facility systems: edge cases that change the balance
System type changes the DIY vs professional balance because risk and diagnostic needs vary by component. Safety-critical items and sealed systems often need professional handling. Meanwhile, accessible items with clear verification steps may stay DIY-friendly.
For HVAC, edge cases include control calibration, sensor interpretation, and sealed or hard-to-access components. If you see recurring error codes after basic checks, DIY alone often will not fix the drift. Also, if the system’s performance declines without a clear cause, a professional can interpret airflow and control response patterns. Therefore, the decision shifts toward pro work.
For plumbing and drains, DIY can handle many clear issues like cleaning strainers and checking visible leaks. However, repeated leaks, persistent drain failures, or issues near valves and pressure components can require professional inspection. The edge case is when damage could be inside walls or behind access panels. Misdiagnosis can lead to unnecessary repairs.
Electrical and controls are where professional work often matters most. Safety risks are high. Also, some control issues require precise testing and correct configuration. If you cannot verify results with proper instruments, DIY may increase the risk of creating new faults.
For refrigeration and sealed systems, DIY scope is usually very limited. Handling sealed refrigerant or pressure-related components incorrectly can cause damage and safety issues. Professionals can perform the correct tests and follow approved procedures. Therefore, most preventive work here is either inspection-level or guided by manufacturer instructions.

For motors, belts, and drive systems, DIY can be effective if you can verify alignment, tension, and condition. Yet abnormal vibration, repeated overheating indicators, or recurring failure patterns often point to a deeper mechanical cause. In those cases, a professional can use diagnostic experience to avoid guesswork.
For water heaters, the balance depends on the safety controls and access. If performance changes come with error codes, unusual noises, or recurring issues, professional inspection is safer. Also, documentation matters for warranty. Some service procedures require specific steps and records.
Warranty and service contract nuances can also change what is allowed. Some tasks may be permitted only with approved procedures and documented proof. Common mistake is assuming that “we did it ourselves” automatically qualifies. It may not. Always follow the manufacturer’s allowed scope and keep records.
Nationally, rules vary by region, and some equipment may be regulated or listed. The universal principle is to follow manufacturer-approved scope and safety constraints first. If you believe local legal requirements apply, confirm them based on your system type and documentation.
DIY vs. Professional Preventive Maintenance: Pros and Cons FAQs
What’s the real difference between preventive maintenance and routine repairs?
Preventive maintenance focuses on actions done on a schedule to reduce the chance of failure. It includes inspections, cleaning, and replacement of wear items before breakdown. Routine repairs address a fault that already exists, based on symptoms after failure. A good preventive plan reduces how often repairs are needed.
When does DIY preventive maintenance become unsafe or too risky?
DIY becomes unsafe when tasks involve safety-critical parts, sealed components, or high-consequence failure modes. For example, repeated faults after basic checks may mean you need specialized diagnostics. Also, if you cannot verify correct operation after the work, risk increases. When verification requires calibrated tools, professional help is usually the safer path.
Will DIY maintenance void my warranty?
DIY does not automatically void a warranty, but it can if you do not follow approved procedures. Check the manufacturer documentation for allowed service scope and required record-keeping. Keep receipts, photos, and dates of work. If a warranty requires authorized service for certain components, DIY outside that scope can be an issue.
How do I know which tasks I should leave to a professional?
Leave tasks that require specialized testing, invasive disassembly, or complex calibration to a professional. Also outsource when the consequences of error could be costly or unsafe. If you cannot match the correct parts and steps from manufacturer guidance, hire a pro. A practical rule is to stop when you cannot verify outcomes clearly.
What should a professional preventive maintenance visit include to be worth it?
A worthwhile visit includes a clear inspection scope and documented findings. It should include measurements or tests where applicable, plus recommended next steps. You should also receive documented work performed and any corrective actions taken. If the report does not connect findings to recommendations, it may not be true preventive value.
How can I compare service plans versus one-time professional maintenance?
Compare coverage boundaries, visit frequency, and what is included in each scheduled . Look for how the provider handles escalation or callback if the issue returns. Also review exclusions, documentation expectations, and how parts planning is managed. Then match the plan to your equipment’s risk profile and operating conditions.
Is a hybrid approach better than choosing only DIY or only professional maintenance?
Hybrid can be better when you can do low-risk tasks well and still get pro coverage for hard diagnostics. It works best when boundaries are clear and you maintain records. For example, do cleaning and visual checks yourself, then schedule professional audits when performance drifts. Without guardrails, hybrid can fail due to missed trends or unclear handoffs.
What are the most common DIY mistakes that lead to repeat service calls?
The most common mistakes are misdiagnosis, wrong parts, and skipping the correct procedure steps. Another frequent issue is poor verification after the work is complete. Documentation gaps can also make it harder to identify patterns later. As a result, the same underlying cause remains unresolved.
How do professionals catch issues DIY owners often miss?
Professionals use diagnostic patterns, trends, and measured values, not just visual symptoms. They interpret sensor readings and system response in context. They also know which checks rule out likely causes. As a result, they can find less obvious degradation before it becomes a failure.
How often should preventive maintenance be done for my equipment in 2026?
Frequency depends on manufacturer guidance, operating intensity, and environment. Dusty or humid conditions can increase wear. Equipment that cycles heavily may need more frequent checks. For your plan, start with the model’s schedule, then adjust based on documented performance trends and repeat findings.
Closing tradeoffs and a practical next step for 2026 planning
The decision comes down to where DIY vs professional maintenance changes outcomes. DIY can be cost-effective and responsive for low-risk tasks. Professionals improve diagnostic confidence and reduce high-consequence mistakes.
Use the decision path you built: categorize tasks by risk and complexity, follow manufacturer-approved scope, and keep records. Then track trends, not just one-off results. If performance changes, treat that as a signal to adjust your preventive plan.
A practical next step is to inventory your equipment and write down the maintenance scope it needs. Next, label each task as DIY-safe, DIY-with-guardrails, or professional-only. Then compare a hybrid schedule against a professional audit plan, based on your DIY boundaries and verification ability.
When you evaluate service options, compare the scope of any professional visit against your equipment needs and your DIY boundaries, not just price. That way, you avoid paying for “busywork” and you reduce the risk that preventable issues slip through. If you want to strengthen your routine habits across tools, align your documentation style with your Small Engine Maintenance Checklist and keep your records consistent.
Finally, remember that prevention works best when it is measurable. DIY improves your responsiveness to obvious issues. Professional maintenance improves consistency for the less obvious parts of system health. Therefore, the best plan is the one you can execute correctly, consistently, and safely.
Updated September 2026