
Before race day, use this checklist-style Go Kart Repair plan to identify the most likely faults fast and apply track-ready fixes—no guesswork, no theory. This isn’t a “shop textbook” guide; it’s a practical sequence built around limited tools, track-side realities, and knowing when to stop and tow instead of improvising. If you do Go Kart Repair correctly, you reduce downtime, prevent repeat failures, and keep the kart safe and legal for track use. Use the sections in order—pre-ride → pre-heat → race-day quick fixes—so you can jump straight to what matches your timing and symptoms. This checklist covers both mechanical reliability and safety/control checks that matter most before you roll onto the grid.
Go Kart Repair Triage: Diagnose Fast Before You Spend Money
If your kart is acting up, start Go Kart Repair triage by matching the symptom to the subsystem instead of swapping parts randomly. In a race weekend, the fastest way to save money is to do a short “symptom-to-system” diagnosis first, then decide whether a quick fix will actually address the root cause.
Why it matters: most race DNFs come from issues that were detectable early—loose steering hardware, weak brake return springs, failing fuel delivery, or wiring problems. When you diagnose first, you prevent repeat failures that cost more time than parts ever would. It also helps you stay compliant with track safety rules, because “working well enough” isn’t enough if brakes or throttle return are unsafe. In practice, triage gives you a defensible decision: what you checked, what you found, and what you changed.
How it works: use a decision path that converts what you see and feel into a likely subsystem. Symptom first (won’t start, hard start, bogs under throttle, surges, loses power, abnormal noise, wheel spin with no drive), then the subsystem: fuel/spark/air, drivetrain (clutch/belt/chain + axle load), steering/brakes (control system), cooling/engine health (overheat or exhaust restriction), and electrical (kill-switch, grounds, charging/regulator where applicable). This structure matters because each subsystem has distinct “quick confirmation” signs: fuel problems tend to show fuel smell or plug wetting, ignition problems tend to show misfire patterns, and drivetrain issues tend to show vibration, heat, or load-related RPM changes.
Practical application: narrow causes with minimal tests—visual inspection for obvious damage or dislodged parts, quick functional tests (throttle return and brake release by hand), listening for a consistent noise that appears at specific RPM ranges, and smell checks (raw fuel, hot clutch/belt odor, or overheated bearing smell). Avoid full teardown during triage. Instead, pick the most likely cause and confirm it with one or two targeted checks. For example, if you hear a rattle that increases with load, suspect chain misalignment, clutch/drive engagement problems, or a loose fastener before assuming a “bad bearing” right away.
Tradeoffs/limitations: triage can’t confirm everything, especially intermittent faults. You may see two simultaneous issues that mask the root cause. A common edge case is a misfire that looks like carb or fuel trouble: a loose kill-switch or failing ground can cause ignition dropouts that mimic “runs rich” symptoms. Another example is a kart that both surges and has sticky brakes; if you only fix the carb, you still risk heat-soaked clutch failure and repeated stalling.
Real-world scenarios and next actions: if you find a loose axle or bearing, stop further “engine tuning” and treat the mechanical fault first—re-secure, inspect for damage, and only then retest. If the kart has clean mechanical motion but a persistent bogging pattern appears after tuning changes or fuel refills, suspect jetting/mixture or air leaks (especially at intake clamps or fuel line connections). Prepare the parts/tools that support the specific next step: for loose bearings, have the correct bearing/retainer hardware and thread-lock plan; for suspected mixture, be ready with jets or adjustment components appropriate to your carb model rather than broad, random part swaps.
When you’re planning deeper support, it helps to review a related workflow like an Engine Service Reliability Checklist approach before events with higher risk of DNFs. If you want the “before the shop gets involved” sequence, use the timing guidance from Before You See Mechanic while you keep triage focused and safety-first.
Pre-Race Go Kart Inspection Checklist (10–20 Minutes) That Prevents DNFs
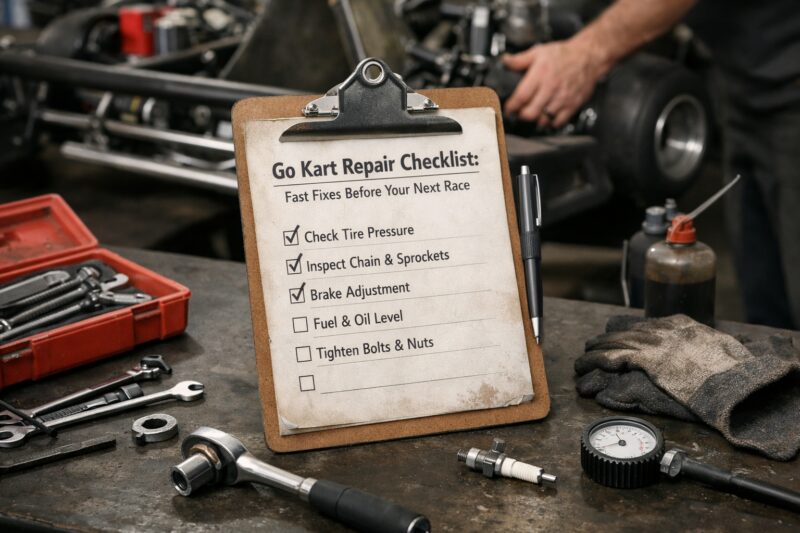
Use this pre-race Go Kart Repair inspection checklist to catch brake, steering, and starting-system issues before they cause an unsafe condition or a late-weekend failure. Spend 10–20 minutes, follow the sequence, and apply the “race day stop/go” rules so you don’t gamble on controllability.
Why it matters: DNFs often happen not because the engine is “bad,” but because the control system fails or something was slightly out of spec from the last session. A loose steering linkage can feel minor on jack stands yet becomes dangerous under corner load. Likewise, brake drag that seems small in the paddock can overheat pads and rotors/drums in just a few laps. Pre-race checks also reduce repeat failures by ensuring you correct the actual assembly issue, not the symptom.
How it works (timed sequence): start with a quick walkaround—wheels straight, no missing guards, no obvious rubbing, and no damaged hoses or fuel lines. Next do fast safety checks focused on performance: verify brake actuation and return (the kart should release cleanly with no continued drag), confirm wheel/axle security (no play beyond normal bearing feel), check steering play and free movement (no binding), and test throttle return (it must snap back reliably). Then run-up checks: start the kart briefly and listen for unstable idle, abnormal rattles, or misfire behavior. Finish with readiness sign-off: confirm the engine mounts are secure, exhaust isn’t leaking excessively, and all fasteners that affect safety/control are tightened appropriately.
Practical engine fundamentals without teardown: check air filter condition and placement (oil-soaked filters, misplaced filter housings, or loose clamps can create unpredictable mixture), verify fuel line integrity and routing, confirm the fuel cap/venting situation is correct for your system, and look for exhaust leaks at joints/manifolds. Inspect for loose fasteners around the engine mounts, intake, and exhaust—vibration can loosen hardware quickly on kart frames with aggressive driving.
Deeper nuance: watch for false positives. Brake pad thickness is not the same as brake effectiveness—contamination, glazing, or a sticking caliper/cable path can ruin braking even with “thick pads.” Similarly, vibration can come from tire wear or bent steering components; don’t assume the axle is bent just because the kart feels rough under load. Common mistake most guides make: they focus on engine tuning alone; track safety and controllability are the first-priority Go Kart Repair items.
Stop/go rule for race start: if brakes don’t fully return or the kart cannot achieve confident, repeatable stopping on the surface you’ll race on, treat it as unsafe and pause. If throttle return is inconsistent, don’t race—fix or tow. If steering has measurable play, binding, or wandering on a straight push test, escalate before you roll onto the grid. If the issue is clearly fixable within minutes (like a disconnected throttle return spring, a visibly loose wheel hub nut, or an obvious intake clamp mis-seated), correct it on-site and retest immediately.
For teams that want a consistent routine, it helps to align this inspection with broader maintenance cadence and documentation. A companion resource like Prevent Costly Breakdowns can help you keep this pre-race checklist tied to the wider reliability plan rather than “one-off” fixes.
Quick Fixes by Symptom: What to Repair First (Spark, Fuel, Air, Drivetrain)
Pick the right Go Kart Repair quick fix by symptom first—no-start, hard-start, bogging, surging, loss of power, abnormal noise, or no-drive. The goal is to correct the system that causes the symptom before you waste time adjusting the wrong thing.
Why it matters: symptoms act like a map to the subsystem. If you treat every issue as an ignition problem or every stutter as “jetting,” you increase the chance of repeat breakdowns. Quick fixes work best when you do small confirmations that separate mixture problems from ignition problems, and drivetrain issues from engine issues.
How it works: treat each symptom like a mini-triage case. For no start, your first-pass order should usually be safety and fundamentals: kill-switch/ground connections, fuel presence, spark indication, and air path issues (like blocked filter or intake clamp). For hard start, focus on flooding signs (wet plug, strong fuel smell) and starting-system behavior—then check fuel delivery and air leaks. For bogging or loss of power under throttle, prioritize mixture delivery (fuel flow restrictions, fuel line routing, intake leaks, or carb settings) and load transmission (clutch/belt/chain engagement and tension).
Practical quick checks and fixes: when you suspect ignition, inspect the spark plug condition and look for obvious ignition-lead or connector faults rather than immediately buying parts. When you suspect fuel delivery, check that fuel reaches the carb consistently and that the fuel line isn’t collapsing under suction or heat. When you suspect air issues, look for loose clamps and hissing/rattle points near intake/exhaust joints; a small air leak can create lean surging that looks like “jetting needs to change.” For drivetrain “wheel spin/no drive,” start with clutch engagement, chain alignment, and tension condition; many no-drive issues come from a load path problem, not from the engine.
Tradeoffs/limits: decide when adjustment is appropriate vs replacement. Some tuning adjustments are reversible and safe to try (idle mixture tweaks, throttle cable tension within spec), but worn components often can’t be “tuned away.” Example: if a clutch/belt system shows heat glazing, cracking, or inconsistent engagement, replacement may be the safer Go Kart Repair action than repeated tension changes. A common mistake is to over-adjust: you can create new problems while chasing symptoms, especially with throttle cable routing and brake linkage.
Deeper nuance: differentiate mixture vs ignition with simple behavior signs. Mixture issues often produce changes in RPM response as you tweak throttle opening; ignition misfires often show as abrupt RPM dropouts or “skipping” behavior even when mixture settings appear unchanged. Plug color can provide hints, but don’t treat it as the only truth—plug readings can be distorted by recent starts, idling time, or rich “choke” behavior.
Tool readiness tie-in: keep first-pass supplies that match these symptom categories—spare plug(s) appropriate to your class/heat range, basic intake/exhaust clamp capability, and a small set of adjustment components used on your kart type. If you want to tighten your “engine reliability workflow,” align your symptom fixes with the systematic mindset behind the Tune Up Before Race guidance.
Brakes, Steering, and Chassis Checks: Fast Repairs That Keep You in Control
If you’re forced to choose what to check first during Go Kart Repair, prioritize brakes and steering before drivetrain or engine tuning. Control failures are both safety-critical and race-weekend problem multipliers because they create heat, tire wear, and unpredictable handling.
Why it matters: brakes and steering define whether you can run consistent lines. Brake drag accelerates pad wear and can overheat components, while sticky or delayed steering return can cause exit-speed loss and higher mechanical load in every corner. Track tech often has safety inspection requirements, so even if an engine “runs,” an unsafe control condition can end your session.
How it works (control-system priority): check brakes first for function and return. Verify pads/cable/hydraulic components are intact, the return spring works (or that calipers retract correctly where applicable), and the rotor/drum doesn’t rub continuously. Then check steering: confirm tie-rod ends/bushings/bearings are secure and the steering system doesn’t bind or develop play. Under real load conditions (as much as safely possible), steering should feel repeatable and predictable without wobble or wandering.
Practical repair steps: for brakes, address the fastest root cause first—routed linkage, return spring misrouting, seized slide hardware, or misaligned caliper/rotor mounting. For steering, repair the “rock-and-wobble” source: worn tie-rod ends, loosened kingpin hardware, or failing bushings. Tightening key fasteners correctly matters more than simply “making it snug,” because vibrations can loosen hardware and create recurring failures. If you’re unsure on torque, defer to the kart manufacturer or class rules rather than guessing.
Deeper nuance: heat changes everything between heats. Brake fade can appear after repeated laps, and bearing lubrication breakdown can show up as rising play or noise after warm-up. Between heats, do quick checks: confirm the wheel still spins freely when brakes are released, and listen for bearing noise that wasn’t present earlier. A common mistake is to assume “it worked in the pits” means it will work after heat soak; heat can change clearances, fluid behavior (where hydraulic), and friction performance.
Chassis fast-check items that affect performance: ensure wheel alignment/track width is correct for the kart setup, look for signs of bent axle or uneven tire seating, and inspect frame mounts for looseness around the engine and steering supports. If you find frame mount looseness, don’t just tighten once—investigate why it loosened (missing thread-lock, wrong fastener grade, or prior impact) so you don’t repeat the failure.
For teams that want to expand this into a complete maintenance and prevention rhythm, connect your control-system checks to broader reliability planning from Prevent Costly Breakdowns.
How to Choose the Right Go Kart Repair Option (DIY, Track Service, or Tech Shop)
Choosing the right Go Kart Repair option comes down to complexity, time constraints, and safety risk—not just whether you “can” fix it. Use a decision framework so you repair what you can confidently diagnose, and escalate the rest to avoid losing the whole weekend.
Why it matters: the cheapest fix is the one that prevents repeat failure and gets you back on track quickly. A mistaken DIY teardown can remove evidence a technician needs (witness marks, assembly states, or the exact failure mode under controlled inspection). The goal is to maximize your probability of success per hour while staying safe and track-legal.
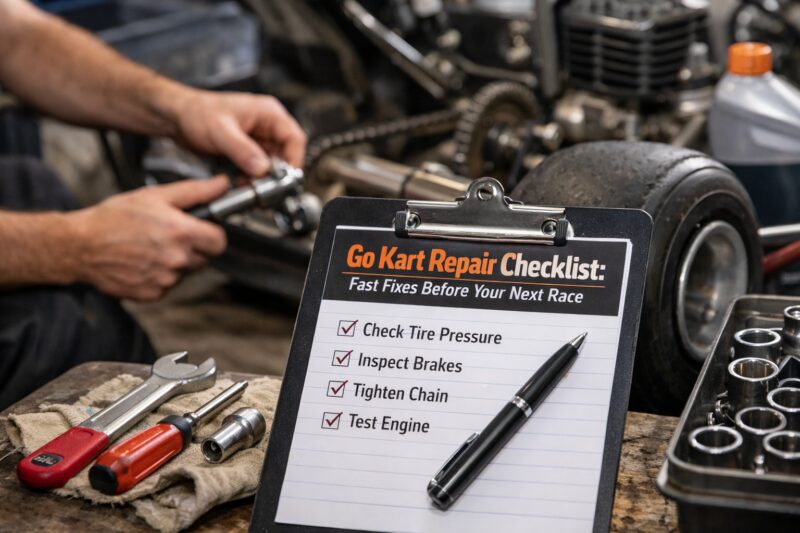
How it works (2–4 realistic approaches): first, DIY troubleshooting with safety-first checks—best for obvious faults like disconnected throttle linkage, loose fasteners, simple intake clamp issues, or a contaminated plug. Second, track-side mechanical service—best when you need quick controlled diagnostics using their parts, stands, or spares, and when replacement can happen immediately. Third, parts-replacement strategy DIY—best when you have correct spares and the failure is straightforward, like replacing a cracked belt section or a worn brake return spring. Fourth, professional overhaul at a tech shop—best for ambiguous intermittent issues, repeated belt/chain failures, driveline rebuilds, bearing preload concerns, or wiring faults that require systematic testing.
Tradeoffs: DIY can be fast when the issue is obvious and you have the right spares. But DIY can also increase total cost if you “strip” components without careful documentation, or if you replace parts that a shop would diagnose differently. Track service trades some per-hour cost for turnaround speed and diagnostic tools. Tech shops can add more time but provide traceability and a structured service record that helps if the same failure repeats. Ask about what they test, what they replaced, and how they verify safety sign-off before release.
Common mistake: waiting too long to escalate. If a component repeatedly fails after repeated adjustments, the correct action is usually deeper inspection rather than more of the same. For example, changing belt/chain tension without verifying sprocket alignment and clutch engagement can lead to repeated failures and additional damage that becomes expensive to repair.
Practical vetting criteria before you approve work: require diagnostic transparency (what checks were performed and what results were observed), confirm parts sourcing practices (genuine vs compatible components), and ensure they provide safety sign-off. If you plan to document your own work, use reference marks or before/after settings so the shop can diagnose faster. For “how to prepare,” it helps to read and apply Before You See Mechanic principles so your DIY triage leaves useful information instead of confusion.
If you also want to avoid future repeats, connect your repair decision-making to a prevention mindset like Engine Service Reliability Checklist.
Common Go Kart Repair Mistakes and Misconceptions That Cost Race Day
The most expensive Go Kart Repair mistakes are usually diagnostic shortcuts—replacing parts without confirming root cause, skipping safety checks, or “temporarily” changing settings that break under heat and vibration. Avoid those patterns and you protect both race-day time and track safety eligibility.
Why it matters: racers often treat DNFs as “bad luck,” but most repeat failures come from a repeatable mechanical or assembly issue. Misconceptions about tuning (like believing jetting will fix an air leak, or that clutch adjustments can compensate for worn driveline components) lead to ongoing failures and wasted spare budgets. Safety-related mistakes also risk disqualification or unsafe operation, which is never worth the savings.
How it works (mistake patterns): replacing without diagnosis is the biggest recurring issue. If you swap plugs, jets, or belts while ignoring the control system, you may simply change the symptom behavior while the actual fault remains. Another common mistake is incorrect fastener torque and reassembly habits. For instance, misrouting a throttle return spring can create inconsistent throttle snap-back; misrouting brake linkage can cause partial release or delayed return. These are “small assembly” errors that show up later when heat expands parts.
Practical guidance: interpret “sounds like X” carefully. Bearing noise, chain misalignment noise, and exhaust leaks can overlap acoustically. The better method is to isolate: change only one variable at a time during testing, and observe whether the noise changes with RPM, load, or throttle position. Also, beware false confidence from incomplete inspection. For example, a kart that “seems fine” after a track cool-down may still have friction issues that only appear under braking heat.
Deeper nuance: incorrect reassembly habits cause repeat breakdowns because they alter critical clearances and geometry. A common error is reassembling with mismatched orientation: for example, installing rotors/drums or guard components in a way that later rubs, or putting a clutch/belt alignment piece back without matching reference marks. Another mistake is over-adjustment. When a technician says “we adjusted it,” racers sometimes interpret that as “make it tighter until it stops failing.” In reality, out-of-spec adjustments can create new stresses that shorten component life.
Fix it correctly: document before/after settings and use reference marks when allowed. If your adjustment system supports it, record cable lengths, tension positions, or idle screw settings. That reduces repeat failure because you can compare outcomes and find whether a “successful lap” came from a correct adjustment or from temporarily bypassing the real issue.
To reduce these mistakes long-term, connect your checklist behavior to a service prevention program like Prevent Costly Breakdowns and keep your baseline tune consistent using Tune Up Before Race.
Some Go Kart Repair problems don’t show up on a quick pre-race inspection—especially intermittent faults caused by heat, tolerance stacking, or wear patterns. If your kart fails after a few minutes, repeats the same belt/chain issue, or develops creeping steering play, switch from “checklist mode” to deeper diagnosis and escalation.
Why it matters: intermittent failures are often the most dangerous and most costly because they tempt you into repeated half-fixes. A problem that only appears after heat soak can cause clutch/belt slippage, fuel delivery instability, or ignition dropout. When wear items combine (tolerance stacking), the kart can pass light checks yet fail under race loads—so you need escalation rules before catastrophic damage happens.
How it works (edge-case scenarios): stalling after a few minutes often points to fuel venting, heat-soaked carb or intake behavior, electrical connection issues that open when warm, or exhaust restriction. Repeated belt/chain failures can indicate alignment, sprocket wear, clutch engagement geometry, or an underlying driveline bearing condition that changes under load. Creeping steering play can signal slowly failing bearings/bushings, loosened kingpin components, or frame mount micro-movement under cornering forces.
Deeper inspection angles: bearing preload can be wrong even when the kart feels “mostly smooth.” Check alignment under load if possible, and look for signs that fuel tank venting is stuck or blocked. Exhaust leaks can open up under thermal expansion, creating lean conditions or misfire behavior that only appears when the engine is hot. If you have consistent problems, review where your setup is near the edge of spec—small deviations can stack into a failure.
Interpreting wear patterns for diagnosis: clutch/belt contact marks and uneven scuffing can reveal misalignment or incorrect engagement. Brake pad transfer patterns can show incomplete release or misaligned rotors/drums. Tire scrub patterns can reflect drivetrain drag, toe/steer geometry issues, or a bent axle indicator that wasn’t obvious visually. Deeper insight: many “mystery problems” come from tolerance stacking—slightly loose hubs plus worn sprocket plus a slightly off-tension can create a repeat failure pattern that feels random.
Common mistake: treating edge-case failures as normal maintenance. If a fault repeats, stop trying to tune around it. Escalation rule: when you see repeat failure after correct first-pass fixes (for example, you replace a belt but still get the same failure mode within the same session), you should pause race activity and move into full inspection/servicing. That prevents catastrophic failure like shredded belts, seized bearings, or control system lock-ups.
For teams who want a structured path from troubleshooting to service scheduling, follow the mindset in Engine Service Reliability Checklist and use Before You See Mechanic to capture the failure timeline and evidence before escalating.
Parts & Consumables Strategy for Faster Go Kart Repair (What to Carry, What to Stock)
Speed up Go Kart Repair at the track by stocking the right consumables and targeted spares, not by carrying every possible part. A smart spares list reduces downtime because you can apply the correct fix immediately when triage identifies the subsystem.
Why it matters: the most frustrating race-day delays are waiting for a part to arrive or swapping in the wrong compatibility option. Consumables run out first—plugs foul, brake components wear, belts and chains stretch, and fasteners loosen under vibration. Stocking the right categories helps you correct root cause quickly and prevents repeat failures caused by using incompatible or worn components.
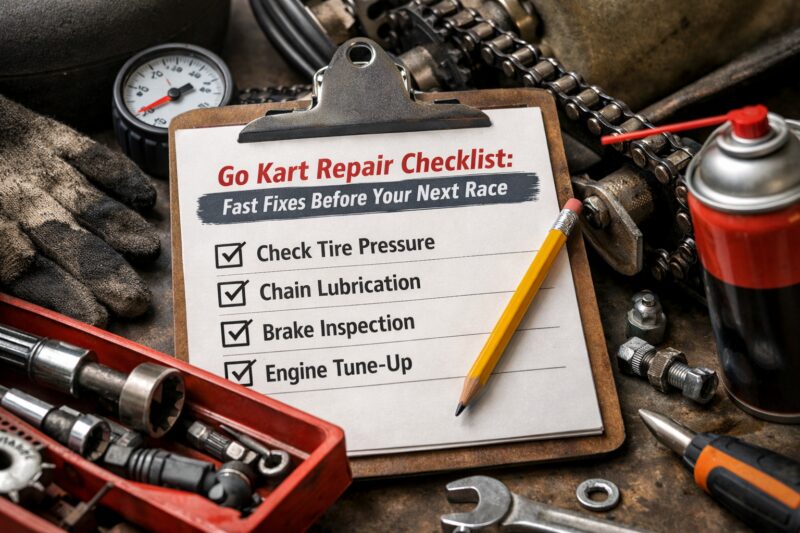
What to carry (category-based): ignition consumables (spark plug(s) and any common ignition wear item for your engine class), fuel system parts (fuel line segments, clamps, and any common venting/fitting component), belts/chains/clutch wear items (replacement belt/chain sections and any alignment-critical pieces you’ve confirmed fit), brake components (pads/shoes, return springs, and basic linkage hardware), bearings/bushings (spares only if your kart history suggests predictable wear), and fasteners (the correct bolts/nuts with appropriate grade plus thread-lock where permitted).
Replace vs recondition guidelines: cleaning is helpful when contamination is the only issue, but replacement is safer when components show cracking, glazing, deformation, or heat damage. For example, resurfacing brake components might help in some cases, but if you’re dealing with heat-transfer damage that affects friction consistency, replacing pads/shoes is usually more reliable. For driveline parts, if alignment-critical surfaces show wear that changes under load, reconditioning without proper measurement can lead to repeat failure.
Deeper nuance: compatibility risks are real. Chain pitch/length mismatches can cause rapid failure. Clutch model fit issues can lead to incorrect engagement geometry. Bearing specs and spacer stacks are especially easy to get wrong when you grab “the same size” from a parts bin. The practical application: verify part numbers against your kart model and engine spec, and keep note of the correct orientation and spacer order when you remove components.
Planning method: map your known failure history to your spares list. If you repeatedly experience throttle return problems, prioritize throttle return spring/related hardware and inspection markers. If belts fail due to alignment rather than wear, carry the alignment-critical pieces and verification tools so you can fix the cause immediately. If you want to standardize your recurring tune and part swaps, a repeatable workflow like Tune Up Before Race helps you keep parts usage consistent across race weekends.
For long-term reduction in repeat failures, connect your spares plan to ongoing prevention work like Prevent Costly Breakdowns.
Frequency-Driven Maintenance Rhythm: Build a Go Kart Repair Plan Around Your Schedule
Build your Go Kart Repair plan around how often you race or practice, not around vague “someday” maintenance. A frequency-driven rhythm helps you catch wear before it becomes a race-day failure.
Why it matters: maintenance intervals that work for one track and one driving style can fail when conditions change. Track surface and temperature alter friction loads on brakes, heat soak behavior in the engine, and wear rates on tires and driveline components. When you tie service to measurable evidence—starts reliability, brake performance consistency, vibration trends—you reduce uncertainty and spend time where it actually prevents DNFs.
How it works: choose cadence based on hours, sessions, or mileage equivalents that match your schedule. Many teams do “minimum viable maintenance” after each session (quick inspections, fast safety checks, and basic cleaning of intake/external hazards) and then “full-cycle” maintenance periodically (more thorough driveline inspection, brake system assessment, and engine component checks). If you’re time-crunched, minimum viable maintenance can still be rigorous if it targets high-risk failure modes: throttle return, brake release, wheel/axle security, and signs of overheating. For higher-frequency racers, full-cycle maintenance might align with every few race weekends or every set number of sessions, depending on wear signals.
Practical application: decide interval using failure evidence. If you’re seeing brake fade earlier in the day, you may need more frequent pad/rotor/drum inspection or better brake system checks. If start reliability declines, you may need more frequent ignition/fuel system verification. Track reliability metrics are measurable: note how many races start without issue, how quickly brakes feel consistent after warm-up, and whether vibration increases session-to-session.
Deeper nuance: track and temperature changes maintenance needs. A hotter event can increase fuel vaporization risk, intensify clutch/belt wear, and raise bearing load. That can invalidate a fixed interval. Common mistake: using the same interval year-round without adjusting for climate and track style. The fix is to “re-validate” intervals at the start of each event block, then adjust based on observed wear patterns.
To keep your rhythm connected to a repeatable plan, use a broader framework like Engine Service Reliability Checklist so your after-session items and periodic service items remain consistent.
Frequently Asked Questions About Go Kart Repair
What should I check first for Go Kart Repair if it won’t start?
Start with safety and the simplest checks: verify kill-switch position, throttle return movement, and that fuel is reaching the carb. Then do quick confirmation for ignition and fuel/air basics by checking plug condition and whether the spark plug shows signs of firing attempt (without unnecessary teardown). If the plug is dry and there’s no fuel smell, prioritize fuel delivery and air filter/intake clamp integrity before swapping parts. Stop and escalate if you find loose wiring or unsafe control-system behavior.
How do I troubleshoot a Go Kart that loses power mid-race?
Match the symptom to likely causes by checking fuel delivery consistency first, then confirm ignition behavior, then assess drivetrain load changes. If it loses power as RPM rises, inspect for carb/air leaks, restricted fuel flow, or ignition misfire patterns. If it feels like it “freewheels” or loses drive under load, inspect clutch/belt/chain tension and alignment. Use a stop/go rule: if throttle return becomes inconsistent or brakes drag severely, pause to prevent unsafe operation and heat damage.
What are the most common Go Kart Repair fixes for brake problems?
Brake problems usually involve pad contamination or wear, return spring/linkage issues, or cable/hydraulic problems where applicable. A quick functional test is essential: the brakes must release fully with no persistent rubbing after you stop. If pads are still thick but braking is weak, check for sticking hardware and alignment between rotor/drum and pads. Replace parts when you see heat cracking, severe glazing, or damaged linkage rather than repeatedly adjusting.
How often should I do maintenance for a Go Kart?
Maintenance frequency depends on sessions and operating conditions, but many teams do after-session safety checks plus deeper checks on a set schedule. Minimum viable maintenance typically covers throttle return, brake release, wheel/axle security, and quick inspections for vibration or rubbing. Full-cycle maintenance is done periodically based on hours/sessions and wear signals you observe, like vibration trend or declining start reliability. If the track is hotter or you race more aggressively, shorten intervals because heat accelerates wear.
Can I do Go Kart Repair at the track during a race weekend?
Yes, but only for problems that match your tools and time window. Track-side service can handle common mechanical adjustments and parts replacements quickly when spares are available. Some issues should not be improvised—wiring faults, driveline rebuild needs, and safety-critical control failures should be escalated to a qualified mechanic or tech shop. If you can’t confirm safety after a fix, tow or pause rather than “testing” at speed.
What does it mean if my Go Kart makes a rattling noise?
Rattling noises can come from loose fasteners, drivetrain issues like chain misalignment, clutch/belt engagement problems, worn bearings, or exhaust leaks. The key detail is when the rattle occurs: at idle, only under throttle, or only under corner load. Inspect systematically by checking wheel/axle security and listening while you vary RPM/load. If the rattle increases with braking or steering input, prioritize control system and driveline checks over engine tuning.
Why does my Go Kart stall after a few minutes of running?
Stalling after a few minutes often points to heat-soak problems such as fuel delivery instability, carb behavior changes, exhaust leaks opening when hot, or electrical connections that fail when warm. Check fuel line routing, tank venting behavior, and intake/exhaust clamp integrity for air leaks. Also examine grounds and wiring connectors for intermittent contact. If stalling repeats consistently as the engine warms, escalate to deeper diagnostics rather than endlessly adjusting mixture.
What tools do I need for fast Go Kart Repair?
You should carry tools that support quick functional checks and the specific first-pass fixes from your symptom triage, not an all-purpose workshop. Common categories include basic metric sockets/wrenches for fasteners, spark plug tools, a way to verify cable/connection security, and the essentials needed to inspect brake and steering fasteners. For safety checks, you also need reliable access to the kart so you can verify throttle return and brake release without improvising dangerous tests. The exact set depends on your kart model and engine type, so match tools to your common failure history.
How do I choose between DIY Go Kart Repair and a professional mechanic?
Choose DIY when the failure is obvious and you can diagnose the root cause quickly with minimal disassembly, using parts you already have. Choose a professional mechanic when symptoms are intermittent, safety-critical, or repeat after first-pass fixes, because they need proper diagnostic tools and a structured inspection. Ask for diagnostic transparency—what tests they performed and what evidence led to their parts decisions. Also confirm safety sign-off procedures and parts sourcing practices before approving repairs.
Where can I get parts for Go Kart Repair quickly in 2026?
For fast turnarounds in 2026, look for local kart dealers, track-side mechanical shops, and nearby kart parts retailers that stock common wear items for your kart class. Many racers also use online ordering with known part numbers matched to their model and engine spec, then pick up or ship to the event if the schedule allows. The fastest strategy is to identify the most common failure items from your past weekends and keep those part numbers ready for rapid ordering. If you can provide the exact component model and thread/fit details, you reduce delays caused by compatibility errors.
Conclusion: Use Triage, Control-First Checks, and Targeted Fixes to Stay Race-Ready
To win time back on race weekend with Go Kart Repair, follow three themes: triage-first diagnosis, control-system safety priority, and symptom-based quick fixes that prevent DNFs. Start by matching the symptom to the likely subsystem, then confirm with minimal tests before you spend money or start swapping parts.
When you repair, keep the focus where it matters most: brakes and steering first, drivetrain second, and then engine fundamentals. Use clear decision-making rules for escalation: DIY and track-side fixes for straightforward, evidence-backed problems, and tech shop service when issues repeat, are intermittent, or involve safety-critical uncertainty.
Finally, make the routine repeatable—keep a targeted consumables/spares plan, align maintenance cadence to your race/practice schedule, and track a few reliability metrics like start success and brake consistency. Before your next event, use this checklist before race day and consult a qualified mechanic or track service for unsafe or repeat failures.
For deeper supporting workflows, review these related resources: Before You See Mechanic, Tune Up Before Race, Prevent Costly Breakdowns, and Engine Service Reliability Checklist.
Updated May 2026