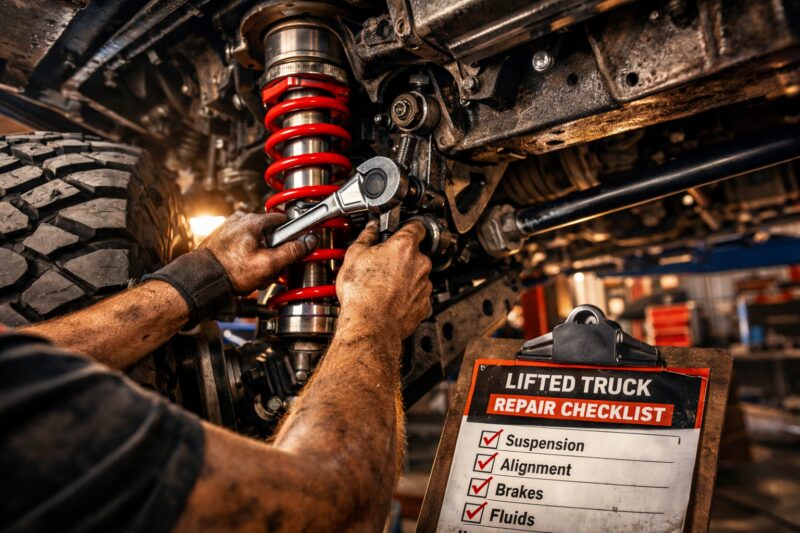
A Lifted Truck Repair checklist helps shops diagnose efficiently and prevents avoidable rework, which is the quickest path to faster service turnarounds for commercial vehicles. A smart workflow is especially important in 2026 because lifted trucks introduce variable fitment, altered geometry, and access challenges that standard, “one-size-fits-all” shop checklists commonly miss. Fleet managers, independent owners, and dealerships all benefit when estimates include measurable lift-specific details up front—because approvals become faster, costs become more predictable, and vehicles spend fewer days out of service.
In practical terms, the checklist reduces diagnostic loops by forcing the shop to capture lift data, correlate symptoms to lift-induced geometry, and confirm alignment/fitment before final assembly. It also gives service writers a common language to communicate what is pending diagnosis versus what is waiting on parts. If you want commercial downtime minimized, this is less about rushing work and more about eliminating uncertainty early.
Lifted Truck Repair Intake Checklist: Capturing the Right Info First
To speed up Lifted Truck Repair, capture the correct intake information before any major disassembly happens. When lift type, ride height, driveline context, and symptom details are recorded in a consistent format, shops diagnose faster and avoid ordering the wrong parts—two of the biggest turnaround killers.
Why it matters: lifted vehicles change the “baseline” the technician expects. The same vibration or noise can mean different things on a stock truck versus a truck with a suspension lift, leveling kit, or a re-indexed driveline. A checklist also matters commercially because the estimate is often what triggers authorization; if your intake is incomplete, approval waits on additional photos, measurements, or second inspections.
How it works: start with a standardized intake form that records lift type (brand/model/category if known), lift height, spacer/coilover/suspension lift details, and install date. Install date isn’t just trivia—it impacts torque spec expectations, corrosion/fastener risk, and parts availability, because many lift systems age into different failure patterns. In the same intake, document driveline and tire/wheel details: tire size, wheel offset/backspacing, alignment history (if the truck has had it), and any prior balancing notes. This helps the shop predict common failure modes before components are removed.
Practical application: ask the service writer to log symptoms precisely rather than loosely. For example, note noise timing (under braking, during steering at low speed, at highway cruise), vibration thresholds (when it starts, when it changes, whether it goes away with throttle), and handling changes (steering wander, braking pull, harsh impact response). Then correlate those details to lift-induced geometry changes like altered caster/camber, changed driveline angles, and tire contact patterns.
Access and labor estimate checkpoint: include an intake step that addresses whether lift height affects inspection access, hoist clearances, underbody damage risk, or teardown time. A tall lift may require additional disassembly to reach brake hose routing or steering components safely, which can change the labor hours needed.
Tradeoffs and limitations: when lift specs are unknown, the checklist must define how to log “unknowns” and what happens next. A strong estimator should not assume. Instead, they should capture measurements and photos, perform quick under-vehicle baseline checks, and identify what must be verified after teardown. This avoids the common “second-diagnosis loop” where a shop replaces one part based on an assumption and then discovers the real cause was geometry, clearance, or worn mating components.
Real-world scenario: a dealership service team receives a lifted pickup with a steering clunk and a complaint of “vibration after installing new tires.” A standard intake may capture the complaint but skip wheel offset and tire size. The lifted-truck intake instead records wheel backspacing, tire size, and lift height, then logs that the clunk occurs over small bumps. That combination often points to steering linkage wear and/or joint play under ride height, which can be tested before alignment and before parts are ordered.
For additional guidance on selecting a repair partner and setting expectations around documentation, see resources on how to choose the right shop workflow, such as choose the right mechanic.
Triage Decision Path: Diagnose to Fix Faster (No Wasted Teardown)
Lifted Truck Repair turnaround improves when diagnosis follows a triage decision path that prioritizes safety-critical items first. The goal is to run targeted tests in the right order so technicians confirm or eliminate causes early—without tearing down components repeatedly.
Why it matters: wasted teardown is expensive and delays authorization. Lifted trucks can also create misleading “symptom stories” because geometry affects how parts load each other. If a shop chases the most obvious symptom first (like alignment pull) without checking brake/steering integrity, it can trigger avoidable rework and comeback visits.
How it works: use a step-by-step decision path that prioritizes brakes, steering, suspension joint integrity, and any suspected structural concerns. Then define criteria for when to proceed directly to repair versus when to run targeted tests before committing labor. For instance, if there is steering play, do a stop-start inspection for steering play before scheduling alignment as the “first fix.” If braking behavior suggests a brake system imbalance or hose restriction, confirm brake hose routing and line condition before removing calipers or replacing pads.
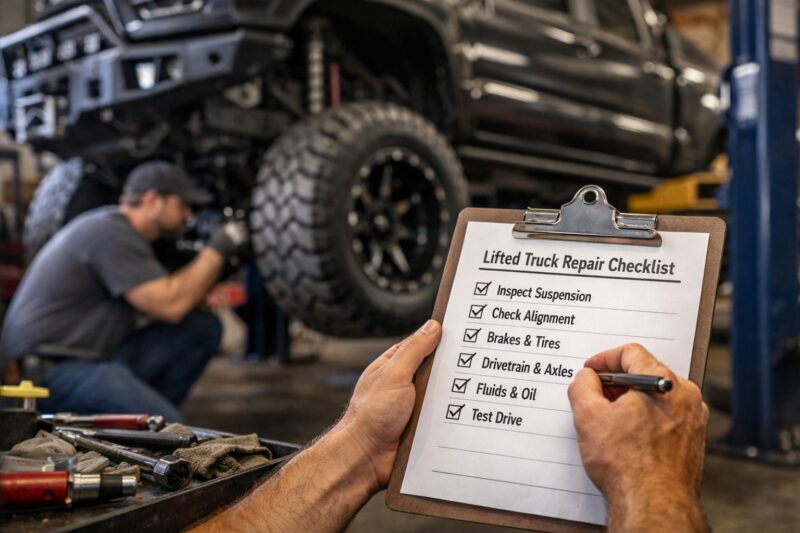
Diagnostic sequencing strategy: visual inspection → mechanical checks → alignment/geometry verification → component testing. Ordering reduces rework because alignment verification can reveal that a “mechanical noise” is actually a bind from incorrect fitment or toe/caster mismatch. Once geometry is verified, component testing becomes more meaningful, such as checking U-joint play at the correct ride height or evaluating differential-related vibration under load.
Red flag stop conditions: escalate immediately if you see frame cracks, repeated joint failures, damaged brake lines, suspected differential issues, or corrosion severe enough that fasteners may fail during reassembly. Commercially, escalation should also be communicated quickly because it changes the risk profile and the authorization decision.
Deeper insight: avoid symptom chasing by isolating whether vibration stems from driveline angle versus tire balance versus worn suspension bushings. A common mistake is testing on jack stands only, then declaring the “cause” because a joint feels fine at rest. Lifted vehicles can unload and reload components differently; technicians should confirm joint play and alignment-related bind at ride height whenever possible.
Practical scenario: a lifted truck arrives with a “high-speed wobble.” A rushed approach might rebalance tires and replace rotors. A triage path first verifies wheel/tire fitment, then checks steering linkage tightness and suspension joint integrity, then confirms alignment and geometry before concluding that driveline vibration is the primary cause.
When you standardize triage and documentation, shops can align internal teams faster, which is a core part of broader faster job success steps for downtime reduction.
Alignment, Geometry & Fitment Verification for Lifted Truck Repair Turnarounds
For Lifted Truck Repair, geometry verification must be treated as a measurable checkpoint, not a “nice-to-have” after parts replacement. Confirm caster/camber/toe, ride height, and steering wheel centering before final assembly sign-off to prevent premature returns.
Why it matters: lifted trucks can show symptoms that mimic mechanical failure even when the real problem is geometry and fitment. If you skip alignment verification, the vehicle may return quickly with tire wear, persistent vibration, pulling, or squeaks from binding. Commercially, that means repeated labor charges, additional approvals, and prolonged downtime.
How it works: require alignment/geometry verification with before-and-after documentation. Lifted vehicles often have altered ride height and linkage angles, and even if the customer “didn’t touch alignment,” the lift install itself may change caster and camber. Verify ride height at the time of alignment because changing ride height changes readings; confirm the steering wheel centering so the driver experiences straight tracking and predictable handling.
Fitment verification steps commonly missed: check brake hose routing and clearance, confirm CV/UB joint angle considerations, and inspect evidence of rubbing on tires, wheels, and underbody components. Look specifically at where hoses arc, where they could contact the frame or steering components, and where lift-induced changes might create contact under full lock or compression. Document what you find with photos of reference points and the lift height measurement.
Document measurements for traceability: capture photos of reference points and store before/after alignment printouts. That documentation protects the shop in authorization disputes and supports warranty decisions by showing cause/effect, not just outcomes.
Tradeoffs and limitations: alignment alone cannot fix every problem. If you have bent components, mismatched tire brands/sizes, or incorrect lift install tolerances, adjustment may not correct the geometry safely. In those cases, the checklist should trigger parts correction rather than repeated alignment attempts.
Edge case: a truck has a recent lift install but no settling period verification. In the first days after the lift, bushings and springs can settle and change ride height slightly. If alignment is performed before settlement, the customer may experience vibration or pull soon after. The checklist should include whether the lift system has completed settling and whether torque verification is complete.
To extend alignment reliability through consistent shop practices, align your workflow with guidance from selecting a service center equipped for repeatable lift diagnostics, such as select an off-road service center.
Parts & Labor Planning Checklist: Reduce Waiting and Approval Delays
Lifted Truck Repair turnaround depends heavily on parts readiness and labor planning, because the fastest diagnostics still fail if parts are late or incorrect. A commercial-friendly checklist ties parts compatibility to lift specifics early so you can quote realistic timelines and avoid approval delays.
Why it matters: lifted trucks often use non-standard components, geometry-changing hardware, and driveline or brake kits that are not interchangeable across lift systems. If a shop waits until teardown to confirm compatibility, the repair can stall during the approval process or during parts shipping.
How it works: implement a parts readiness workflow that identifies OEM versus aftermarket compatibility constraints tied to the lift system. For example, brake kits and UCA/LCA geometry changes can alter parts selection and routing. Differentials and driveline components may also require specific angles, pinion factors, or balance considerations depending on the lift type and operating conditions.
Lead-time strategy: confirm availability early and pre-verify interchangeability. Flag likely “while we’re in there” items based on age/mileage and symptom context—such as suspension wear items that tend to fail around the same mileage window as the diagnosed problem. Include torque spec references, required tools, and corrosion/fastener risk assessment in the labor plan, because stuck hardware can expand labor time significantly on lifted vehicles with more exposure to road salt and debris.
Communication template for service writers: set realistic timelines by separating what is pending diagnosis from what is waiting on parts. This reduces scope creep because customers and fleet managers can make better authorization decisions. The checklist should also require a clear “diagnosis gate” before committing to parts replacement.
Deeper insight: address partial repair rework, where one joint is replaced but misalignment or worn mating components are not handled. On lifted trucks, geometry issues can overload a component that was “okay” initially but fails under corrected or changed angles. The checklist prevents this by requiring alignment/fitment verification before calling the job complete.
Tradeoffs: rushing into a repair decision without parts readiness can create a timeline mismatch where technicians are ready but parts aren’t. Conversely, over-planning can slow the first estimate. The checklist should strike balance by verifying the most critical constraints first (lift specs, alignment needs, and safety-critical parts).
Commercial scenario: a fleet manager needs the truck back for a scheduled route. The shop uses the parts checklist to confirm interchangeability of suspension arms and brake hardware for the specific lift type. They also pre-kit consumables and set an appointment sequence aligned to parts arrival, reducing idle time in the bay.
Common Mistakes & Misconceptions in Lifted Truck Repair (and how to Avoid Repeat Work)
The biggest Lifted Truck Repair mistakes are usually “checklist reuse” errors: applying a standard repair checklist unchanged to a lifted vehicle. When geometry changes, inspection priorities and part wear patterns change too, so the checklist must reflect lift-specific realities.
Why it matters: misconceptions lead to repeated visits. A shop may replace a suspension joint, realign the truck, and still see vibration return because the true cause was driveline angle interaction, tire fitment offset issues, or brake hose clearance under load and steering angle. Commercially, every comeback costs labor, inventory time, and customer trust.
Frequent pitfalls to avoid: skipping lift-height measurement, assuming tire size matches manufacturer spec, overlooking brake line clearance, and neglecting steering linkage inspection. Another frequent issue is not validating joint play at ride height. On lifted trucks, a joint can feel tight on jack stands but loosen under real load conditions.
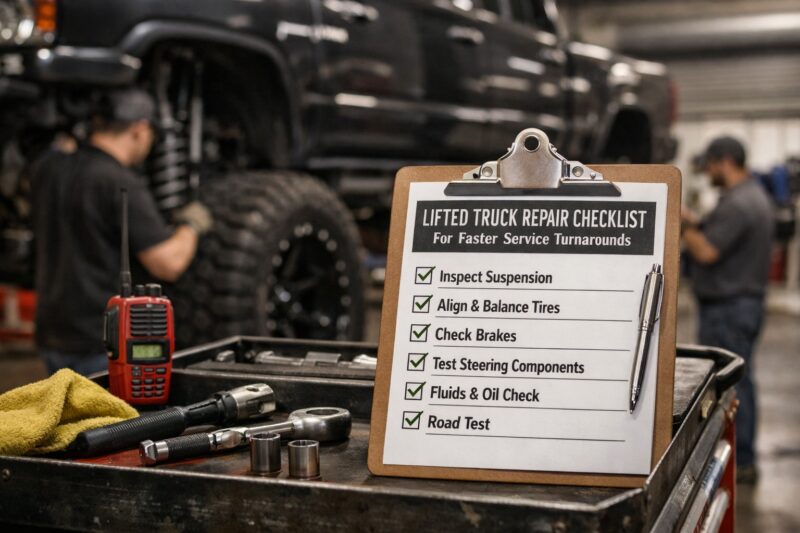
Documentation mistakes that slow approvals: missing photos, missing measurements, or write-ups that do not clearly connect observed symptoms to the diagnosed cause. For commercial customers, clarity is a timeline feature. If the service writer can show before/after evidence and align it with the authorization request, approval delays shrink.
Hidden damage misconception: lifted trucks can show components that look fine initially but fail under load after disassembly—especially after impacts. For example, a bent control arm may not be obvious on a quick visual inspection but will cause abnormal wear or binding after reassembly. The checklist should include post-teardown inspection gates so you do not “assume the old part is straight” just because it appears intact.
Deeper insight: lifted trucks amplify diagnostic uncertainty because they introduce multiple interacting variables (geometry, tire fitment, driveline angle, and compliance changes). What most guides get wrong is treating one variable as the cause without validating the others. The correct approach uses triage sequencing and measurable checkpoints so you confirm likely causes rather than declaring them.
Real-world scenario: a technician hears a squeak and replaces a bushing. Without checking for brake hose or steering bind clearance, the squeak returns because another component contacts during steering lock. The repair checklist should have required clearance verification before concluding the bushing was the root cause.
If you are building a repeatable workflow, ensure your shop process includes the same diagnostic gates and documentation standards discussed in commercial off-road repair checklist.
Repair Options & What to Look For (Alternatives that still meet faster turnaround goals)
Lifted Truck Repair options should be selected based on both speed and verification needs—not just the fastest parts swap. The best turnaround often comes from choosing a repair category that matches the verified root cause and includes alignment/fitment proof.
Why it matters: “fast fix” choices can fail if the lift-induced geometry root cause is not corrected. Conversely, a fully corrective approach can be slower if it requires multiple parts and long lead times. Commercially, you need a decision framework that balances downtime with long-term reliability and return-risk.
Categories of repair approach: replace-only (targeted component replacement), corrective repair (geometry plus component correction), and preventive refresh (service items at lift-induced wear points). Replace-only may be appropriate when diagnosis confirms a single failed part and fitment constraints are already validated. Corrective repair is appropriate when symptoms correlate to geometry, clearance, or driveline angle issues. Preventive refresh is appropriate when wear patterns show multiple items are likely to fail soon, especially in high-salt or high-mileage operations.
Comparison table (approach vs speed/verification needs):
| Repair approach category | Turnaround speed potential | Return-risk if skipped steps | Verification needed for faster success |
|---|---|---|---|
| Replace-only | Fast when cause is isolated | Medium to high if geometry/fitment is off | Fitment clearance + geometry check proof |
| Corrective repair | Moderate (parts + setup) | Lower when root cause is geometry/clearance | Alignment/ride height + road test validation |
| Preventive refresh | Moderate with pre-kitting | Lower across repeat wear patterns | Torque spec readiness + inspection gates |
Practical guidance for choosing OEM vs aftermarket: consider compatibility with the lifted setup, installation complexity, and return-risk. OEM parts can reduce fitment uncertainty, but aftermarket can be faster if it is proven to match the specific lift system. The checklist should require that any selected part family matches lift-specific constraints and that the shop documents any deviations.
Downtime optimization strategies: schedule staging appointments after parts arrival, and sequence work so alignment time happens after all adjustments and final component installations. This avoids re-bay time where technicians align, then reopen for missing parts. A repair decision should also set expectations for when a road test will occur and what “success criteria” the customer will feel (noise elimination, stable steering, vibration reduction at specific speeds).
Tradeoff: speed without root-cause correction can create “repeat visits.” The checklist prevents this by requiring minimum verification steps even when the chosen repair appears straightforward.
Advanced & Edge-Case Considerations (What Most Checklists Miss)
Lifted Truck Repair checklist quality is measured by how well it handles edge cases—situations where standard assumptions fail. If your workflow misses these, you will see vibration returns, repeated approvals, and unpredictable labor time.
Why it matters: lifted trucks can present unique conditions such as incomplete settling after a recent lift install, driveline vibration after re-indexing, or persistent balance issues from mismatched wheel/tire sizes. Advanced considerations also matter for commercial fleets because edge cases can cause extended downtime when the shop must order parts it didn’t anticipate.
Common edge cases: first, recent lift installs with incomplete settling or torque verification. If the lift system was assembled without a proper torque verification schedule, a repaired suspension joint may loosen again, making the “fix” feel temporary. Second, vibration after driveline re-indexing can happen if pinion angles or indexing references weren’t verified to spec after lift height changes. Third, mismatched tire brands or sizes can create persistent vibration that looks like component failure.
Corrosion and fastener risk planning: on lifted trucks, more underbody exposure means stuck hardware is more common. Pre-check fasteners and plan for thread repair, penetrating oil cycles, and potential replacement hardware. This step reduces “labor surprise,” which helps service writers quote realistic timelines and reduces approval churn.
Sensor/ECU-adjacent diagnostic considerations: some lifted-truck symptom sets can masquerade as mechanical issues. While the checklist should not guess electronically, it should prompt technicians to confirm whether warning codes, sensor faults, or drivability changes are contributing to symptoms that seem like suspension or driveline problems.
Load and use scenario impacts: towing, off-road impacts, frequent highway vibration, winter road debris, and salt exposure change outcomes. The checklist should capture usage context because it affects component wear likelihood and the priority of preventive refresh items.
Deeper insight: include a post-repair verification loop—what to test on the road after alignment and torque. A common mistake is a quick yard test that doesn’t reproduce the condition. Road tests should target the original complaint conditions: the same speed band, steering angles, braking events, and road surface type if possible. This is where lifted-truck comeback visits are prevented.
To reinforce the kind of documentation and communication that makes edge-case fixes faster, build your process around repeatable shop communication and validation steps consistent with faster job success steps.
Lifted Truck Repair Turnaround Workflow for Shops (From Estimate to Final Sign-off)
A Lifted Truck Repair turnaround improves when shops run a single end-to-end workflow from intake to final sign-off. Instead of treating diagnosis, authorization, and repair as separate tasks, the workflow standardizes each handoff and embeds quality gates to reduce returns.
Why it matters: handoff delays are a major cause of downtime, especially for commercial customers. If technicians document details inconsistently, service writers must re-contact fleets for missing information. If alignment happens too early, technicians may re-open work later. A workflow prevents these inefficiencies.
How it works: intake → triage tests → diagnosis notes → parts/authorization → repair sequencing → alignment/verification → quality sign-off. The intake stage includes lift height and fitment details. Triage tests confirm safety-critical items first. Diagnosis notes document symptoms precisely and connect them to lift-specific geometry or component checks.
Internal accountability points: assign who verifies lift height/measurements, who confirms alignment results, and who signs torque specs and inspection checkmarks. This reduces the “someone assumed someone else did it” problem. Quality control gates should occur after teardown (confirm hidden damage not missed), after reassembly (confirm routing and clearances), and after a short road test (confirm symptoms resolution).
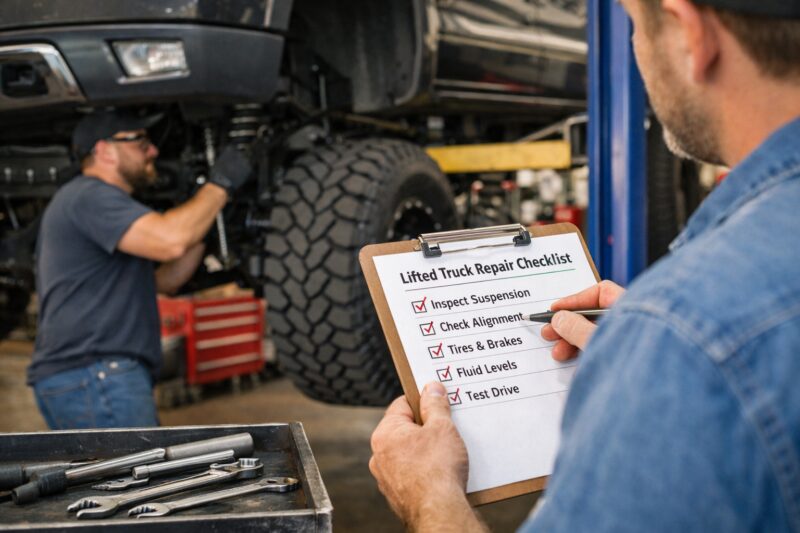
Final invoice and notes for commercial transparency: list parts replaced, relevant measurements, tests performed, observed symptom changes, and any remaining recommendations. Commercial customers need evidence so they can approve quickly next time and so they can compare outcomes across repair events.
Tradeoffs: more gates can slow the process if not structured well. The checklist should minimize duplication by using the same measurement sources and photo sets across stages. For example, the same lift-height photos used at intake should be referenced in alignment confirmation documentation to prevent rework in reporting.
Real-world scenario: a dealership service department receives multiple lifted trucks for vibration complaints in a single week. With a standardized workflow, the advisors can submit approvals with comparable measurement data, and technicians can stage parts and alignment work without waiting for missing documentation.
To extend workflow discipline across shop systems, consider aligning your intake and documentation standards with the broader guidance in commercial Off-Road Repair checklist.
Geography Anchor: Lifted Truck Repair in the United States (National Considerations That Affect Timing)
Lifted Truck Repair timing in the United States varies by region due to corrosion severity, parts distribution differences, and shop capacity cycles. Building a checklist that accounts for these national constraints helps shops keep commercial turnaround promises during 2026 peak demand.
Why it matters: salt exposure and winter road debris can drastically change fastener risk. In northern states, corrosion can turn a routine suspension component replacement into a multi-day repair because hardware may require thread repair or additional replacement. In other regions, parts availability can vary by local inventory and distributor speed, affecting the lead-time planning section of the checklist.
How it works: document climate and road-condition impacts as part of the intake and approval communication. If a truck is from a salt-heavy area, note expected labor increases for corrosion-related fastener delays. That information should be used early in the estimate to avoid authorization surprises.
Regional spec variations: typical tire/wheel sizes and off-road usage patterns differ. Some regions have more aggressive tire fitment common in off-road usage, while others see more highway towing or winter drivability. The checklist should capture usage context and align part selection accordingly, rather than assuming a universal lift and tire behavior.
Deeper insight: adapt the checklist for shops with limited hoist or aligner capacity. If alignment resources are constrained, prioritize what keeps the vehicle safe and driveable first: confirm brake and steering integrity, perform targeted inspections, and stage parts so alignment happens at the correct time in the workflow. What most guides get wrong is focusing only on technical steps and ignoring capacity planning, which is often the real bottleneck in commercial turnaround.
Practical scenario: a shop in a winter-heavy region uses the corrosion and fastener risk check as an estimate multiplier and pre-quotes additional hardware possibilities. That speeds approvals because customers understand why labor time may extend and why pre-authorization matters when stuck hardware is likely.
For commercial buyers trying to reduce timing risk, evaluating how a shop manages capacity and documentation is part of “choose the right repair partner,” aligned with choose the right mechanic.
Frequently Asked Questions About Lifted Truck Repair
How do I speed up a lifted truck repair turnaround without rework?
Speed it up by using the measurement-first intake and triage decision path so the shop confirms lift-specific constraints before ordering parts. Require evidence like lift height measurements, symptom timing notes, and a short under-vehicle baseline before teardown. This reduces diagnostic loops that cause rework when the first repair guess was incomplete.
The estimate should include lift type or lift height details, photos/measurements that show what the shop found, and a parts lead-time statement. It should also specify the diagnostic gates planned (for example, when alignment/geometry will be verified and what tests will confirm the cause). Clear pending-versus-approved scopes prevent back-and-forth during authorization.
Can a lifted truck be repaired quickly if the lift specs are unknown?
Yes, but only if the shop uses substitute verification steps like lift-height measurement, photo capture of key reference points, and targeted clearance checks. The checklist should avoid guessing part compatibility based on model assumptions alone. Instead, it should plan for “unknowns” by verifying fitment and geometry early to prevent wrong-part ordering.
What alignment checks matter most after lifted truck suspension repairs?
Focus on caster, camber, toe, ride height verification, and steering wheel centering. Also confirm that the steering feels straight after alignment and that tire contact patterns look correct for the lifted stance. Alignment alone can be insufficient if components are bent or if clearance issues exist, so pair alignment proof with fitment inspection.
Why does my lifted truck vibrate even after new suspension parts?
Vibration can come from driveline angle changes, tire/wheel balance effects, or suspension compliance differences that were not verified at the correct ride height. If joint play and fitment were checked only on jack stands, the vibration may persist under load. The checklist should require verification of geometry and driveline factors before declaring the suspension repair complete.
How do shops prevent comeback visits after lifted truck repair work?
Shops prevent comebacks by using quality control gates after teardown, after reassembly, and after a short road test that reproduces the original complaint conditions. They also document measurements and alignment/verification proof so there is accountability. Tight documentation reduces the chance that a vehicle returns with unresolved geometry or clearance issues.
Are aftermarket parts reliable for lifted truck repair timelines and quality?
Aftermarket parts can be reliable when they are compatible with the specific lifted setup and when the shop documents fitment verification. The biggest timeline risk is ordering parts that look compatible on paper but do not match clearance or geometry constraints. Ask about warranty terms, return policy, and how compatibility is confirmed before installation.
What are the most common lifted truck repair mistakes that delay service?
The most common mistakes are missing lift-height specs, skipping brake/clearance checks, and running incomplete diagnostics that focus on the wrong variable. Delays also occur when photos and measurements are not captured for authorization. Without those inputs, approvals and parts ordering stall, extending downtime.
How often should preventative maintenance be included in lifted truck repair jobs?
Include preventative refresh based on mileage, age, and usage patterns (towing, off-road impacts, or salt exposure), not only on the diagnosed symptom. If the checklist identifies lift-induced wear points that are likely near end-of-life, pairing them into the same job often shortens total downtime. Shops should present it as a documented recommendation tied to observed wear, not generic upsell.
What should I ask a shop before approving lifted truck repair work?
Ask how they will verify lift-specific details (lift height, clearance, and alignment plan), what diagnostic tests they will run before committing to parts, and how long parts lead times are expected to be. Also ask what QC gates they will perform and how they document measurements/photos for the authorization and final sign-off. Finally, ask whether they can reproduce the symptoms during a road test before closing the job.
Conclusion: Faster, Safer Lifted Truck Repair with a Checklist-Driven Workflow
A Lifted Truck Repair checklist delivers faster service turnarounds by doing five things well: measurement-first intake, triage decision-path diagnosis, alignment and fitment verification, parts and labor planning that respects lead times, and quality control gates that prevent repeat work. When each stage captures and communicates the right details, commercial approvals become faster because the estimate is grounded in evidence, not assumptions.
In 2026, lifted trucks are common in commercial fleets and dealerships, and the cost of uncertainty is high. This approach reduces diagnostic rework, shortens time-to-authorization, and lowers comeback visits by confirming geometry and clearances before final sign-off. It also helps service writers and technicians speak a shared “proof language” so waiting time becomes an exception rather than the norm.
If you’re a service buyer, ask the shop for documentation: photos and lift-height measurements, alignment printouts (before/after), and a post-repair road test verification note tied to your original symptoms. If you manage shop operations, adopt/standardize the workflow and train staff to follow the gates consistently. For more related commercial Off-Road Repair process framing, review the broader checklist approach in commercial Off-Road Repair checklist.
For authoritative background that supports safer, standardized maintenance and corrosion awareness, consider guidance from Federal Motor Carrier Safety Administration and National Highway Traffic Safety Administration, plus manufacturer technical instructions where available. Your checklist should ultimately align with those safety expectations while remaining lift-specific in its measurements and verification steps.
Updated May 2026