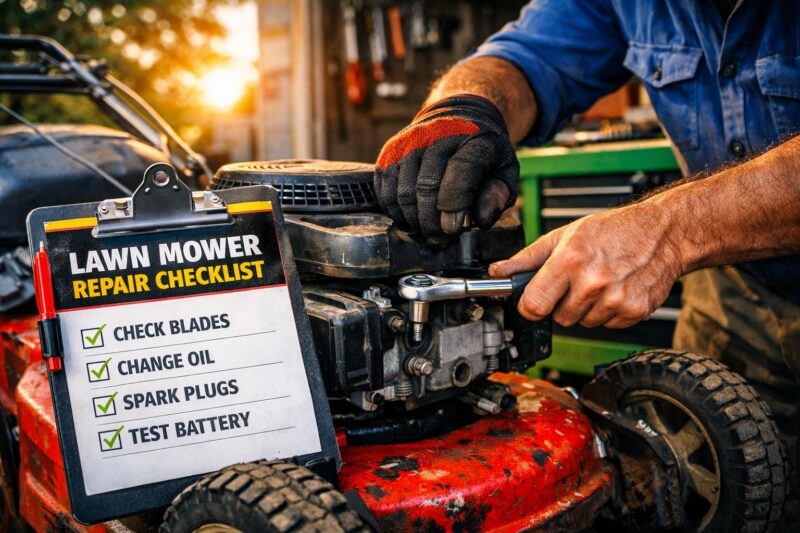
A Lawn Mower Repair checklist helps commercial customers get reliable answers faster—so a shop can diagnose quickly, reduce downtime, and avoid repeat visits caused by guessing parts. For 2026 operations, that matters even more when properties are scheduled around seasonal growth and staff coverage. This guide lays out a practical, safety-first, proof-based process for delivering fast, cost-effective Lawn Mower Repair across push, self-propelled, and riding models. It’s designed for homeowners, property managers, and small service teams that need predictable turnaround, documented results, and clear approvals before labor and parts add up.
Top 10 Questions About Lawn Mower Repair Checklist for Fast, Cost-Effective Service
If you need Lawn Mower Repair work done quickly and without surprise labor, the real question is not “what’s wrong?”—it’s “how will the shop prove the cause?” A strong checklist organizes intake, safety triage, diagnostics, and approvals so technicians don’t duplicate checks or skip evidence. For commercial customers, this reduces downtime and helps you plan mowing schedules with fewer “bring it back” scenarios.
The checklist starts before any tools touch the mower: it captures symptoms in a structured way, verifies mower type and configuration, and gathers operational history that changes the repair path. That “upfront clarity” is what controls labor costs, because ignition, fuel delivery, airflow, blade load, and safety interlocks each follow different diagnostic paths. When shops rely on vague descriptions like “it won’t start,” they often remove parts that were never the root cause, which increases both time and customer frustration.
Practically, this checklist can be implemented as a paper form, a service-bay checklist, or a mobile intake workflow. The key is evidence-based decision-making: record what was tested, document results, and only recommend parts after confirmation tests. Tradeoffs exist: a fully documented process may add a few minutes at intake, but it usually saves far more time by preventing duplicated labor. Real-world scenarios include property managers who have multiple similar mowers failing the same way after winter storage, where a consistent intake protocol enables pattern-based stocking and faster repeatability.
Common guides get one thing wrong: they treat diagnostics as a “guessing game” rather than a decision tree. The checklist should force replication—especially for intermittent problems. For example, a mower that starts cold but stalls after warming may involve fuel evaporation, temperature-sensitive ignition, or deck load affecting airflow; without a replication protocol, the shop may chase the wrong branch.
What Does a Lawn Mower Repair Checklist Do for Customers?
A Lawn Mower Repair checklist streamlines service by turning customer symptoms into a structured diagnostic plan, which leads to faster, more consistent decisions. For commercial clients, it reduces downtime and lowers the chance of repeat visits caused by incomplete diagnosis.
Why it matters: customers don’t pay for “activity,” they pay for corrected performance. A checklist ensures technicians address the actual failure mode—starting failure, stalling under load, uneven cutting, unusual noise, reduced power, or drive/traction issues—rather than replacing parts based on assumptions. This is especially important when multiple mowers are operating on a shared schedule, such as weekly cuts for retail properties or recurring maintenance for HOA-managed neighborhoods.
How it works: the checklist captures symptom details, confirms mower type (push, self-propelled, riding), and gathers configuration information such as bagging vs mulching and blade height habits. Then it runs safety triage, followed by proof-based tests that follow a logical order (often fuel/air/ignition before mechanical teardown). Documenting “tests performed + results” prevents duplicated diagnostics if the job is paused, escalated, or handed off between technicians.
In practical application, shops can use photo/video intake to reduce back-and-forth—spark plug appearance, air filter condition, clogged discharge chute, and visible fuel line issues help technicians arrive prepared. The limitation: not every issue can be confirmed without running the engine under load; however, the checklist compensates by specifying escalation gates and replication steps for intermittent behavior. A real-world example is a mower that “won’t mulch”: the checklist treats it as a performance outcome with multiple possible causes (blade-to-deck relationship, blade condition, obstruction patterns, airflow restrictions) instead of assuming a muffler or carb problem.
Deeper insight: the most common mistake is skipping the “evidence record.” Without notes, staff may re-check basics during each visit, which increases labor hours and delays approvals. When diagnostics are written clearly, you can also support communication with commercial decision-makers who need a documented chain of reasoning.
To enhance service process improvement, it's essential to adopt an approach that ensures the right repair service is chosen for intake and triage, as different mower categories require tailored diagnostic workflows. This phase often involves using checklists combined with a shop-focused tune-up process, such as achieving faster, smoother starts to verify engine health before undertaking more complex repairs. For those seeking to implement a parallel process for maintenance planning, reference guides like Small Engine Tune-Up and local shop workflows can provide valuable insights. Additionally, understanding how to identify an effective small engine shop can significantly influence the efficiency and success of the repair process.
How Should You Perform Intake & Triage for Fast, Accurate Lawn Mower Repair?
Start intake with structured symptom capture and a safety triage gate, so you only diagnose once the mower is safe to handle. This is the foundation of a repeatable, fixed fast checklist that reduces wasted labor and prevents escalation too late.
Why it matters: intake errors create diagnosis errors. If a technician doesn’t know whether the mower is self-propelled or riding, or whether it’s typically stored with the fuel valve on, they may select incorrect tests or parts. For commercial customers, this can lead to longer downtime and missed service windows.
How it works: the service form should collect symptom category (starting failure, stalling, uneven cutting, unusual noise, reduced power, drive issues) and then ask for operational history: fuel freshness, last service date, mower age, storage method, and cutting height habits. Verify mower type and configuration early—push vs self-propelled vs riding, plus blade/engine variants and whether the operator bags clippings or relies on mulching. Where possible, require photo/video intake: spark plug condition, air filter appearance, clogged discharge chute, and any visible fuel wetness. Photos accelerate diagnosis because visible contamination and airflow restrictions often point to specific branches quickly.
Safety triage should stop the process when conditions suggest immediate escalation. For example, suspected fuel leaks near hot surfaces, damaged safety switches, or repeated rope-backfire patterns are “do not proceed” scenarios because continuing diagnosis could create fire or injury risk. Tradeoffs include that some safety gates may delay “hands-on” troubleshooting; however, the checklist treats this as risk control and documentation for customer approval.
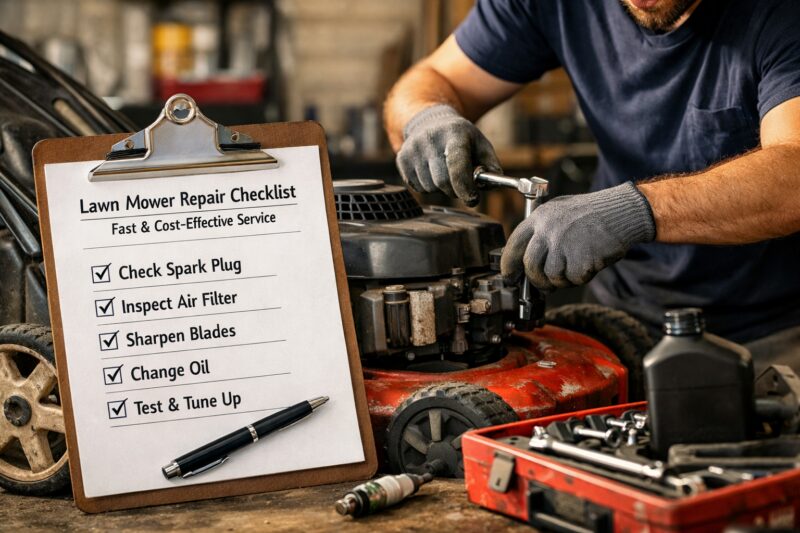
Real-world scenario: property managers sometimes report “engine problem” when the true issue is deck airflow blockage—grass buildup increases engine load and can mimic fuel starvation or ignition instability. Photo intake of the deck and discharge path reduces this ambiguity.
Most guides miss the safety interlocks gate. They focus on performance complaints and forget that handle/brake safety features can prevent operation or alter how the engine runs. A well-run triage gate also helps technicians and customers avoid conflict when operation changes after transport or storage movement.
How Do You Build a Diagnostic Workflow That Controls Labor Costs?
A diagnostic workflow controls labor costs by organizing tests in a logical order, documenting results, and using decision paths instead of guessing parts. When the shop follows this workflow, customers get faster outcomes and fewer repeat visits.
Why it matters: labor time grows exponentially when technicians chase multiple theories without proof. A checklist reduces “thrash” by starting with the lowest-cost, highest-yield checks: fuel quality and delivery basics, air intake restrictions, spark/ignition fundamentals, then moving into mechanical or drive-component testing. This sequencing helps prevent unnecessary carb or ignition replacements when the real issue is stale fuel, clogged intake, or a failing safety interlock.
How it works: after each test, the technician records “tests performed + results” with clear notes. That record prevents duplicated diagnostics across visits and provides justification for parts or repair decisions. Use a symptom → probable cause cluster → confirmation test flow. For starting failure, clusters often include fuel delivery restriction, ignition instability, air restriction, or compression-related issues. For reduced power, the clusters often expand to deck load and airflow; confirmation tests might include verifying airflow at the intake and ensuring blade condition doesn’t cause excessive drag.
Practical application: estimate time and complexity before teardown, then re-check the estimate after each diagnostic milestone. This helps commercial customers evaluate cost risk at logical stopping points. The workflow should also include a replication protocol for intermittent issues—seasonal starts, temperature sensitivity, and humidity-related starting behavior. For example, the technician may attempt warm-start and cold-start sequences consistently and document outcomes, rather than relying on a single attempt.
Tradeoffs and limitations: some intermittent faults require multiple attempts or controlled conditions, and the checklist should predefine escalation when replication fails. Common mistakes include skipping “replication” and interpreting a single failed start as a definitive branch. Another mistake is not recording results, which causes staff to re-test the same basics later.
For engine-focused workflows, consider mapping your diagnostic milestones to service guidance such as same-day tune-up steps in Local Small Engine Repair and using a consistent documentation approach that parallels maintenance scheduling described in Small Engine Tune-Up.
What’s Included in Engine & Fuel System Repair Checklist for Fast Fixes?
An engine and fuel system repair checklist accelerates Lawn Mower Repair by confirming fuel delivery, air intake, and ignition fundamentals before committing to major parts. It also reduces repeat failures by addressing root causes such as stale fuel, clogged airflow, and contamination patterns.
Why it matters: many “carb problems” are actually fuel freshness, delivery restrictions, or airflow restrictions. If a shop jumps straight into carb replacement, it may ignore shutoff valve behavior, tank/line degradation, or intake blockages that mimic ignition and carb symptoms. Commercial customers care because repeat failures create additional downtime and labor costs.
How it works: first check fuel quality and delivery. Look for stale fuel indicators, verify the tank and fuel line condition, and test shutoff valve behavior. For models with carburetors or fuel systems prone to varnish, also inspect carb-related faults as applicable. Next check air intake: air filter condition and intake blockages that can mimic “carb” symptoms. Then do ignition basics: inspect spark plug condition and gap, examine wire/coil criteria, and decide between cleaning vs replacement based on physical evidence.
Leak and contamination verification should be explicit. Signs that require escalation include fuel smell at unusual points, wet carb areas, or evidence of oil-fuel mixing patterns that suggest deeper internal contamination or wrong fuel/oil ratios. Deeper insight: include decision factors for “carb cleaning vs replacement.” Recognize varnish vs mechanical wear and treat repeated cleanings as a red flag. If cleaning repeatedly fails, the checklist should push toward confirmation (e.g., verifying fuel flow and checking for internal wear) rather than repeating the same step.
Real-world scenarios: a mower that stalls after running for a few minutes may indicate debris in the fuel system or a venting/flow issue; a systematic checklist catches this earlier than a parts swap. A mower that surges or won’t idle may show ignition instability or air restriction rather than “just needs a new carb.” Tradeoffs exist: deeper disassembly increases labor, so the checklist should force confirmation tests before teardown escalation.
For evidence-based ignition and service practices, align your general approach with guidance from US EPA—Small Engine Emissions. For general maintenance concepts and fuel-handling precautions, also cross-check manufacturer documentation via Briggs & Stratton Technical Information and similar OEM guides.
How Do You Checklist Blade, Deck, and Cutting Performance Issues?
A blade and deck performance checklist repairs the outcome by linking the customer’s complaint (uneven cutting, poor mulching, scalping, or excessive clumping) to specific mechanical causes. Instead of only addressing engine symptoms, this checklist targets airflow, blade sharpness, deck condition, and drive engagement.
Why it matters: even when the engine runs correctly, lawn cutting performance can fail due to dull or damaged blades, incorrect height settings, bent decks, obstructions, or belt/traction problems. Commercial properties notice immediately—patchy turf, scalping, and uneven stripes impact appearance and can create customer disputes about “why it doesn’t look right.”
How it works: confirm the cutting complaint root cause clusters. Uneven cutting commonly points to dull blades, blade imbalance, incorrect blade height, deck damage, or traction/drive issues causing inconsistent movement speed (self-propelled and riding). Blade inspection checklist should evaluate edge condition, balance, mounting integrity, and determine when sharpening is appropriate vs when replacement is safer—especially when blades are bent, cracked, or severely worn. Deck airflow and clog prevention checks should examine discharge chute obstructions and mower deck buildup patterns, because restrictions increase engine load and reduce cutting efficiency.
For belt/drive systems where applicable, inspect tension, wear, tracking alignment, and friction-surface contamination. A deeper insight fork is “it won’t mulch.” Treat it as a diagnostics decision: evaluate blade-to-deck relationship, blade condition, and obstruction patterns before recommending major engine work. Mulching failures often stem from airflow and blade timing, not always from fuel or spark issues.
Tradeoffs: replacing components for purely cosmetic reasons can be unnecessary; the checklist should tie recommendations to measurable condition (bent blade evidence, deck deformation, blockage patterns). A common mistake is assuming mulch failure is a carburetion problem, which wastes labor and delays the real fix.
If your shop also performs maintenance scheduling, consider integrating deck inspection into the same engine health workflow used for choose the right service decisions and shop process planning in Small Engine Shop.
How Should You Handle Parts, Pricing, and Approvals for Commercial-Ready Service?
Parts, pricing, and approvals should be handled using a standardized estimate workflow that separates “quote before teardown” from “confirm after inspection.” This approach protects commercial customers from surprise costs while allowing technicians to move fast with confidence.
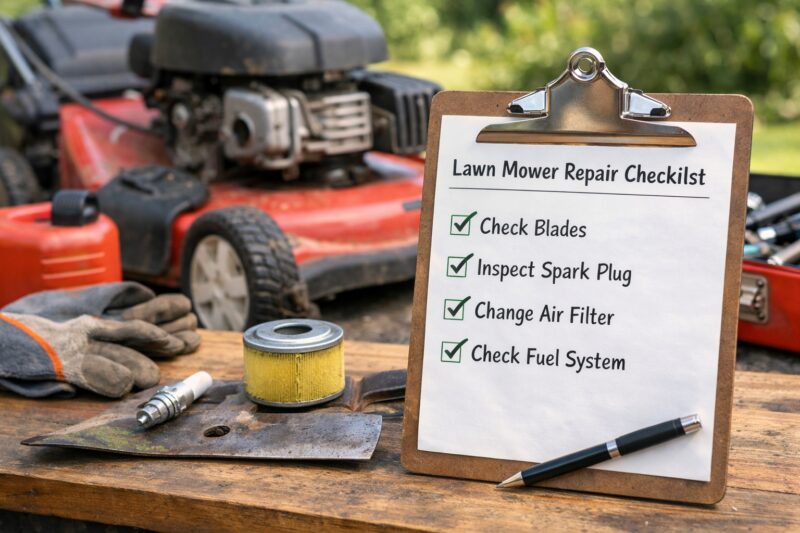
Why it matters: in commercial service, the business problem is cashflow and uptime planning. Customers often need written estimates, predictable decision points, and documented outcomes so procurement or property management can approve quickly. Without a structured approval plan, shops either delay work for every decision or risk replacing the wrong parts at the wrong time.
How it works: create a workflow that defines what can be quoted before teardown—such as likely items based on symptom clusters—and what requires visual confirmation, like blade condition, belt wear patterns, or fuel line degradation. Define approval thresholds clearly, for example a “call-before-replacing” policy for high-cost components or safety-critical parts. Communicate options: repair vs partial replacement vs full assembly when wear is cumulative, and explain tradeoffs in plain language. Transparent documentation should include photos, test results, part numbers, and before/after operational outcomes.
Deeper insight: take a total cost of ownership mindset. That means accounting for probable secondary wear (filters, ignition components, belts) when diagnostic evidence suggests related deterioration. Importantly, total cost of ownership is not upselling; it’s selecting replacements that prevent immediate repeat failures. A common mistake is treating every job as isolated—ignition instability plus repeated stalling might justify one coordinated set of checks rather than random part replacement.
Real-world scenario: a commercial operator brings in a mower with hard starting and reduced power after storage. The checklist may justify replacing air filters and confirming spark plug condition alongside fuel system work, because clogged airflow and ignition wear can compound the same symptom. The shop can then show evidence to speed approval.
If you want a maintenance-aligned framing for pricing conversations, tie your diagnostic milestones to documented service planning like fixed fast checklist methodology and related service categories in Small Motor Repair.
What Common Mistakes Cause Lawn Mower Repair Delays or Unnecessary Work?
The most common causes of delays and unnecessary Lawn Mower Repair are skipping proof steps, replacing parts without confirmation, and failing to document diagnostic outcomes. These mistakes lead directly to repeat visits, additional labor, and missed mowing schedules.
Why it matters: commercial customers lose time when repairs don’t restore performance the first time. If a shop doesn’t follow a structured checklist, staff may jump to expensive replacements like carburetors or ignition modules when the root cause is actually stale fuel, clogged airflow, or a safety interlock. Delays also happen when technicians can’t explain what they tested, which complicates approvals.
How it works: the checklist prevents the “expensive leap” by ordering checks in a logical sequence and requiring recorded results. It also includes safety and control interlocks so technicians don’t troubleshoot around a handle/brake safety feature that blocks operation. Record outcomes and control handoffs so context doesn’t get lost if the job is paused for parts ordering or customer approval.
Deeper insight: symptom masking is a major hidden problem. A clogged deck and poor airflow can increase engine load and produce symptoms that look like fuel problems (stalling, surging) or ignition issues. If a technician clears the airflow restriction first, the “engine problem” may resolve without replacing parts. Another common mistake is not verifying interlock behavior—if the safety switch is damaged, the mower may start inconsistently or shut off under engagement conditions.
Real-world example: a self-propelled mower “won’t engage.” Some guides assume drive belt failure immediately and replace belts. A better checklist confirms control lever function, safety interlocks, friction surface contamination, and belt tracking alignment before recommending parts. When those checks are documented, approvals become easier and turnaround improves.
Tradeoffs: strict checklists can slow initial assessment if a shop insists on perfect documentation before any work. In practice, the best approach is “document as you go” with predefined minimum evidence capture that still supports fast decisions.
What Are Your Options When Repair Isn’t the Whole Answer?
When Lawn Mower Repair won’t be efficient or safe, the checklist should help you choose the best alternative—on-site minor repair, shop repair, or parts-only replacement. A good service plan also helps decide repair now vs repair later based on seasonality and failure risk.
Why it matters: the right decision protects customer value. Even if a mower can be fixed, repeated wear across multiple components may make repair uneconomical. Commercial customers also need clear scheduling options during peak seasonal demand when turnaround times can fluctuate.
How it works: the checklist supports decision criteria for “mower is uneconomical to repair” in a safety-first way. It requires documented diagnosis, cost comparisons, and clear alternatives—not vague judgments. For example, if diagnostics isolate one fault and parts are available quickly, targeted repair is appropriate. If multiple components show cumulative wear—blade, belts, ignition components, and fuel system contamination—refurbishment-style repair may make more sense. Refurbishment should be justified with evidence, not guesswork.
Practical application includes scheduling strategy. In peak season, repairs may need to be prioritized by risk and uptime impact—mowers that control large property areas might be repaired first. “Repair later” decisions should consider current performance degradation, safety risk, and whether the customer can substitute equipment temporarily.
Tradeoffs: replacing rather than repairing can cost more upfront, but may reduce repeat failures and downtime. The limitation is that true uneconomical repair often emerges only after inspection milestones; that’s why a checklist includes pre-teardown estimates plus post-diagnostic confirmation points. A common mistake is prematurely declaring a mower uneconomical without proving the fault or documenting what else is worn.
Here’s a practical comparison your team can use during approvals:
| Repair approach | Best for | Risk / downsides |
|---|---|---|
| On-site minor repair | Simple faults with fast verification (e.g., clogged airflow cleared, basic control checks) | May miss hidden wear if the checklist can’t be completed with adequate inspection |
| Shop repair with diagnostics | Jobs that need proof-based troubleshooting and component testing | More scheduling time; requires customer agreement on diagnostic milestones |
| Parts-only replacement (targeted) | When diagnostics confirm a specific failure and compatible parts are readily available | If secondary wear is present, symptoms may recur without coordinated follow-up checks |
To keep service planning aligned with engine health programs, structure your alternative decisions alongside your shop categories, similar to choose the right service guidance in Small Engine Shop. When you coordinate maintenance with repairs, using same-day tune-up steps from Local Small Engine Repair can reduce the odds of returning with a related issue after the primary fix.
What Advanced Considerations and Edge Cases Should Your Checklist Cover?
Your checklist should cover recurring faults, intermittent failures, and wiring or contamination edge cases so you avoid chasing the wrong branch. Advanced coverage is what separates predictable commercial turnaround from “trial-and-error” service.
Why it matters: edge cases cost the most when they are mishandled—because technicians may repeatedly replace parts that don’t address the underlying issue. For commercial fleets, one recurring failure mode can repeat across multiple units, compounding downtime and inventory costs. A checklist that addresses pattern recognition reduces that risk.
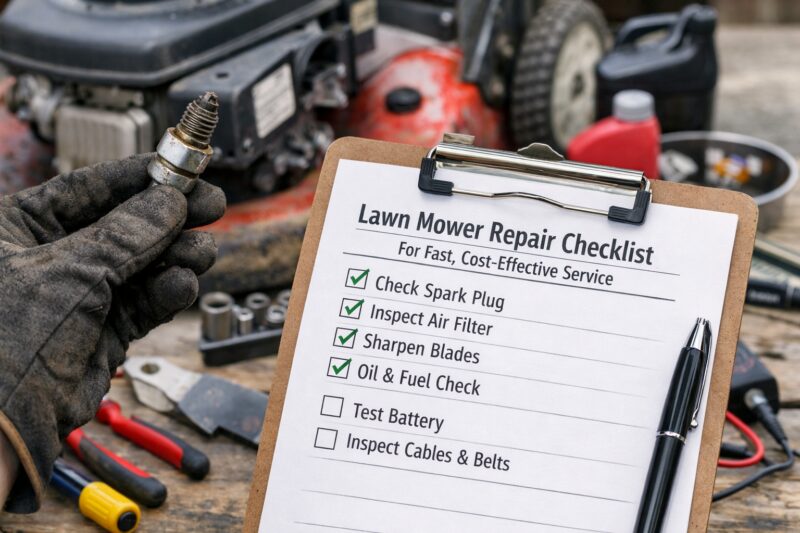
How it works: first define how to handle persistent or recurring faults such as vibration, repeated stalling, and intermittent drive engagement. Widen the diagnostic net when the symptom recurs after a recent fix. For example, if stalling returns after cleaning the carb, the checklist should investigate why contamination reoccurred—storage habits, fuel quality, tank venting, or internal wear—rather than repeating the same cleaning step.
Ignition and fuel edge cases should include wiring wear, grounding issues, and contamination that returns after cleaning. A “spark looks good” plug may still be hiding intermittent misfire caused by wire deterioration under vibration. For intermittent issues, include replication attempts across warm and cold starts and document conditions like humidity and starter behavior. Real-world scenario: a mower fails more often during humid mornings; the replication protocol can reveal a fuel-air balance issue that only appears at certain intake temperatures.
Weather and storage-induced failures should be addressed with pre-season checklist steps that reduce future calls. Examples include verifying proper fuel storage, ensuring decks are cleaned to prevent buildup, and performing baseline inspections before peak mowing demand. Tradeoffs: advanced testing may require additional time or specialized tools; the checklist should specify when to escalate to specialized testing equipment or specialist evaluation.
Common mistake: most guides ignore recurrence patterns. If the same failure returns, the checklist should trigger a different workflow—confirmation testing, root-cause isolation, and review of the previous repair documentation. This is where a faster smoother starts mindset helps: even if the mower “starts,” you still verify operating stability and load performance to prevent repeat problems.
How Do You Make Local Lawn Mower Repair Turnaround Predictable?
Turnaround becomes predictable when your checklist matches local realities like parts availability, scheduling practices, and common seasonal failure modes. For commercial customers, predictable communication is as important as fast diagnosis.
Why it matters: local demand spikes can stretch scheduling windows, and parts lead times can determine whether a mower is ready within your planned mowing cycle. Without predictable processes, customers experience downtime even if the technician is skilled. A checklist helps the shop prepare better and helps customers provide the right intake information so delays don’t stem from missing details.
How it works: anchor the checklist to region-typical patterns without needing to invent details. Seasonal demand spikes often align with growth peaks and weather transitions, and shops can reduce delays by stocking the most common wear items and preparing diagnostic workflows. Your sub-bullet for customers should emphasize what to include in intake so the shop doesn’t wait for photos or missing histories—fuel freshness notes, last service date, and clear symptom descriptions.
Good communication for commercial customers looks like defined status updates cadence, clear call-back windows, and agreed pickup/drop-off scheduling. The checklist can also include transport documentation: when a mower is picked up, photograph its condition and confirm visible symptoms and control lever state to avoid blame disputes if symptoms change after movement or storage. Tradeoffs: more documentation may slow intake slightly, but it reduces disputes and speeds approvals because customer leadership can rely on evidence.
Practical application: ask local shops for written estimates, diagnostic documentation, and repair outcome verification steps. If your vendor can provide “tests performed + results,” you can approve work with less uncertainty. This supports procurement decisions for commercial operations.
To strengthen your choice of service provider and alignment with diagnostic processes, use choose the right service as a selection criteria when requesting documented intake and proof-based diagnostics from Small Engine Shop. If you need to coordinate repairs around maintenance windows, reference ongoing workflows like Local Small Engine Repair to understand how diagnosis and tune-up timing affect availability.
Frequently Asked Questions About Lawn Mower Repair Checklist for Fast, Cost-Effective Service
What’s the fastest way to diagnose lawn mower starting problems?
Use a proof-first sequence: verify fuel freshness and delivery, confirm air restriction is not preventing airflow, and check spark plug condition before deeper teardown. Inspect quick items such as the air filter and spark plug appearance, then confirm behavior during consistent warm and cold start attempts. If repeated rope-backfire, strong fuel odor near hot components, or damaged safety switches appear, escalate immediately rather than continuing.
How do you know whether to repair or replace a mower?
Compare documented diagnostic findings against safety-critical wear and expected remaining life. As a practical threshold, if multiple major components show cumulative wear (for example, blade damage plus drive belt/controls plus fuel system contamination) and parts are costly, replacement may be more economical than repeated repairs. The decision should be documented with photos, test results, and an explanation of what else is likely to fail next.
How long does lawn mower repair usually take?
Minor repairs with available parts can be resolved in a short diagnostic window, while diagnostic-heavy issues can take longer because the shop must replicate intermittent faults and document evidence. Parts-dependent jobs vary based on lead times and the repair class—fuel/ignition work is often faster than deck and drive system repairs requiring alignment or multiple confirmations. Peak seasonal scheduling can add wait time even if the repair is straightforward.
What information should I provide when requesting lawn mower repair?
Provide the symptom description with when it occurs (cold start vs warm start vs under load) and any operational history such as last service date, fuel freshness, and storage method. Include mower type and configuration: push vs self-propelled vs riding, blade height habits, and whether the unit is set for bagging or mulching. Photos or videos of the spark plug, air filter, and deck discharge area reduce diagnostic time because they provide evidence for confirmation tests.
Why does my mower stall after starting?
Stalling after starting often branches into fuel delivery issues, air restriction, ignition instability, or deck load causing excessive restriction and engine bogging. Confirmation steps include checking airflow restrictions, verifying fuel flow/venting behavior, and inspecting spark plug condition after a stall event. If the deck is severely clogged or the blade is obstructed, address airflow and blade-related load before replacing engine components.
What should be checked during a lawn mower tune-up?
A proper tune-up checklist typically covers air filter condition, spark plug condition and gap, and fuel condition/line delivery as relevant to the model. It should also verify blade balance and edge condition, and check belts and controls where applicable. If mulching performance is part of the complaint, inspect blade-to-deck relationship and discharge airflow to avoid misattributing performance problems to ignition or fuel.
Are DIY fixes worth it before calling for lawn mower repair?
DIY can be worth it for low-risk tasks like cleaning external deck debris or replacing a clearly failed air filter, but it can waste money if it masks the true root cause. Avoid repeated part swaps that bypass confirmation testing because that can confuse technicians and increase labor during diagnosis. If safety controls are suspected or fuel leaks appear, stop DIY and escalate for professional Lawn Mower Repair.
How can I prevent repeat repairs after a recent fix?
Prevent repeats by ensuring the shop documents what was tested and what was repaired, then verifies outcomes with operating tests. Use correct fuel and storage practices and follow post-repair operating steps such as proper break-in behavior for any replaced components. If a fault is intermittent, ask the shop to note replication conditions so you can match operating patterns and avoid reoccurrence.
What’s included in a professional lawn mower diagnostic inspection?
A diagnostic inspection should include evidence-based tests such as fuel/air/ignition checks, confirmation tests based on symptom clusters, and documented results of what worked or didn’t. It should also verify safety interlocks and mower configuration before deeper teardown. The diagnostic results should feed into a clear estimate and approval plan tied to specific, confirmed causes.
Do lawn mower repair shops offer estimates before replacing parts?
Some shops offer diagnostic-quote estimates, fixed quotes for minor repairs, or approval-based models that require confirmation before part replacement. The best approach separates “known-likely” costs from “requires inspection” costs so customers can approve at logical milestones. Ask specifically what is quoted before teardown and what will trigger a call-before-replacing decision.
What’s the most common cause of uneven cutting after service?
Uneven cutting is often caused by blade condition or blade height settings, deck alignment issues, or airflow obstruction from buildup. After service, it can also result from blade mounting integrity problems or traction/drive changes that affect mowing speed consistency. Confirmation typically includes checking blade balance/edge condition, verifying height settings, and inspecting discharge/chute airflow to rule out clogs.
Conclusion: How to Use This Checklist to Get Reliable, Cost-Effective Lawn Mower Repair
This checklist is built on a simple philosophy: structured intake leads to proof-based diagnostics, which leads to documented approvals and outcome-focused verification. For commercial customers in 2026, that means fewer surprises, fewer repeat visits, and faster return-to-service for push, self-propelled, and riding mowers.
Cost control comes from evidence—not guesses. When shops record tests performed and results, they prevent duplicated diagnostics, reduce unnecessary parts replacement, and improve decision speed for property managers and small service teams. Safety-first triage and interlock verification also protect both the customer and the technician, which prevents dangerous “keep testing” behavior when escalation is required.
Reliability comes from documentation and verification. Photos, test results, and before/after outcomes provide an audit trail that helps when approvals must be justified or when intermittent issues require replication across warm and cold starts. If you’re preparing for service, use the intake checklist to provide symptom details, operational history, and photo/video evidence that reduces labor.
Next step: ask your local provider for a documented diagnostic approach and a milestone-based approval workflow, similar to the fixed fast checklist model. You can also align your service requests with related maintenance planning resources such as Small Engine Tune-Up and Small Motor Repair, and use your repair intake information to support faster turnaround and clearer outcomes.
Updated May 2026