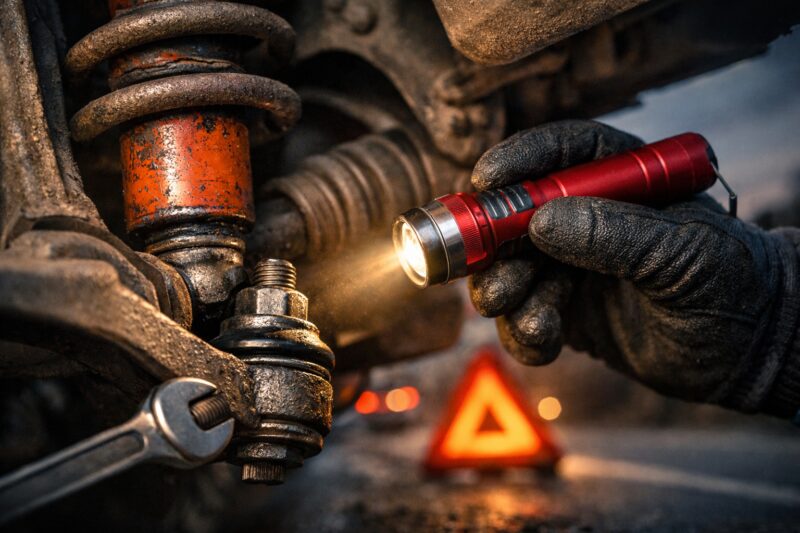
If you want to prevent suspension problems before they become dangerous, you need a routine that catches wear early and matches your driving habits. That is the point of suspension preventive maintenance: it reduces uneven tire wear, improves ride quality, and avoids costly “surprise” failures. For many drivers, the first warning signs show up as clunks, bounce, drift, or a steering feel that suddenly feels less precise. By checking the right things on a schedule, you can decide whether a quick inspection is enough or whether service is needed soon.
This guide shows what to check, how often to check it, and when to escalate to a professional inspection or repair. You will also learn how to separate true suspension issues from tire, brake, and steering causes that can look similar. Because road conditions, mileage, and vehicle type vary, there is no single perfect schedule. Use the guidance here to build a practical plan that fits how you actually drive.
Done well, preventive work improves handling confidence, helps tires last longer, and keeps alignment-related problems from snowballing. It also makes shop visits faster because you can describe symptoms with dates and conditions, not guesses.
Build a symptom-based inspection routine that finds issues early
A good suspension inspection routine prevents small wear from turning into unsafe steering or braking problems. It works best when you combine a simple cadence with symptom tracking. Suspension problems rarely announce themselves all at once. Usually, you feel a minor change first, then it grows more frequent.
Start with two layers of checks. First, do a short monthly review that looks for obvious leaks, torn boots, and looseness. Second, add deeper checks at seasonal intervals, such as before winter and after winter road conditions. If you notice early symptoms, increase the inspection frequency right away. For example, if you hear clunks over small bumps, do not wait for the next season.
“Inspect” means more than looking under the car. You should also observe how the suspension behaves. Notice dive and squat during braking and acceleration. Listen for knocking on rough pavement, and watch for a bounce that lasts longer than before. Also check tire contact clues, such as cupping or feathering patterns. Those patterns often point to alignment drift, worn bushings, or reduced damping control.
When should you investigate now versus monitor? Use three criteria: severity, frequency, and impact on stability. If a noise happens every drive and you feel reduced steering control, prioritize inspection sooner. If it is occasional, mild, and does not affect braking or steering feel, you can monitor while you plan a closer check. However, any symptom that affects stability should move straight to professional assessment.
Suspension wear can be intermittent, which is why you may not catch it during a casual look. A pothole impact, uneven vehicle loading, or temperature changes can alter how components flex. To reproduce clues safely, choose a familiar, low-risk road with similar bump patterns. Then compare the result on multiple passes. Also document what you felt, including speed and road type. That record helps your next suspension inspection appointment move faster.
Check wear points methodically across bushings, boots, dampers, and links
Suspension issues usually start at specific wear points, not everywhere at once. A systematic approach helps you avoid missing the root cause. Begin with the rubber and joint areas first, since they often show early damage. Then check the parts that control motion, like shocks and struts.
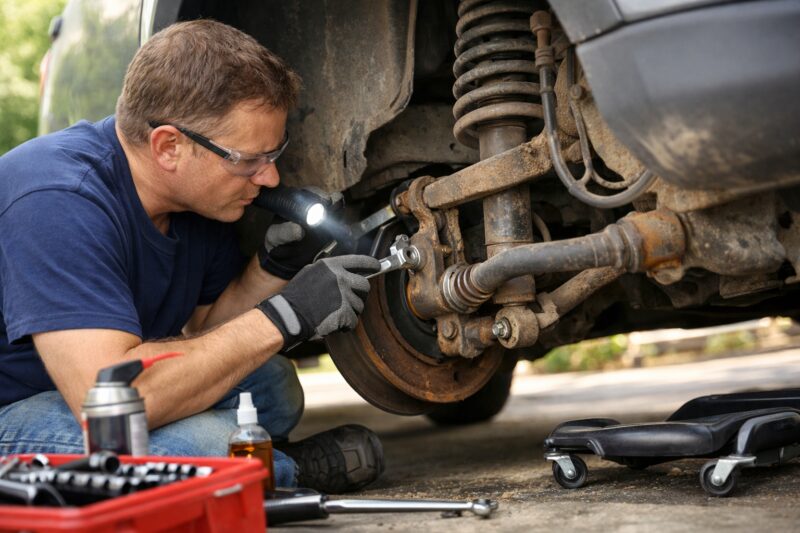
Start with bushings and mounts. Look for torn rubber, cracks, or missing material in control arm bushings and sway bar bushings. Also look for grease residue on areas that should be dry. Many bushings are designed to wear gradually, so small cracking can become a bigger problem over time. When bushings degrade, the suspension no longer holds alignment as consistently, and handling can feel vague.
Next inspect boots and protective covers. Damper shafts and steering-related boots can collect road grime, but meaningful contamination often looks like fresh tearing, missing clamps, or fluid that has traveled. With CV-style boots, check for splits and grease sling. With strut or shock boots, confirm they are intact and seated correctly. If a boot is torn, it lets moisture and grit reach the joint area, which accelerates wear.
Then check for damper performance leaks. Leaking dampers usually show oil residue around the shock body or at the lower mounting area. Leaks matter because dampers control rebound and keep the tires planted. Once damping is weak, tires can bounce and scrub, and alignment can drift under load. However, do not confuse suspension residue with brake dust. Brake dust usually collects near calipers and rotors, while suspension leaks tend to track along damper bodies and mount points.
Finally check links and joints. Look for missing fasteners, worn ball joint boots, and looseness at connections. A small gap can be normal, but excessive play or uneven gaps are not. Use caution: some components are under load even when the car looks level. Do resting checks when possible, then lift safely for detailed inspection. If you do not have the right support equipment, use a shop for any check that requires lifting or wheel removal.
Use driving tests to decide whether you need service or just a closer look
Driving and handling tests help you judge whether a suspension change is getting worse. They also help you pick the right next step: simple inspection, professional diagnostics, or immediate repair. Your goal is not to diagnose from the seat. Your goal is to decide how urgent it is.
Start with low-risk, repeatable observations. Pay attention to steering feel during straight driving, and note whether the car wanders. Check braking stability. Does the nose dip too far, or does the car pull more than usual? Listen to road noise patterns. Some noises change with steering angle, while others change with vehicle speed or bump type.
Next observe rebound behavior. After you hit a bump at a safe speed, does the car settle quickly, or does it bounce more than once? Excess bounce often points to weak dampers or binding components. Also note clunk timing. A clunk over small bumps at low speed can suggest loose links or worn bushings. A vibration under specific acceleration or deceleration may indicate something other than suspension, like tire balance, wheel bearings, or drive axle issues.
Map symptoms to likely areas, but confirm with inspection. If clunks happen mostly on one corner, you can focus your visual checks on that side. If the symptom affects both sides similarly, look at components that connect across the vehicle, like sway bar links or shared mounting points. Still, do not assume. False positives happen after tire rotations, new tires, or recent alignment changes. Road surface also matters. Some streets exaggerate minor issues.
Know the stop criteria. If the car sags noticeably, you should not keep driving. If a knocking sound grows with speed, or if the car pulls strongly under braking, seek professional assessment quickly. Also stop if you see new leaks after driving or if steering suddenly feels unstable. In those cases, schedule a suspension inspection appointment rather than waiting for a routine check.
Make suspension maintenance measurable with wear patterns and baseline notes
Suspension work should not be guesswork. The best results come from measuring symptoms and verifying that the vehicle improves after service. When you track changes, you also catch problems that hide until you compare “before” and “after.”
Use tire and wheel wear patterns as a practical measurement tool. Look for uneven tread depth, feathering, or cupping. Uneven wear can reflect alignment changes caused by worn bushings, subframe shift, or failing dampers. In addition, observe sidewall condition and tread edge wear. These clues help your suspension inspection appointment focus quickly on alignment-related wear.
Also measure basic vehicle stance. Check ride height consistency left to right. If one corner sits lower, the suspension may be worn, or the spring may be damaged. You can also mark the location of components relative to fixed points, such as the wheel arch gap, then recheck months later. That method helps you detect slow sag without specialized tools.
For play checks, measure what you can safely reach. At joints, look for movement that feels more than normal. If you feel looseness while pushing or pulling gently, note where you found it. After service, recheck the same points. A good outcome should include restored compliance and no binding during suspension movement.
Remember that alignment and suspension interact. You can correct toe, camber, and caster, but worn bushings can pull alignment out again under load. That is why a preventive maintenance service plan should include coordination. If you replace dampers or bushings, ask the shop to verify alignment afterward and confirm the suspension is seated correctly before final tightening. Communication matters. Bring your notes, symptom timeline, and photos if you have them, so the technician can confirm root causes efficiently.
Do not forget torque and installation quality. Correct torque on mounting hardware helps the suspension settle properly. If a shop under-torques or reuses worn hardware, clunks and leaks can return. You can reduce wasted time by describing your findings clearly first.
Avoid common shortcuts that shorten suspension life and waste money
Many suspension problems come from skipping steps or fixing only one piece of a connected system. As a result, repairs can fail early, or symptoms return quickly. Preventive maintenance helps you avoid those traps.
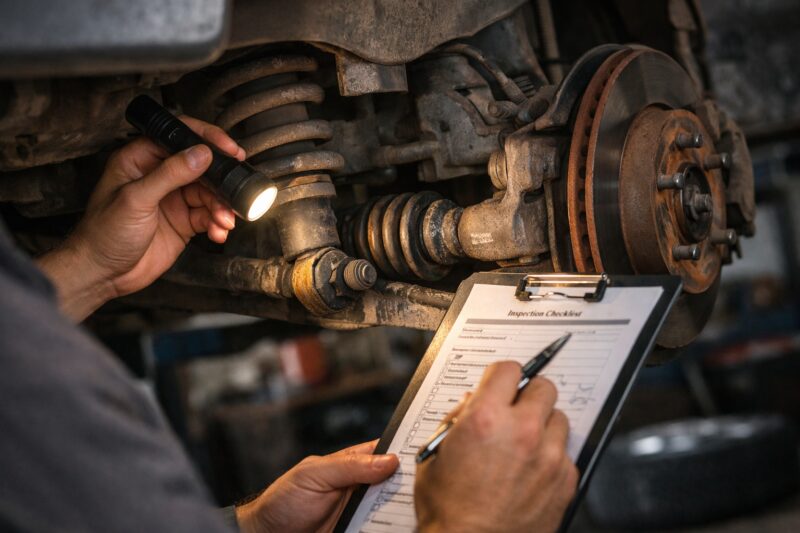
One common mistake is replacing a single part without checking related components. For example, if bushings are worn, new shocks may still struggle because alignment and suspension control remain off. Similarly, if a boot is torn, replacing a damper without addressing the boot can expose the joint to moisture and grit. The right sequence depends on your inspection findings, not on what part a salesperson recommends.
Another mistake is ignoring small leaks. A light seep can become a heavier leak that reduces damping. Then the tire wear patterns shift and your alignment needs repeat correction. Also avoid the belief that “new shocks or struts alone fix everything.” If mounts are failing or links are loose, the ride and handling will not return to normal.
Noise perception also leads to wasted money. Noise does not always mean the worst part is broken. Some noises come from worn hardware, dry joints, or even normal tire tread patterns. However, do not dismiss noise either. If it is progressive or you feel steering instability, treat it as real and get it checked.
Installation errors can create repeat issues too. Incorrect torque, reused stretched hardware, or improper seating of mounts can cause premature wear. After any suspension work, ask what was torqued and whether alignment was verified. If you are doing work yourself, use proper lifting and wheel support. Improvising with unstable stands can cause serious injury.
Edge cases also matter. If you recently changed tire size or switched to mismatched tires, you can create vibration and uneven wear that mimic suspension symptoms. If the vehicle has aftermarket lowering, spring rates and ride height change how components work, so preventive checks should be more frequent. Also watch for brake caliper or wheel bearing issues. Those can produce knock and pull that sounds like suspension noise.
Choose the right maintenance approach for your vehicle and driving style
Suspension preventive maintenance does not mean you must do a full refresh every time. Instead, you choose an approach based on symptoms, wear patterns, and vehicle use. That usually saves money and improves ride quality long-term.
In general, you have three categories of approaches. First, there is DIY inspection and visual checks. This works well for monthly reviews and basic leak or boot checks. Second, there is professional inspection and diagnostics. This fits when symptoms affect handling or you cannot reach the worn areas safely. Third, there is targeted repair or component refresh based on what you find.
Daily commuters often benefit from a balanced plan. Focus on bushings, boots, and dampers, since those wear steadily with road texture and daily heat cycles. SUVs and trucks may also need extra attention to load sensitivity. If you frequently carry cargo or tow, the suspension wears differently and alignment can drift under heavier load. Performance setups can have even faster wear, and they often require more frequent alignment checks.
Decide between replacing one part and doing matched pairs. Many shops recommend paired replacement to maintain balance. For example, if one damper is leaking on one side, the other side may still be within spec, but performance can be mismatched. Matched replacement can feel better and keep tire wear patterns symmetrical. However, you do not want to replace new parts unnecessarily. That is why inspection and measurement are so important.
There are also tradeoffs with “cheaper fixes.” A lower-cost component can restore a short-term ride, but it may wear faster or change the way the suspension controls rebound. That can shift wear to bushings or links next. It can also affect alignment retention. For vehicles with aftermarket parts, fitment matters. Incorrect bushing design, wrong strut length, or incompatible spring rates can cause premature failure. Always confirm correct fitment before installation.
If you are unsure, ask for local suspension repair help with a process-based explanation. A shop that can link symptoms to specific worn components can help you build a plan that avoids random parts swapping.
Handle special conditions where suspension wear shows up in unusual ways
Some driving conditions make suspension wear behave differently than normal city cruising. When you understand those patterns, you inspect smarter and avoid misdiagnosis. This matters because unusual wear can hide until you change road type or vehicle load.
Rough roads and frequent pothole impacts can create sudden damage. After a major impact, you might notice clunks or alignment drift within days. In addition, winter salt can accelerate corrosion. Rust can hide joint play because it “stiffens” components temporarily. Then the stiffness breaks loose later, and the issue appears as a sudden noise or increased movement.
Heavy towing or cargo changes loading and spring behavior. Bushings may compress more under load and then rebound, stressing the joints. If you notice symptoms mostly during loaded trips, that is a clue. Likewise, temperature swings can change rubber compliance. In cold weather, bushings can feel firmer and noises may appear. In warm weather, the symptom may soften, so you may miss it unless you check in the right conditions.
Not every “suspension” symptom is suspension. Tire defects can cause vibration that changes with speed. Wheel bearing issues can create noise that sounds like a rough ride. Brake hardware can produce knock during braking. Steering linkage play can imitate clunks when you hit bumps. Therefore, separate by test. Change one variable at a time when you can, such as load and turning angle, and see if the symptom tracks with speed, steering, or bump type.
If multiple subsystems show wear signs, consider broader undercar inspection. For example, if you find leaks and looseness in several areas, you may need more than a single-component repair. That is also where documentation helps. Your notes can guide the technician and prevent them from overlooking intermittent problems.
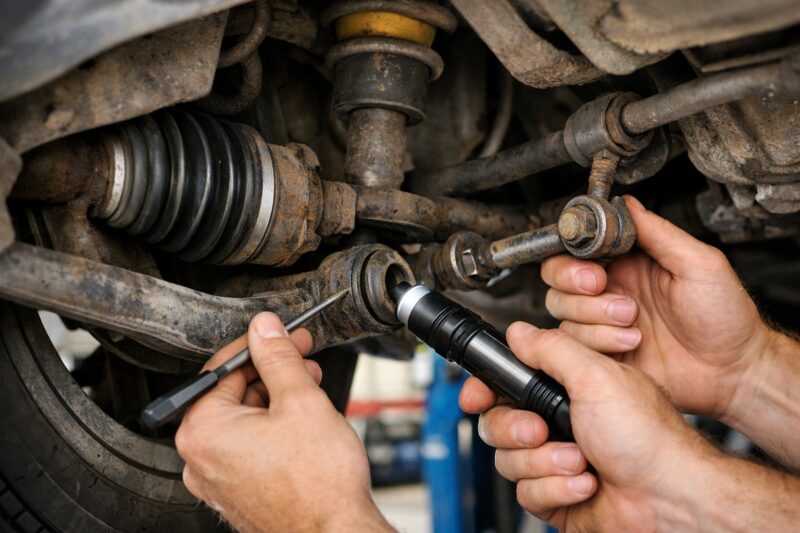
If you drive a lifted truck, remember that clearances and angles change. That is why you should consider lifted truck suspension checks when you see symptoms. Lifted setups often expose joints and boots to different stress patterns than stock vehicles.
Adjust your preventive maintenance schedule to U.S. seasons and road conditions
Suspension preventive maintenance should match seasonal risks. In the U.S., winter road salt and spring potholes are recurring causes of faster wear. Meanwhile, hot and dry regions can still cause rubber aging and boot cracking from heat cycles.
Plan a pre-winter inspection to check corrosion-prone hardware, bushings, and damper seals. Then do a post-winter check to confirm no new leaks or looseness appeared. In spring, inspect again after heavy rains and pothole season. Also add a mid-summer visual review if you spend time on rough roads or carry cargo often.
The exact frequency depends on how quickly you see changes. If you notice tire cupping after winter, shorten the time between checks. If your vehicle stays stable year-round, a seasonal cadence plus monthly visual review might be enough. However, if you already have minor clunks or uneven wear, treat them as time-sensitive. Progression matters more than a calendar date.
Also listen to “normal” noise in your region. Rural roads can create frequent vibrations even on a healthy suspension. Urban road seams may trigger small knocks from tire tread, but a worn joint often produces a repeated metallic sound over bumps. Base your expectation on what your car felt like when it was healthy. Then compare changes over time.
For salt-heavy climates, prioritize corrosion inspection on hardware, brackets, and bushing areas. Check for seized bolts and degraded rubber around joints. For heat-prone regions, focus on boot integrity and rubber cracking. Keep in mind that salt can mask play by stiffening components, so a post-winter check is crucial even if the car felt fine in February.
If you are scheduling service, align your timing with when you can respond. For example, after spring inspections, book a shop visit while you can safely drive to test results without long delays. That keeps your suspension maintenance cycle efficient and reduces the chance of extended driving with a developing fault.
Frequently asked questions about preventive maintenance for your car’s suspension
How often should I check my car’s suspension for preventive maintenance?
A good baseline is a quick monthly visual check plus a deeper inspection twice per year. However, adjust that cadence if you notice symptoms, because progression should shorten the interval. In harsh climates, salt and potholes can accelerate corrosion and loosening, so seasonal checks should be treated as minimums.
For higher-mileage vehicles or daily commuters on rough roads, consider a mid-season check too. If you tow or carry cargo regularly, check more often because load stresses bushings and dampers. If you are unsure, start with a baseline inspection now and update your schedule after you see wear patterns.
What are the first signs of suspension wear I shouldn’t ignore?
Early signs include clunks over bumps, increased bounce after hitting a pothole, and steering that feels less stable. Also watch for uneven tire wear, such as feathering or cupping, since that can reflect alignment drift from worn bushings. You should also pay attention to sudden changes in ride height on one corner.
Leaking dampers are another key sign. If you see fresh oil residue on shock or strut bodies, that often means damping performance has dropped. Any symptom that becomes more frequent over time deserves a closer look soon.
Can worn suspension bushings cause uneven tire wear?
Yes, worn suspension bushings can lead to uneven tire wear. When bushings soften or tear, the suspension can shift slightly under braking, turning, and bumps. That movement can pull alignment out of spec and change how the tire contacts the road.
For example, you may see rapid edge wear on one side or tread feathering that worsens over weeks. That pattern often points to alignment instability rather than a one-time impact. In that case, repairs should focus on the worn bushings, then verify alignment after suspension work.
How do I know whether to replace shocks or struts versus the whole suspension?
Start with confirmation: check for leaks, bounce behavior, and worn mounting hardware. If dampers are leaking and the ride is bouncy, replacing shocks or struts may be the correct fix. If you also find torn bushings, failed mounts, or loose links, then targeted repair can require more than dampers.
In many cases, the “whole suspension” replacement is not necessary. A measured approach is better: replace what is worn, and confirm the result with test drives and alignment verification. Your decision should follow inspection findings rather than symptom guessing.
Is it safe to drive if my suspension makes a clunk over bumps?
It depends on severity. If the clunk is mild, infrequent, and the vehicle still steers and brakes normally, you can often drive carefully to schedule an inspection. However, if the clunk is strong, happens every bump, or you feel reduced steering control, you should get checked soon.
Stop driving and seek immediate assessment if the car sags, pulls hard, or makes a knocking noise that grows with speed. Also stop if you notice new leaks after driving. When in doubt, prioritize safety and schedule a suspension inspection appointment.
Do I really need an alignment after suspension preventive maintenance or repairs?
Yes, alignment is commonly needed after suspension work. Changing components such as struts, control arms, or bushings can affect toe, camber, and caster. Even if the steering wheel feels centered, tire contact angles can shift.
A shop should verify alignment targets after repairs, not before. Also note that worn bushings can pull alignment out again, so the suspension preventive maintenance service plan should address both wear and alignment verification together.
What should I inspect under my car if I suspect a leak?
First, locate the leak source visually. Damper leaks often leave oil residue along the shock or strut body and near mounting points. Other fluid sources can look similar, so look for the area it tracks from and whether it appears after driving.
Check for fresh wetness, pooling, and residue patterns. Also confirm whether the leak matches the corner where you see performance changes. If you are unsure, a professional inspection can differentiate damper seep from brake fluid or other undercar fluids.
What’s the difference between suspension noise and tire or road noise?
Suspension noise often changes with bump type and vehicle corner. Tire or road noise usually relates more to speed and tire tread texture, and it may not change with steering angle. Meanwhile, steering linkage noise can change when you turn the wheel.
Try controlled checks: drive over the same bump at the same speed and note whether the sound tracks. Then test turning angle. Even with careful isolation, inspection is still needed if noise becomes more frequent or is accompanied by handling changes.
How does winter road salt affect suspension parts and preventive maintenance in 2026?
Winter salt increases corrosion on bolts, brackets, and joint areas, and it can speed up rubber degradation. It also can create residue that makes inspections harder. In 2026, the main preventive step is still to inspect corrosion-prone components after salt seasons.
Focus on hardware around bushings, sway bars, and mounting points. After winter, check for new looseness, seized fasteners, and damper leaks that can start later. A post-winter check helps because corrosion can hide play until components move again.
Will aftermarket suspension parts change my preventive maintenance schedule?
Aftermarket parts can change wear rates and alignment sensitivity, so they may require a more frequent inspection cadence. For example, some components may wear faster if they alter ride height or suspension geometry. Others may be more sensitive to correct torque and alignment targets.
Your schedule should be based on compatibility and how quickly you notice changes. Confirm fitment and pairing, then baseline your ride and tire wear. If you installed performance or lowered parts, plan extra checks and consider a suspension inspection appointment sooner when symptoms start.
Conclusion: turn inspection into safer decisions and verified repairs
Preventive suspension maintenance is mainly about early detection and better decision-making, not just doing tasks on a calendar. When you inspect systematically, test symptoms in a low-risk way, and verify results with measurements, you reduce surprise failures. That approach also helps you choose what to do now versus what can wait.
Build your process around three pillars: consistent inspection, symptom-informed tests, and confirmation after service. That means recording what you observe, taking photos when helpful, and tracking tire wear patterns over time. Then you can communicate clearly during a suspension inspection appointment and avoid random parts swapping.
As you move forward, start with a baseline inspection now. If symptoms are progressive or affect stability, schedule a professional check without delay. Finally, keep your notes so the next preventive maintenance service plan is accurate and efficient.
If you drive a lifted truck, make sure your plan includes lifted truck suspension checks. If you need guidance on where to start or what to prioritize, seek local suspension repair help that explains the link between symptoms and specific components. That combination keeps your car’s ride confident and safe through 2026 and beyond.
Updated September 2026